If you’ve ever tried to edit a video on your phone and been overwhelmed by too many options or frustrated by too few, you already understand why choosing the right app matters. CapCut and InShot are two of the most popular mobile video editors available today, and they both promise to make editing easy, fast, and professional-looking straight from your smartphone.
I’ve spent time testing both apps across different types of projects, and in this comparison, I’ll break down what each does well, where each falls short, and, most importantly, which one is the right fit for you based on how you actually edit.
CapCut vs InShot: Quick Overview
Before we get into the details, here’s a fast snapshot of both apps so you know what you’re comparing.
Feature | CapCut | InShot |
Developer | InstaShot Inc. | |
Available On | iOS, Android, Windows, Mac | iOS, Android |
Free Version | Yes (very generous) | Yes (with watermark) |
AI Tools | Yes (extensive) | No |
Best For | Creative, detailed editing | Quick, simple editing |
Watermark (free) | No | Yes |
Desktop Version | Yes | No |
CapCut is made by ByteDance, the same company behind TikTok, which is worth knowing, especially if you’re in a region where TikTok-related apps have faced restrictions. InShot is made by InstaShot Inc. and has no such concerns.
User Interface: Which Is Easier to Use?
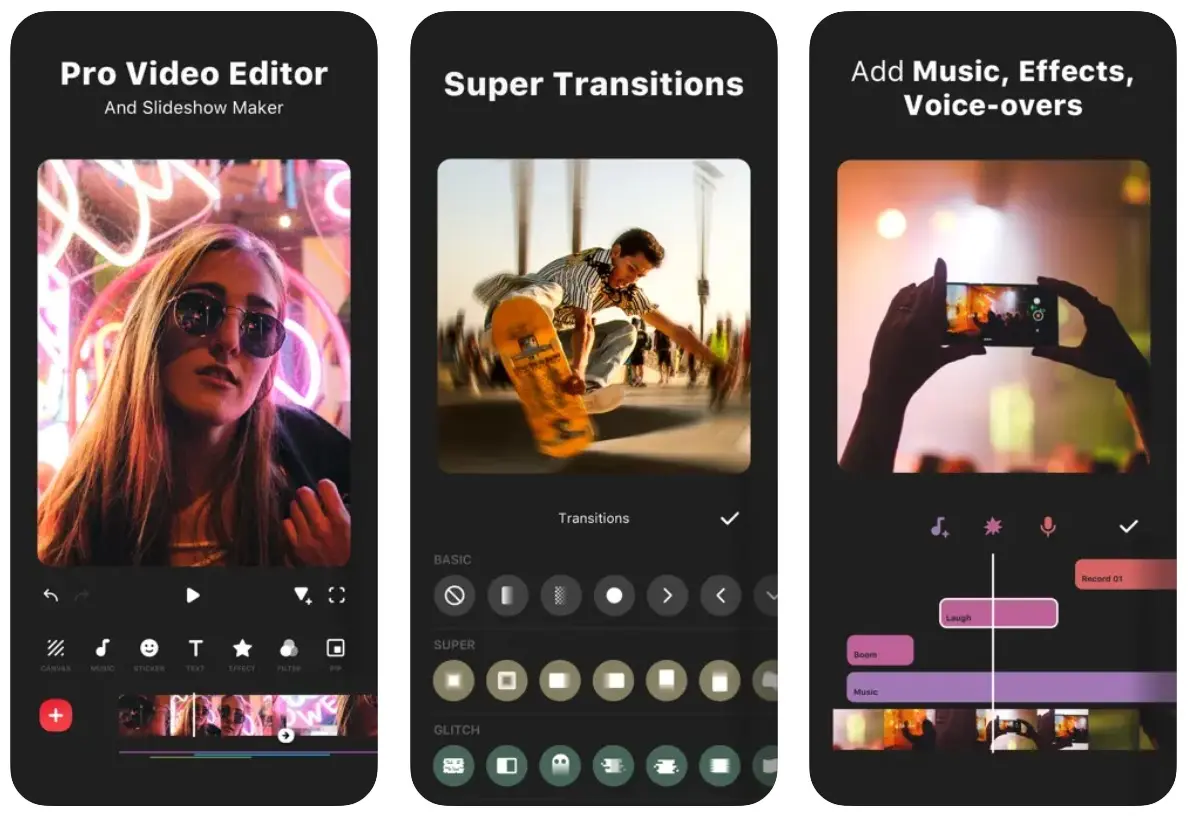
When you open CapCut for the first time, you’ll notice immediately that there’s a lot going on. The home screen shows templates, trending effects, AI tools, and multiple creation options all at once. It takes a few sessions to find your rhythm, but once you do, the workflow feels powerful and professional.
InShot takes the opposite approach. You tap one button to import your video, and all your editing tools appear in a clean horizontal bar at the bottom of the screen. Everything is where you’d expect it to be, and you can start making real edits within seconds of opening the app.
If you’re a complete beginner, InShot will feel more comfortable from day one. However, if you’re willing to spend a little time learning, CapCut will give you significantly more creative control in return.
Editing Features Compared
Both apps cover the essentials: trimming, splitting, adding music and text, and applying filters and transitions. But the depth of features is where they start to separate.
Feature | CapCut | InShot |
Multi-layer Editing | ✅ | ✅ |
Keyframe Animation | ✅ | Limited |
Green Screen (chroma key) | ✅ | ❌ |
Background Removal | ✅ (AI-powered) | ❌ |
Auto Captions | ✅ | ❌ |
Speed Curves | ✅ | Basic only |
Text Animation | Advanced | Basic |
Audio Editing | Advanced | Simple |
Built-in Stock Music | ✅ | ✅ |
Stickers and Overlays | Extensive | Good selection |
CapCut’s green screen feature alone is something InShot simply doesn’t offer, and it’s a game-changer if you want to replace backgrounds or create creative visual effects. Keyframe animation, which lets you control exactly how an element moves across your screen over time, is another area where CapCut is significantly more capable.
InShot handles the essentials reliably and with very little frustration. If your editing needs are trim, cut, add music, add text, and export, InShot does all of that cleanly and quickly without making you dig through menus.
AI Tools and Automation
This is the category where CapCut wins by the largest margin, and it’s not even close.
CapCut includes automatic caption generation that transcribes your speech and adds styled subtitles in seconds. It also has AI background removal, AI-generated video effects, smart cutout tools, and a feature that automatically matches your video cuts to the beat of your music. These tools can save you enormous amounts of time, especially if you’re creating content regularly.
InShot has no meaningful AI tools at the time of writing. Every edit is manual, which some experienced editors actually prefer, but if you want automation, CapCut is your only option between these two.
One thing worth noting: because CapCut is made by ByteDance, some users have privacy concerns about the AI features that process your footage on cloud servers. If privacy is a priority for you, keep that in mind when deciding whether to use CapCut’s AI tools.
Export Quality and Watermarks
Both apps let you export up to 4K resolution, depending on your device’s capability. In practice, CapCut tends to produce slightly sharper exports at the same resolution settings, particularly noticeable on close-up shots and text overlays.
The watermark situation is an important difference you should be aware of. CapCut’s free version exports your video without a watermark; it looks completely clean. InShot’s free version stamps a watermark on every export, and you need to pay for the Pro plan to remove it.
If you’re sharing videos professionally or building a brand, exporting watermark-free content matters. In this specific area, CapCut’s free version is the clear winner.
Pricing: What Do You Actually Get for Free?
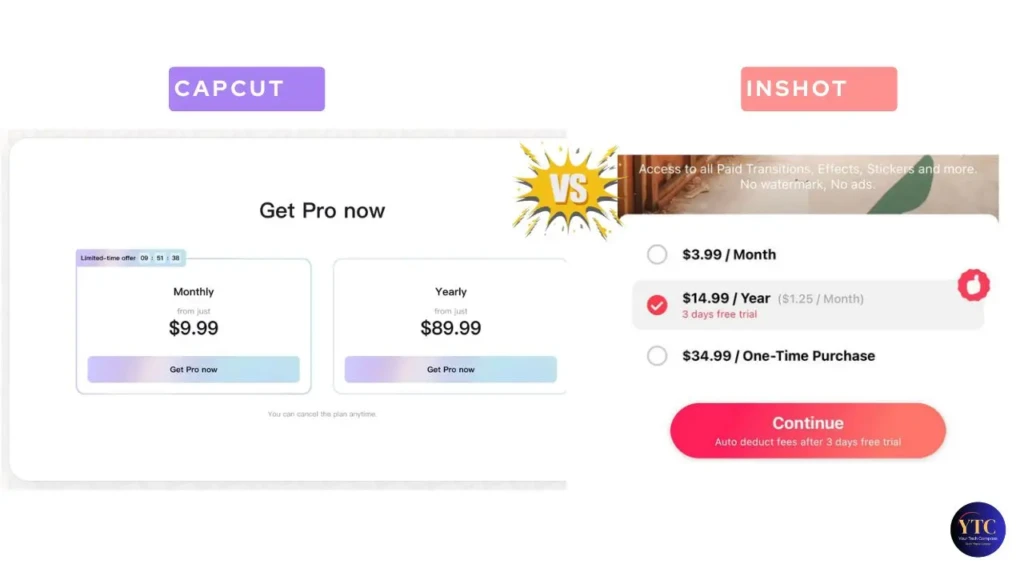
CapCut Pricing: CapCut’s free version is genuinely impressive. You get access to most core tools, AI features, effects, filters, transitions, and watermark-free exports without paying anything. The paid plan, CapCut Pro, unlocks additional cloud storage, exclusive premium templates, and some advanced AI tools. Most casual creators will never need to pay for CapCut.
InShot Pricing: InShot’s free version gives you solid editing tools but locks watermark-free exports behind its Pro subscription. InShot Pro costs approximately $3.99 per month or around $14.99 per year, making the annual plan a reasonable value if you use it regularly. The Pro plan also unlocks exclusive filters, transitions, and sticker packs.
If you’re on a tight budget and don’t want to spend anything, CapCut’s free version gives you more. If you prefer InShot’s simpler experience and don’t mind a small annual fee, the Pro plan is worth it.
Performance on Different Devices
CapCut’s advanced features, particularly the AI tools and multi-layer editing, demand more processing power from your phone. On newer iPhones and flagship Android devices, it runs smoothly and handles complex projects without issue. On older or mid-range phones, you may notice some lag when applying heavy effects or previewing complex edits.
InShot is significantly lighter. It runs smoothly on mid-range and older devices, handles basic editing with ease, and rarely crashes even on phones with limited RAM. If you’re not using the latest smartphone, InShot will give you a much more frustration-free experience.
This is a genuinely important factor to consider. The best editing app is the one that actually runs well on your specific phone, not just the one with the most features on paper.
CapCut vs InShot: Pros and Cons
CapCut
The Pros
- Extremely generous free version with no watermark.
- Powerful AI tools that save serious editing time.
- Available on desktop (Windows and Mac) and mobile.
- Green screen, keyframe animation, and advanced audio editing.
- Huge library of templates, effects, and transitions.
The Cons
- Steeper learning curve for complete beginners.
- Heavier on device resources, can lag on older phones.
- Made by ByteDance, raising privacy concerns for some users.
- The sheer number of features can feel overwhelming at first.
InShot
The Pros
- Extremely easy to learn, ideal for beginners.
- Runs smoothly on almost any device.
- Clean, uncluttered interface.
- Reliable and consistent export performance.
- Affordable Pro plan.
The Cons
- Free version includes a watermark on all exports.
- No AI tools or automation features.
- No desktop version.
- Limited advanced features, such as green screen and keyframe animation.
- Less suitable for complex or layered editing projects.
Which App Should You Choose?
Here’s my honest recommendation based on different types of users:
Choose CapCut if:
- You create content regularly for TikTok, YouTube Shorts, or Instagram Reels.
- You want AI tools to speed up your editing workflow.
- You edit on both your phone and your computer.
- You’re on a budget and don’t want to pay for a subscription.
- You’re willing to spend a few hours learning a more powerful tool.
Choose InShot if:
- You’re new to video editing and want something simple to start with.
- You edit on an older or mid-range smartphone.
- You just need to trim, cut, add music, and post; nothing complex.
- You’re comfortable paying a small annual fee for a clean, watermark-free experience.
- Speed and simplicity matter more to you than advanced features.
My honest take: Start with InShot if you’ve never edited a video before. Learn the basics, get comfortable with trimming and timing, and build the habit of editing regularly. Once you feel confident, try CapCut. You’ll appreciate its power much more after you understand the fundamentals. Many creators actually use both: InShot for quick daily edits and CapCut for more detailed, creative projects.
FAQs
Yes. CapCut’s free version is very generous. It includes most features, AI tools, and watermark-free exports, with no payment required. A Pro plan exists for additional cloud storage and premium content, but most users won’t need it.
Yes, the free version of InShot adds a watermark to all exported videos. You need the InShot Pro subscription to remove it. The annual plan costs around $14.99, which works out to just over $1 per month.
CapCut is the more natural choice for TikTok content, partly because it’s made by the same company (ByteDance) and integrates smoothly with TikTok’s format and trends. However, InShot also works well for TikTok if you prefer simpler editing.
Yes. CapCut has desktop apps for both Windows and Mac, a significant advantage over InShot. You can start a project on your phone and continue editing on your computer, all through the same account.
CapCut is safe to download and use for video editing. However, because it’s made by ByteDance, some users have raised concerns about data privacy, particularly around the AI features that process footage through cloud servers. If privacy is important to you, it’s worth reading CapCut’s privacy policy before using its cloud-based AI tools.
Absolutely, and I’d actually recommend it. Many content creators use InShot for quick, everyday edits and CapCut for more creative, polished projects. There’s no rule that says you have to pick just one.
Final Thoughts
Choosing between CapCut and InShot isn’t about which app is objectively better; it’s about which one fits where you are right now in your editing journey. InShot gets you editing immediately with minimal frustration, while CapCut rewards the time you invest in learning it with professional-level results.
If you’re just getting started with content creation and want a simple tool to help you manage your ideas before you even start editing, take a look at our guide on how to use Apple Notes. It’s a free, built-in tool that works surprisingly well for planning video scripts and content calendars. And whenever you’re ready to explore more apps that can level up your creative workflow, browse our Apps & Tools section for honest, beginner-friendly comparisons.
At YourTechCompass, every guide is written to give you accurate, practical information; no sponsored fluff, no vague advice. Explore more and find the answers you’re actually looking for.