Most iPhone users open Apple Notes, type something, and close it, never realizing they’re using less than 20% of what the app can actually do. Apple Notes isn’t just a place to jot down a grocery list. Used properly, it can replace your to-do app, your document scanner, your collaboration tool, and your personal journal, all for free, already installed on your device.
This guide will show you exactly how to use Apple Notes from the ground up, including features that even long-time Apple users have never discovered. No tech experience needed. We’ll keep it simple.
What Is Apple Notes, and Who Is It For?
Apple Notes is a free note-taking app that comes pre-installed on every iPhone, iPad, and Mac. It was first introduced back in 2005 as a basic text app, but today it’s one of the most powerful free productivity tools available on any smartphone, and most people have no idea.
It is designed for anyone who wants to capture information quickly without needing to learn a complicated app. If you own an iPhone, you already have it. If you use multiple Apple devices, everything syncs automatically through iCloud, meaning a note you type on your iPhone appears on your Mac within seconds.
Apple Notes is ideal for:
- Students who want to take quick notes in class or organize study materials.
- Professionals who need to capture meeting notes and to-do lists.
- Creatives who want to sketch ideas, brainstorm, or draft content.
- Everyday users who want one simple, reliable place to store information.
- Anyone who wants to go paperless with document scanning.
It is not ideal for heavy team collaboration or complex project management; for those purposes, apps like Notion or Obsidian are better suited. If you’re unsure which note-taking app is right for you, our guide on the best note-taking apps for Mac breaks down all your options side by side.
How to Set Up Apple Notes the Right Way
Before you write your first note, spend two minutes setting things up properly. Most people skip this step and end up with a messy, unsynced mess of notes later.
Step 1: Enable iCloud Sync
iCloud sync ensures your notes appear on all your Apple devices. Without it, your notes stay trapped on a single device.
- Open Settings on your iPhone
- Tap your name at the very top (your Apple ID)
- Tap iCloud
- Scroll down and find Notes
- Toggle it on (it should turn green)
That’s it. From now on, every note you create will automatically appear on your iPad and Mac as well.
Step 2: Set Your Default Account
If you have multiple email accounts on your iPhone, Apple Notes may try to save notes to the wrong account. Here’s how to fix that:
- Open Settings
- Scroll down and tap Notes
- Tap Default Account
- Select iCloud
This ensures all your notes are always saved to iCloud, not buried in a Gmail or Yahoo account folder.
Step 3: Turn on Password Protection
Before you store anything private in Apple Notes, set up a password:
- Go to Settings → Notes
- Tap Password
- Choose between Face ID, Touch ID, or a custom password
- Follow the on-screen steps to set it up
Now you can lock individual notes containing sensitive information, such as passwords, personal details, or financial information.
How to Create and Organize Your First Notes
Creating a New Note
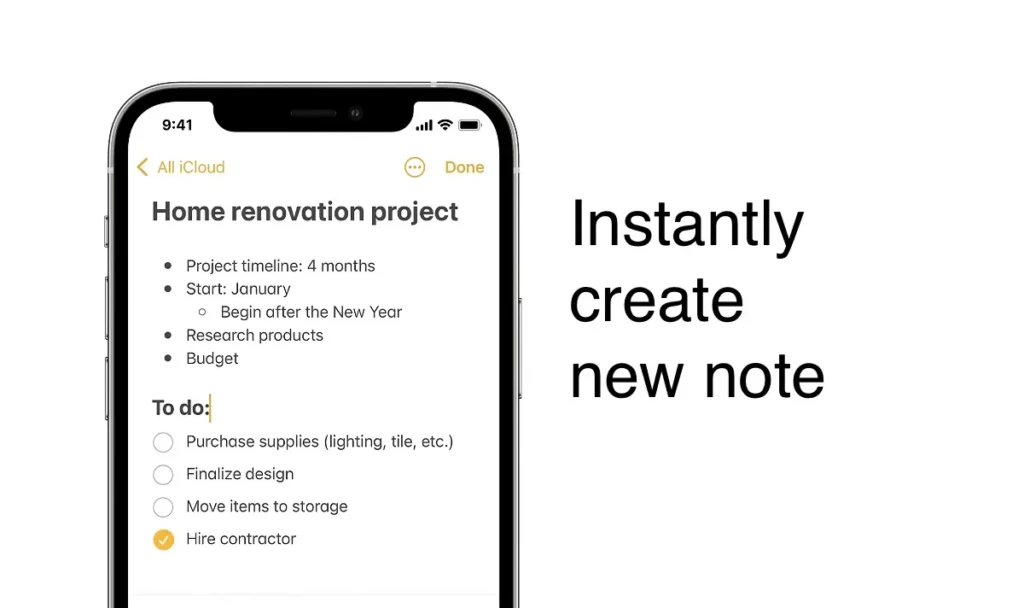
On iPhone: Open Notes, then tap the orange pencil and paper icon in the bottom right corner.
On Mac: Open Notes, then press Command + N or click the pencil icon at the top of the window.
You’ll see a blank note with a cursor ready to type. The first line you type automatically becomes the note’s title, so make it descriptive. “Grocery List” or “Monday Meeting Notes” rather than just starting to write.
Using Folders to Stay Organized
Think of folders in Apple Notes the same way you think of physical folders in a filing cabinet. Without them, every note piles up in one place and becomes impossible to find.
How to create a folder:
- On the main Notes screen, tap Edit in the top right corner
- Tap New Folder at the bottom
- Name it and tap Save
Suggested folder structure for beginners:
- 📁 Work (for meeting notes, tasks, and professional information).
- 📁 Personal (for journaling, ideas, and private notes).
- 📁 Shopping (for grocery lists and wish lists).
- 📁 Reference (for information you want to save long-term).
- 📁 Inbox (a temporary home for quick notes you haven’t sorted yet).
Using Tags for Even Faster Organization
Tags work alongside folders, making it easier to find related notes across different folders. To tag a note, simply type the # symbol followed by a keyword anywhere inside the note.
For example: Meeting notes for the new project. #work #project #urgent
Now, when you search #work in Apple Notes, every note tagged with it appears instantly, regardless of which folder it’s in.
The Core Features Explained Simply
Checklists
Checklists turn Apple Notes into a basic to-do app. Tap the checklist icon (a circle with a checkmark) in the formatting toolbar to start a checklist. Type each item and press Enter to add the next one.
When you complete a task, tap the circle next to it to check it off. Completed items automatically move to the bottom of the list, keeping your active tasks visible at the top.
Real Example: Create a note called “Weekly Groceries,” add all items as a checklist, then share it with your partner. You can both check items off in real time while you’re at different ends of the supermarket.
Attachments and Document Scanning
You can attach photos, videos, and scanned documents directly to any note. This is one of Apple Notes’ most underused features.
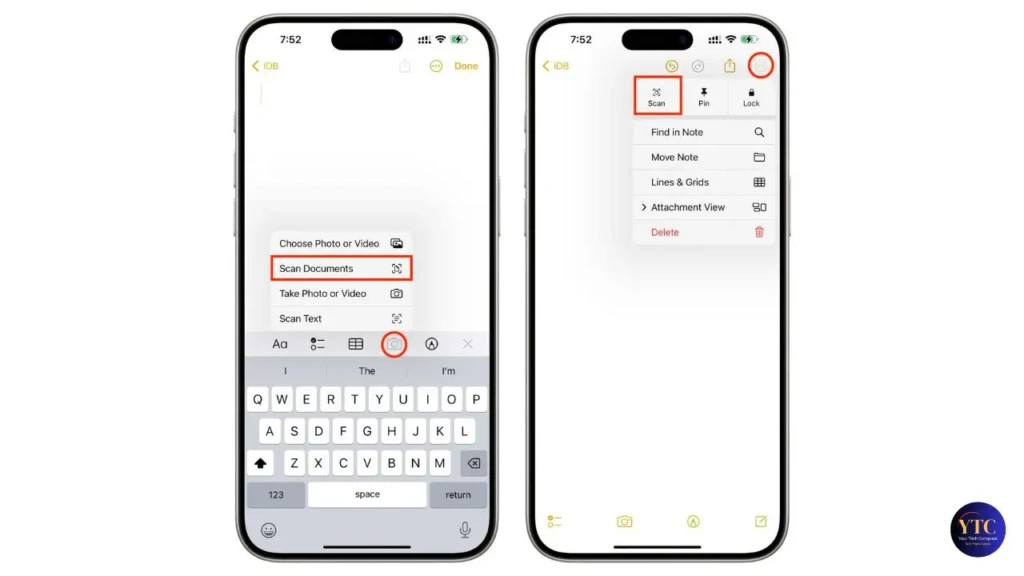
To scan a document directly into a note:
- Open or create a note
- Tap the camera icon in the toolbar
- Select Scan Documents
- Point your camera at the document; Apple Notes will automatically detect the edges
- Tap the shutter button or let it scan automatically
- The scanned document is saved directly into your note as a PDF
This is genuinely useful for saving receipts, contracts, handwritten notes, or any physical paper you want to digitize.
Drawing and Handwriting
If you have an Apple Pencil or just want to use your finger, tap the pen tip icon in the toolbar to open the drawing canvas. You can choose from a pen, pencil, marker, ruler, or eraser.
This is particularly useful for:
- Sketching quick diagrams or mind maps
- Annotating screenshots or photos
- Writing notes by hand if you prefer handwriting to typing
- Drawing layouts, wireframes, or rough designs
Formatting Tools
The formatting toolbar above your keyboard lets you add structure to any note. The key options are:
- Title, Heading, Body (for organizing long notes into sections).
- Bold, Italic, Underline (for emphasis).
- Bullet lists and numbered lists (for organized information).
- Tables (for comparing information side by side).
- Indentation (for creating sub-points under main points).
For longer notes, using headings and bullet points makes a huge difference when you come back to review them later.
Advanced Apple Notes Features Most People Don’t Know About
1. Pin Your Most Important Notes
Swipe right on any note in the list and tap the yellow pin icon. Pinned notes always appear at the very top of your notes list, above everything else. Use this for your most-accessed notes like a master to-do list, a work-in-progress, or frequently referenced information.
2. Quick Note: Capture Ideas Without Opening the App
On iPad and Mac, Quick Note lets you capture a thought in seconds without interrupting what you’re doing.
- On iPad: Swipe up from the bottom right corner of the screen with your Apple Pencil or finger.
- On Mac: Move your cursor to the bottom right corner of the screen.
A small floating note window appears. Type your idea, then swipe it away. It saves automatically to a dedicated Quick Notes folder. This is one of the fastest ways to capture ideas that exist anywhere in iOS.
3. Smart Folders
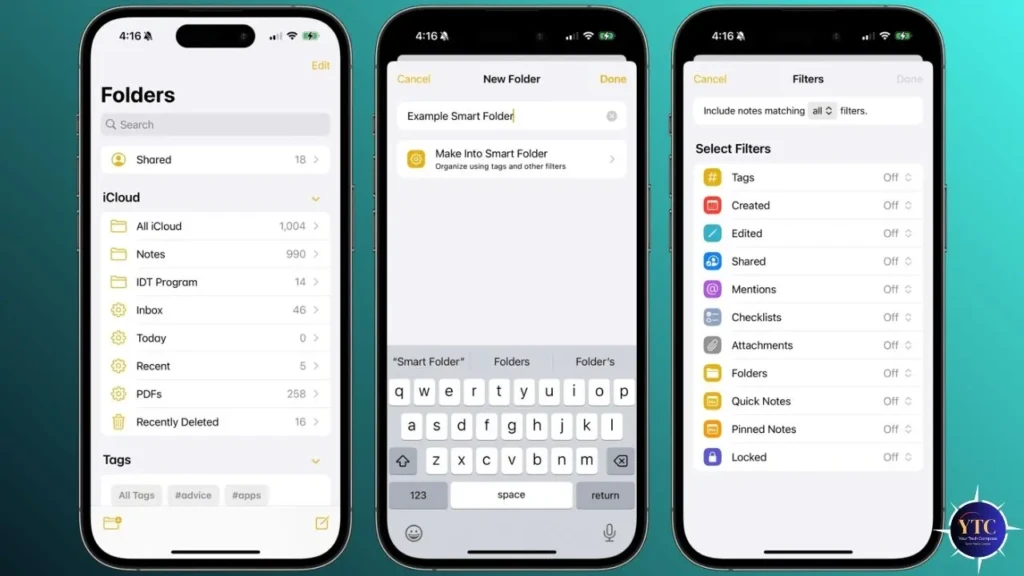
Smart Folders automatically collect notes that match specific tags, without you having to move anything manually.
How to create a Smart Folder:
- On the main Notes screen, tap New Folder.
- Tap Make into Smart Folder.
- Choose the tags you want it to collect.
- Tap Done.
Now every note tagged #work automatically appears in your Work smart folder. You never have to manually sort notes again.
4. Link Notes Together
Just like websites link to other pages, you can link one note to another inside Apple Notes.
- In a note, press and hold on a blank space.
- Tap Add Link.
- Search for the note you want to link to.
- Tap it to insert the link.
This is powerful for creating a personal knowledge base, for example, a master “Projects” note that links to individual notes for each project.
5. Use Apple Notes on Windows via iCloud.com
Most people don’t know you can access Apple Notes on a Windows computer through your browser. Simply go to iCloud.com, sign in with your Apple ID, and click Notes. All your notes appear exactly as they do on your iPhone. This is useful when you’re working on a computer that isn’t a Mac but still needs access to your notes.
6. Scan Text from Images (Live Text)
On iPhone 11 and later with iOS 15 or higher, you can use Live Text to copy text directly from any image inside Apple Notes. Simply tap and hold on text within an image, and iOS will recognize and highlight it so you can copy it just like regular text. Useful for copying text from photos of menus, business cards, or handwritten notes.
7. Recover Deleted Notes
If you accidentally delete a note, don’t panic. Apple Notes keeps deleted notes for 30 days.
- Go to the main folders screen.
- Scroll down and tap Recently Deleted.
- Find your note, swipe left, and tap Recover.
If it’s been more than 30 days, go to iCloud.com, click Data Recovery, and check if an older version is available there.
8. Collaborate in Real Time
You can share a note with another person and edit it together in real time, similar to Google Docs.
- Open the note you want to share.
- Tap the person with a plus icon at the top.
- Choose how to send the invite (via Messages, Mail, or a direct link).
- Select whether they can make changes or view only.
Both people see edits happening in real time. Useful for shared shopping lists, group project notes, or working documents with a colleague.
9. Format with Markdown-Style Shortcuts
Apple Notes supports some quick formatting shortcuts that speed up your workflow. While typing:
- Start a line with – and a space to create a bullet point automatically.
- Start a line with 1. and a space to create a numbered list automatically.
These small shortcuts save time when you’re capturing information quickly.
10. Hide Notes from Search
For extremely private notes, you can lock them so they don’t appear in search results or Siri suggestions.
- Swipe left on the note.
- Tap the lock icon.
- Confirm with Face ID or your password.
The note will now only open when you authenticate; it won’t appear in any search results on your device.
How to Use Apple Notes for Productivity
Apple Notes can replace several separate apps if you use it intentionally. Here is a real daily workflow example you can adapt:
- Morning (5 minutes): Open a note called “Today” and write your three most important tasks as a checklist. Pin this note to keep it at the top of your list.
- During the Day: Use Quick Note on iPad or Mac to capture any ideas, links, or thoughts that come to mind without interrupting what you’re doing. Let them collect in the Quick Notes folder.
- During Meetings: Create a new note named after the meeting and date, for example, “Marketing Meeting Feb 2026.” Use headings for Agenda, Discussion Points, and Action Items. Share the note with attendees so everyone sees the same information.
- Evening (5 minutes): Open your Quick Notes folder and sort what you captured during the day, move useful notes to the right folders, delete the irrelevant ones, and add tags to the ones you want to find later.
- Weekly: Review your notes and archive anything you no longer need. Move it to an “Archive 2026” folder so it’s still accessible but not cluttering your active workspace.
This simple system keeps Apple Notes organized long-term without requiring hours of maintenance.
How to Use Apple Notes on iPhone, iPad, and Mac
On iPhone
The Notes app icon is yellow with a white-lined notepad. Everything is accessible from the main screen. The toolbar at the bottom of each note contains all formatting and attachment options.
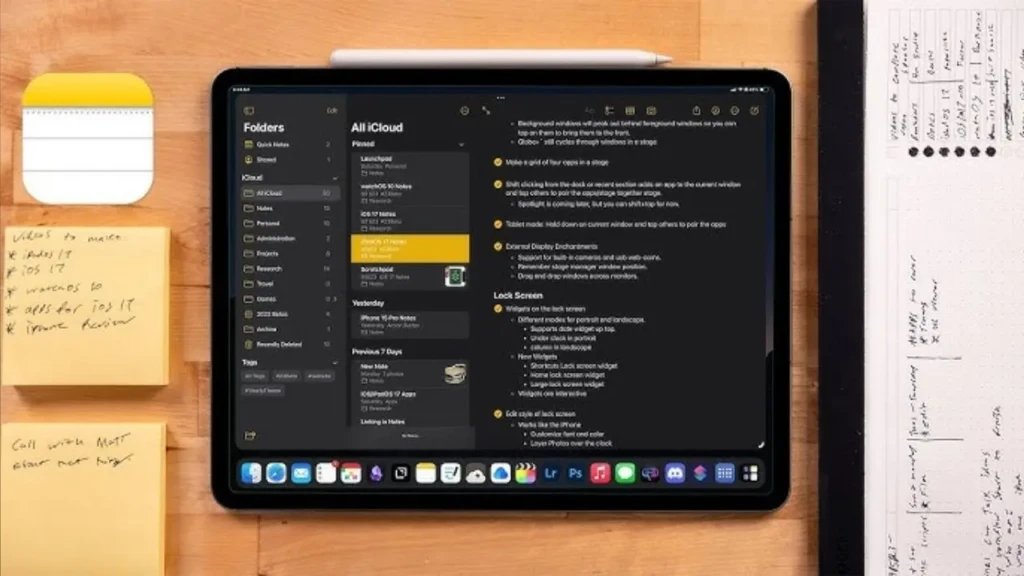
On iPad
The iPad experience adds a sidebar that shows your folders and notes simultaneously, making navigation much faster. Quick Note is available by swiping from the bottom right corner. Apple Pencil support makes drawing and handwriting particularly smooth on iPad.
On Mac
Open Notes from your Dock or by searching with Spotlight (Command + Space, then type “Notes”). The three-column layout shows folders on the left, your note list in the middle, and the note content on the right. The keyboard shortcut Command + N creates a new note instantly. You can also use Notes in full-screen mode for distraction-free writing.
Common Apple Notes Problems and How to Fix Them
Notes Not Syncing Between Devices
Cause: iCloud sync is off, or your internet connection dropped.
Fix:
- Go to Settings → Apple ID → iCloud → Notes and make sure it’s toggled on
- Check that both devices are connected to the internet
- On Mac, go to System Settings → Apple ID → iCloud → Notes and confirm it’s enabled
- If still not syncing, sign out of iCloud on one device and sign back in
Notes App Missing from iPhone
Fix: It may have been accidentally removed. Go to the App Store, search “Notes,” and reinstall it; your notes will still be there via iCloud. Alternatively, swipe down from your home screen and search “Notes.” This is because it may just be hidden in a folder.
Apple Notes Not Showing on Mac
Fix: Go to System Settings → Apple ID → iCloud and make sure Notes is checked. Then open Notes on Mac and wait up to a minute for it to sync. If notes still don’t appear, restart the Notes app.
Shared Note Not Updating for the Other Person
Fix: Both people need to be connected to the internet. Ask the other person to close and reopen the note. If it still doesn’t update, remove their access and re-invite them.
Notes Taking Up Too Much iCloud Storage
Fix: Large attachments (photos, scans, videos) inside notes use your iCloud storage. Go to your notes and delete attachments you no longer need. You can also go to iCloud.com and manage your storage from there.
Formatting Changed When Copying to Another App
Fix: Apple Notes uses its own formatting system that doesn’t always transfer cleanly to other apps. When pasting into Word, Gmail, or other apps, use “Paste and Match Style” (on Mac: Shift + Option + Command + V) to paste as plain text and reformat manually.
Can’t Unlock a Locked Note
Fix: If you’ve forgotten your Notes password, go to Settings → Notes → Password → Reset Password. Note: this will permanently lock any notes that were previously locked with the old password; they cannot be recovered without the original password.
Note Was Deleted More Than 30 Days Ago
Fix: Go to iCloud.com → Account Settings → Restore Notes. Apple sometimes keeps older backups that go beyond the standard 30-day recovery window in the app itself.
Apple Notes vs Google Keep: Which Should You Use?
If you’ve ever wondered whether to stick with Apple Notes or switch to Google Keep, here’s a simple breakdown:
Feature | Apple Notes | Google Keep |
Price | Free | Free |
Available On | Apple devices + iCloud.com | All platforms, including Android |
Best For | Apple ecosystem users | Cross-platform users |
Organization | Folders + Tags | Labels + Color coding |
Document Scanning | Yes | No |
Drawing | Yes | Basic only |
Offline Access | Yes | Yes |
Collaboration | Yes | Yes |
Search within Images | Yes (Live Text) | Yes |
Choose Apple Notes if you only use Apple devices and want everything seamlessly connected without any setup.
Choose Google Keep if you switch between iPhone and Android, or use Windows and need your notes accessible everywhere, regardless of device.
For a deeper comparison focused specifically on students, check out our article on Apple Notes vs Google Keep for Students.
FAQs
No. Apple Notes is exclusive to Apple devices. However, you can access your notes on any computer, including Windows, through iCloud.com in a browser. There is no official Android app.
Yes. If you prefer not to use iCloud, your notes will be saved only on your device. Go to Settings → Notes → Default Account and select “On My iPhone” instead of iCloud. Be aware that local notes won’t sync to other devices and won’t be backed up unless you manually back up your phone.
Apple Notes uses end-to-end encryption for locked notes, which means even Apple cannot read them. Unlocked notes are stored in iCloud with standard Apple encryption. For highly sensitive information such as passwords, a dedicated password manager like 1Password or Apple’s Keychain is more appropriate.
There is no limit on the number of notes you can create. However, attachments count toward your iCloud storage. The free iCloud plan gives you 5GB, which is enough for thousands of text-only notes but fills up quickly if you’re scanning many documents or attaching videos.
Yes. Apple Notes supports real-time collaboration. Share a note via the share button at the top of the note and give the other person editing access. Both of you can type simultaneously and see each other’s changes in real time.
Final Thoughts
Apple Notes is genuinely one of the most underrated apps on your iPhone. Most people use 10% of what it offers, a scratch pad for quick thoughts, when it’s actually capable of running your entire personal organization system for free.
Start simple. Create a few folders, use checklists for your daily tasks, and try the document scanner the next time you have a receipt or form to save. Once those habits form, explore advanced features such as Smart Folders, linked notes, and Quick Note. Each one you add makes the whole system more powerful.
The best note-taking app isn’t the one with the most features; it’s the one you actually use consistently. And Apple Notes, already on your phone and completely free, has a head start that no other app can match.
Looking for more ways to get the most out of your Apple devices? Browse our Tech Guides for simple, beginner-friendly tutorials on everything Apple.