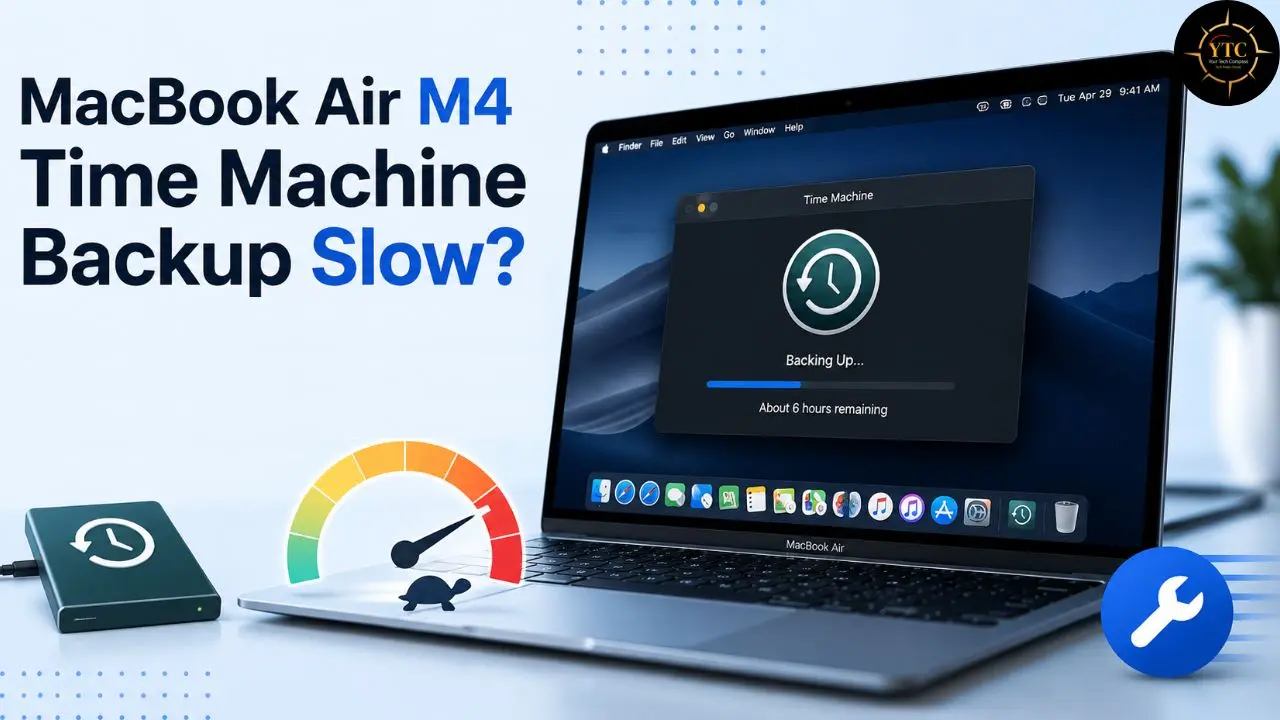
You plug in your external drive, start a Time Machine backup on your brand-new MacBook Air M4, and watch the estimated time climb to four hours. Then six. Then “calculating…” — stalling there for the better part of an hour without moving. Your Mac is one of the fastest consumer laptops Apple has ever made, yet it appears to be losing a race against time. If your MacBook Air M4 Time Machine backup is slow, you’re not alone. I’ve seen this complaint appear consistently across Apple’s own support communities, MacRumors forums, and Reddit threads from M-chip Mac users, and the frustration is completely understandable because the hardware is clearly capable of much more than what Time Machine appears to use it for.
The reason your MacBook Air M4 Time Machine backup is running so slowly almost always comes down to one of a handful of causes, and the most common one is built directly into macOS by design. Time Machine is intentionally throttled as a low-priority background process, meaning your M4’s remarkable power sits idle while the backup drags on. Beyond that, using a spinning hard drive instead of an SSD, incorrect drive formatting, and Spotlight competing for disk access are documented bottlenecks. This guide walks you through six targeted ways to fix slow Time Machine backups, ordered from quickest to most technical. Most readers see a dramatic improvement before reaching Fix 4.
Why Is Your MacBook Air M4 Time Machine Backup So Slow?
Before jumping into fixes, it’s worth taking two minutes to understand the actual causes. The fix that helps you most depends directly on which cause is responsible for your situation, and some of these causes compound each other, which is why a single fix sometimes isn’t enough.
Cause 1: macOS Throttles Time Machine Deliberately
This is the most common cause, and it surprises most people when they first hear it. Apple built Time Machine to run as a low-priority disk operation, meaning macOS intentionally limits how many system resources it can use. The specific mechanism is a kernel parameter called debug.lowpri_throttle_enabled, which is set to 1 (enabled) by default on every Mac.
When throttling is active, Time Machine runs slowly even if your MacBook Air M4 is completely idle, sitting on your desk with no other apps open, no video playing, nothing happening at all. The Mac isn’t the problem. The throttle is.
On M4 hardware specifically, this throttle feels particularly punishing because the contrast between what the chip is capable of and what Time Machine is allowed to use is wider than on any previous generation. The fix for this is a single Terminal command that takes 30 seconds and carries zero risk, and I’ll walk you through it step by step in Fix 1.
Cause 2: You’re Using a Spinning Hard Drive Instead of an SSD
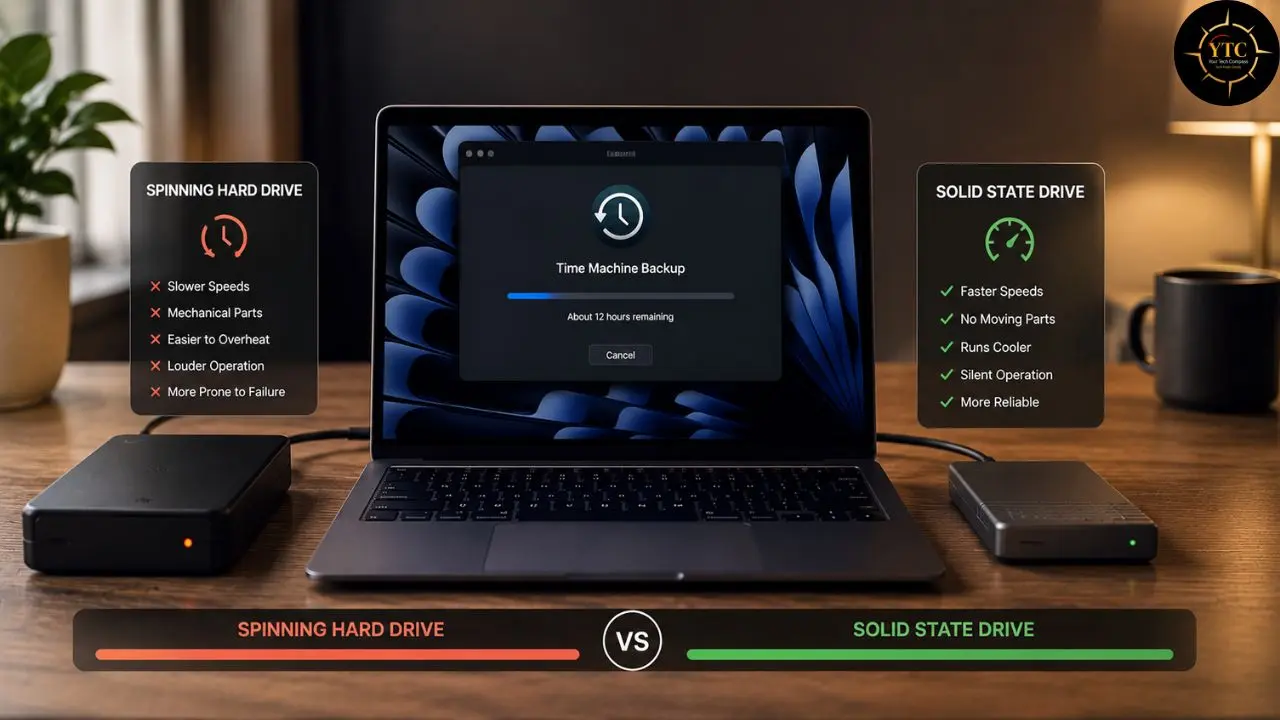
A spinning hard drive, the kind with physical platters inside, has a maximum read/write speed of roughly 80-150 MB/s. A modern USB-C SSD reaches 800-1,000 MB/s. That’s not a minor difference; that’s a 6- to 12-times speed gap between the two storage types. When your MacBook Air M4’s internal SSD is generating data at SSD speeds and the backup destination is a mechanical hard drive, the drive itself is the bottleneck, and no software fix will overcome it.
One verified M4 Pro user on Apple’s support communities reported backing up to a Western Digital Elements portable hard drive and consistently experiencing 3-hour backup sessions; the drive was the constraint, not the Mac. If you’re using a spinning drive, switching to an SSD is the single most impactful change you can make. More on specific drive recommendations in Fix 2.
Cause 3: Your Drive Is Formatted Incorrectly
macOS now requires APFS (Apple File System) for Time Machine backups on Macs running macOS Ventura and later. New Time Machine backups can only be made to case-sensitive APFS, either plain or encrypted. If your drive is formatted as exFAT, NTFS, or old HFS+, Time Machine either can’t back up correctly or must perform significant extra processing that adds time and creates instability.
APFS was specifically designed for SSDs. It supports point-in-time snapshots that Time Machine uses to track changes, full-disk encryption, and space sharing between volumes. APFS is ideal for SSDs and flash storage running macOS High Sierra or later due to its efficiency and security features, and for spinning hard drives, HFS+ (Mac OS Extended, Journaled) is still the better choice because APFS metadata fragmentation can degrade performance on mechanical drives over time.
Cause 4: Spotlight Is Competing With Your Backup
By default, Spotlight tries to index every connected drive, including your Time Machine backup drive. When Spotlight’s indexing process (mds_stores) runs at the same time as a Time Machine backup, both processes are competing for the same disk read/write bandwidth. The mds_stores process crashing can cause large disk write volumes as macOS tries to reindex from scratch every time, which dramatically compounds the slowdown during the first backup or after a backup reset, when both processes are dealing with large volumes of new data at the same time.
Cause 5: Large or Unnecessary Files Are Being Backed Up
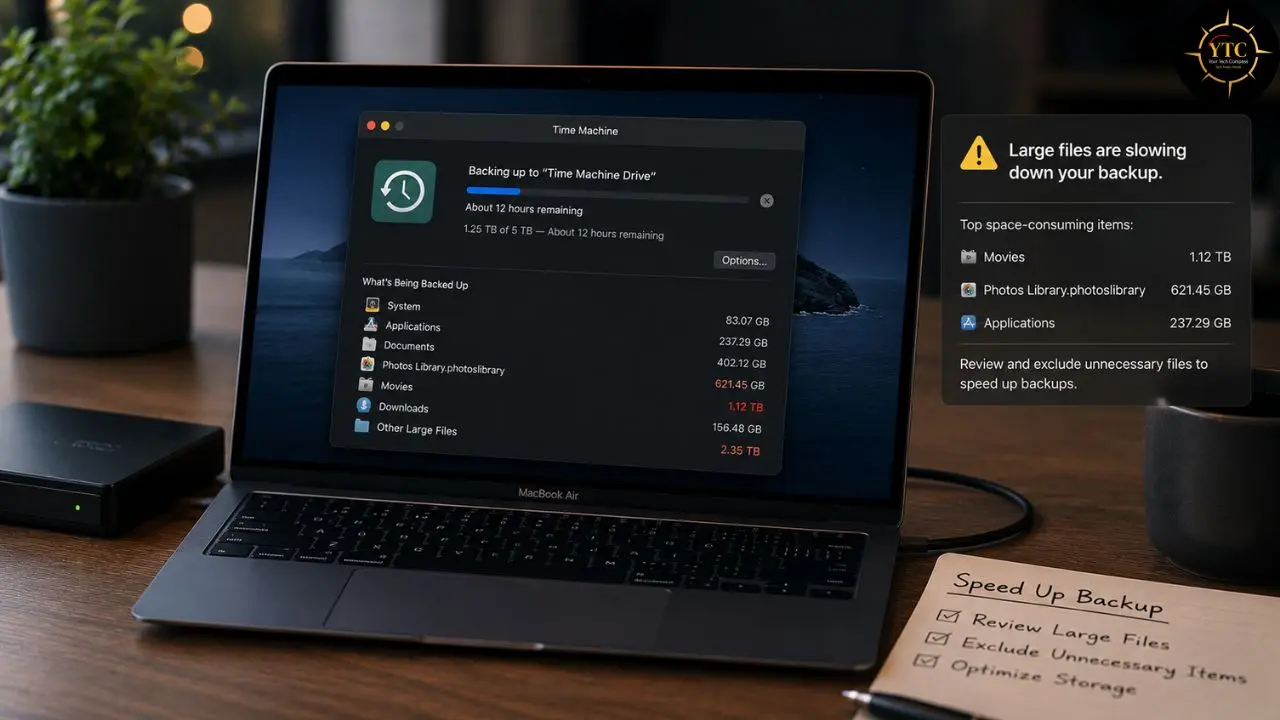
Time Machine backs up everything on your Mac by default, including files that don’t need to be backed up and that change frequently enough to add significant time to every backup cycle. For developers, Xcode’s DerivedData folder alone can grow to 30–50GB.
Virtual machine files (Parallels, VMware, UTM) are often 20–100GB each. Large media files, download caches, and application caches all get included by default, even when they serve no recovery purpose.
The practical consequence is that every backup cycle spends time copying data you’ll never actually need to restore; time that accumulates across hundreds of future backup sessions.
Cause 6: The First Full Backup Is Always the Slowest
If you’re setting up Time Machine for the first time on your MacBook Air M4, it’s worth knowing that the first backup is inherently slower than every one that follows. The initial backup copies your entire Mac from scratch; there’s no incremental baseline yet.
Every subsequent backup is incremental, meaning only the files that changed since the last backup get copied. That’s dramatically faster. If you’re reading this during your very first backup, some of what you’re experiencing is expected, but the fixes below will still make a meaningful difference.
How to Fix A Slow MacBook Air M4 Time Machine Backup
Fix 1: Disable Time Machine’s Throttle Using Terminal
- What It Does: Temporarily removes macOS’s artificial speed limit on Time Machine, allowing it to use full disk I/O during the backup session.
- Risk Level: Zero; the setting resets automatically on your next restart, or you can revert it manually when done.
- Time to Apply: About 30 seconds.
This is the fix I always recommend starting with, because it’s the fastest to apply, carries no risk whatsoever, and addresses the most common cause of slow M4 Time Machine backups. By disabling disk throttling, Time Machine will use more resources on your Mac, allowing it to back up faster. However, don’t leave it permanently disabled, as it will affect Mac performance when running other tasks. Think of it as temporarily unlocking the speed that the hardware is already capable of delivering.
Here’s exactly how to do it:
Step 1: Open Terminal
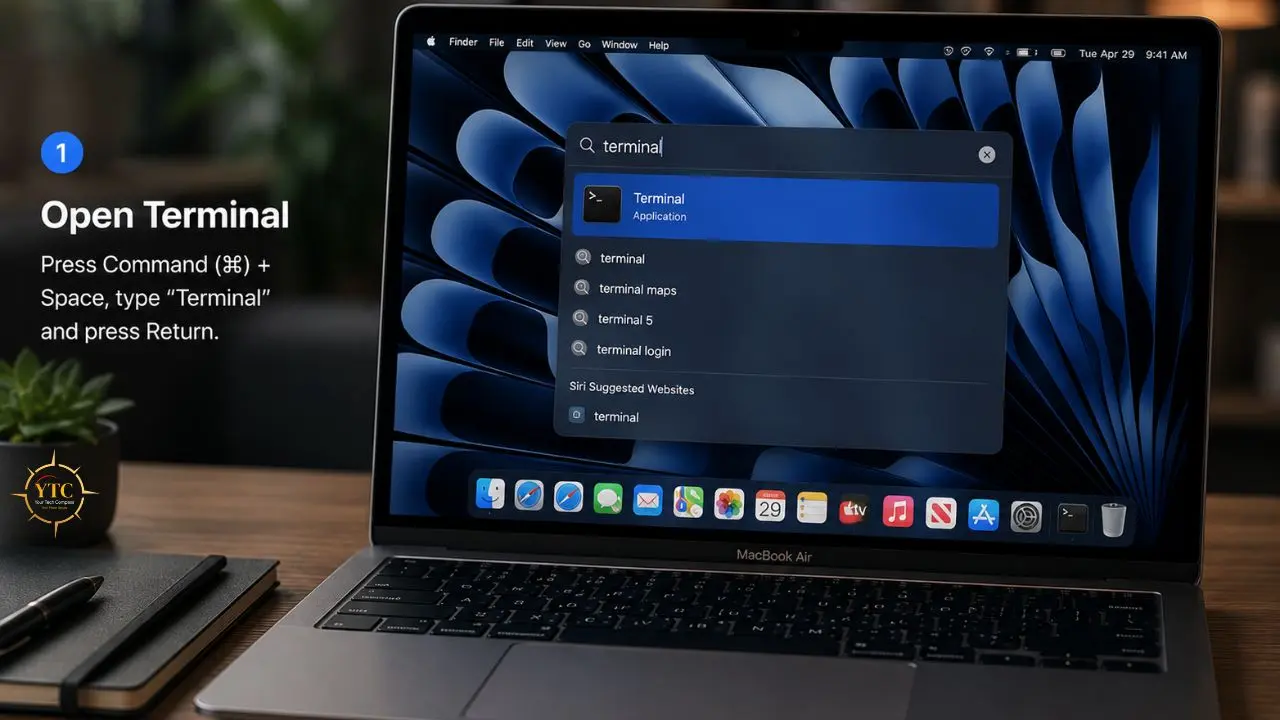
Press Command + Space to open Spotlight Search. Type “Terminal” in the search box and press Return. Terminal is a text-based interface that lets you run commands directly on macOS; you don’t need any technical background to follow these steps.
Step 2: Enter the Throttle-Disabling Command
In the Terminal window, type or copy-paste the following command exactly as shown, then press Return:
sudo sysctl debug.lowpri_throttle_enabled=0
The word sudo means you’re running this command with administrator-level permissions. sysctl is the macOS tool for adjusting kernel settings. debug.lowpri_throttle_enabled=0 turns the throttle off. The 0 means “disabled.”
Step 3: Enter Your Mac’s Admin Password
The terminal will ask for your password. Type it and press Return.
You won’t see any characters appear as you type; that’s normal macOS security behavior. Press Return when done, and Terminal will confirm the change with a single line of output.
Step 4: Check Your Time Machine Backup
Switch back to your Time Machine progress and watch the estimated time. In most cases, you’ll see the backup accelerate noticeably within a few minutes. The estimated time remaining should drop significantly as the backup starts using more disk bandwidth.
Step 5: Re-Enable Throttling When the Backup Finishes
Once the backup completes, type the following command in Terminal and press Return to restore normal settings:
sudo sysctl debug.lowpri_throttle_enabled=1
Alternatively, simply restart your Mac; the change does not persist across reboots. The throttle automatically returns to its default enabled state.
One Honest Note
This fix helps most when the throttle (Cause 1) is your primary bottleneck. If you’re backing up to a spinning hard drive, disabling the throttle will help, but it won’t overcome the fundamental drive-speed limitation. In that case, combine this fix with Fix 2 for the best result.
Fix 2: Switch From a Spinning Hard Drive to an External SSD
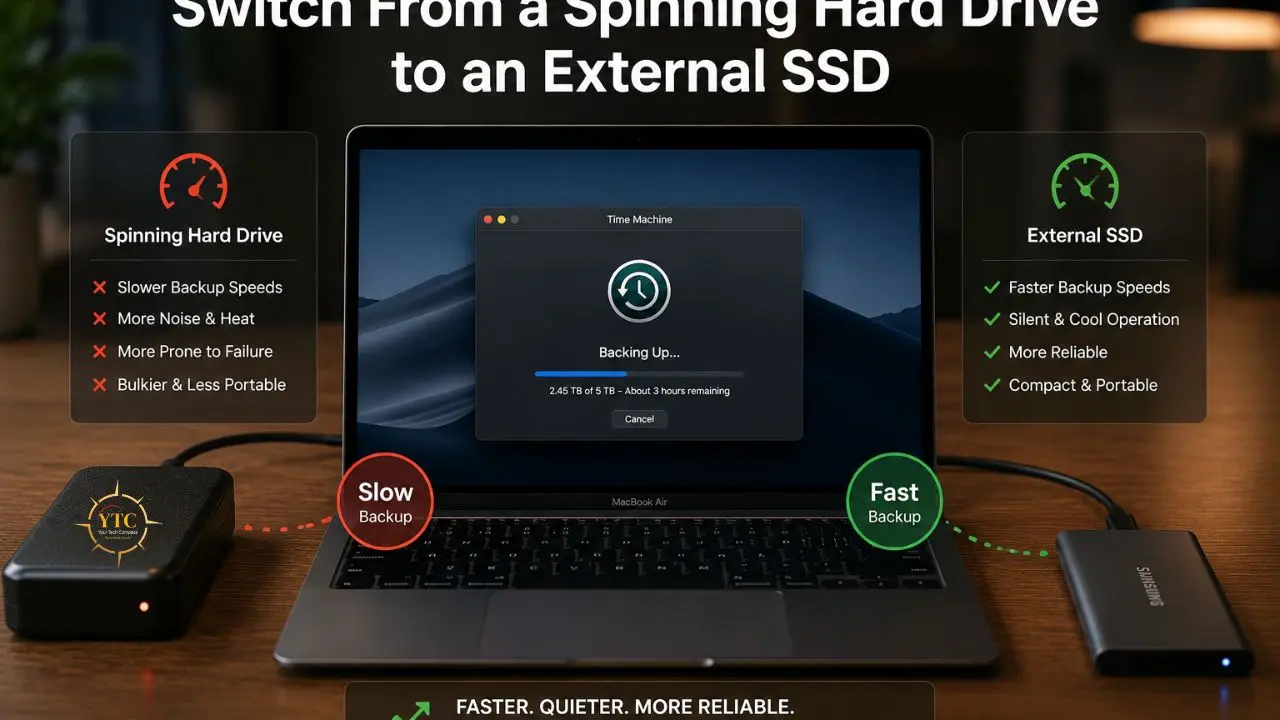
- What It Does: Removes the drive speed bottleneck entirely; the single most impactful hardware change you can make for slow Time Machine backups.
- Risk Level: Zero (requires a new hardware purchase, not a settings change).
- Impact: Dramatic. Backup sessions that previously took 3–4 hours on a spinning drive routinely complete in 20–30 minutes on a USB-C SSD.
I want to be direct about this: If you’re currently backing up to a spinning mechanical hard drive, no combination of software tweaks will give you the experience you expect from an M4 Mac. The drive is physically incapable of receiving data as fast as your Mac can send it. With an SSD as the Time Machine destination, after the first full backup, subsequent backups take less than a minute on M-chip Macs; less than a minute, not three hours.
Here’s the real-world speed comparison to make this concrete:
🔌 HDD vs. SSD Backup Speed Comparison
Drive Type | Max Write Speed | 500GB Backup Estimate | Best For |
Spinning HDD (USB-A) | 80–150 MB/s | 3–6 hours | ❌ Not recommended for M4 Macs |
USB 3.0 SSD (USB-A) | 400–500 MB/s | 45–90 minutes | ✅ Acceptable improvement |
USB-C SSD (Gen 2) | 800–1,000 MB/s | 15–25 minutes | ✅ Recommended |
Thunderbolt SSD | 2,500–3,000 MB/s | Under 10 minutes | ✅ Maximum performance |
Recommended External SSDs for Time Machine on MacBook Air M4
The following drives have been verified to work correctly with Time Machine and to offer genuine USB-C speeds. I’m not recommending the most expensive options, just the ones that solve the problem reliably at reasonable prices.
- Samsung T7 Shield (~$80 for 1TB, USB-C): 1,050 MB/s read, 1,000 MB/s write. Bus-powered; no external power adapter needed. Drop-resistant and well-suited for travel.
- WD My Passport SSD (~$70 for 1TB, USB-C): 1,050 MB/s read, 1,000 MB/s write. Compact and durable, with optional hardware encryption.
- SanDisk Extreme Portable SSD (~$75 for 1TB, USB-C): 1,050 MB/s read. IP65 rated for dust and water resistance; a good choice if you move your Mac frequently.
How Large Should Your Backup Drive Be?
Apple recommends at least 2× your Mac’s internal storage to give Time Machine room for meaningful backup history. For a 512GB MacBook Air M4, use a 1TB drive. For a 1TB model, use 2TB. Going 3× gives you a deeper backup history and more recovery options, which is worth the modest extra cost if you can manage it.
Once you have your SSD, skip ahead to Fix 3 to format it correctly before adding it as your Time Machine destination.
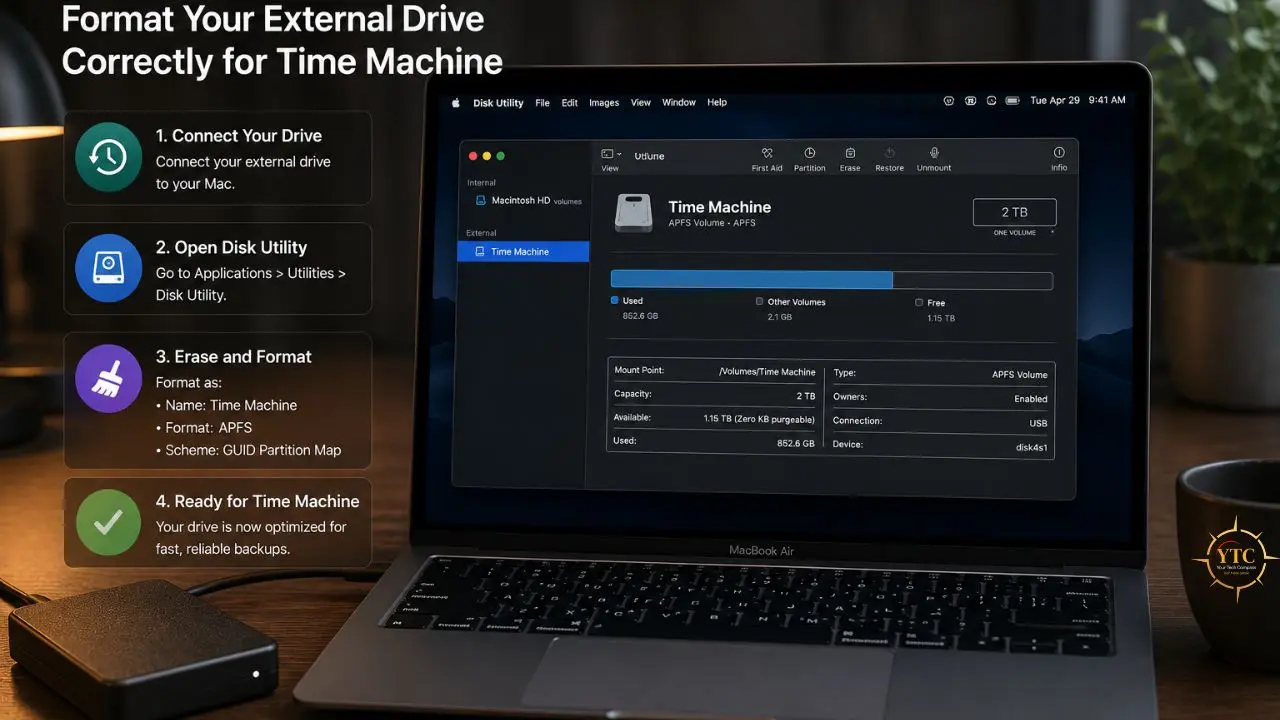
Fix 3: Format Your External Drive Correctly for Time Machine
- What It Does: Ensures your backup drive uses the file system macOS requires for reliable, fast Time Machine backups on modern Macs.
- Risk Level: This erases everything on the drive. Back up any data stored on it before proceeding.
- When to Apply This Fix: Any time you’re setting up a new drive, or if you suspect your drive is formatted as exFAT, NTFS, or an older version of HFS+.
Which Format Should You Choose?
- For An External SSD → APFS (Apple File System): This is the format macOS now requires for Time Machine on modern Macs. APFS is the default and preferred format for Time Machine on modern Macs; optimized for SSDs and supporting point-in-time snapshots, full-disk encryption, and file cloning. When Time Machine uses APFS, snapshots work correctly, incremental backups are more efficient, and the backup drive itself is more space-efficient because APFS volumes can grow and shrink dynamically.
- For a spinning HDD → HFS+ (Mac OS Extended, Journaled): HFS+ with journaling enabled on a GUID Partition Map is the better choice for platter-based drives. APFS on a spinning drive leads to metadata fragmentation over time, which gradually degrades performance and often creates hard-to-diagnose problems.
- Never Use ExFAT or NTFS: Time Machine cannot back up reliably to either format.
Step-By-Step: How to Format Your Drive for Time Machine
Step 1: Plug your external drive into your MacBook Air M4. If you have anything stored on it that you want to keep, copy it to another location first, as this process permanently erases the drive.
Step 2: Open Disk Utility. Go to Finder → Applications → Utilities → Disk Utility. Alternatively, press Command + Space, type “Disk Utility,” and press Return.
Step 3: In the left sidebar, find your external drive. Click on the drive name itself; the top-level entry at the top of the list, not the indented volume name below it. If you don’t see your drive at all, click the View menu in Disk Utility’s toolbar and choose Show All Devices. This reveals drives that might otherwise be hidden.
Step 4: Click Erase in the top toolbar of Disk Utility.
Step 5: In the dialog that appears, give your drive a clear name; “Time Machine Backup” works well. Set the Format to APFS for an SSD, or Mac OS Extended (Journaled) for a spinning HDD. Set Scheme to GUID Partition Map.
Step 6: Click Erase. Disk Utility will format the drive in 30–60 seconds. When it completes, click Done.
Step 7: Go to System Settings → General → Time Machine. Click Add Backup Disk and select your freshly formatted drive. Time Machine will begin a new full backup.
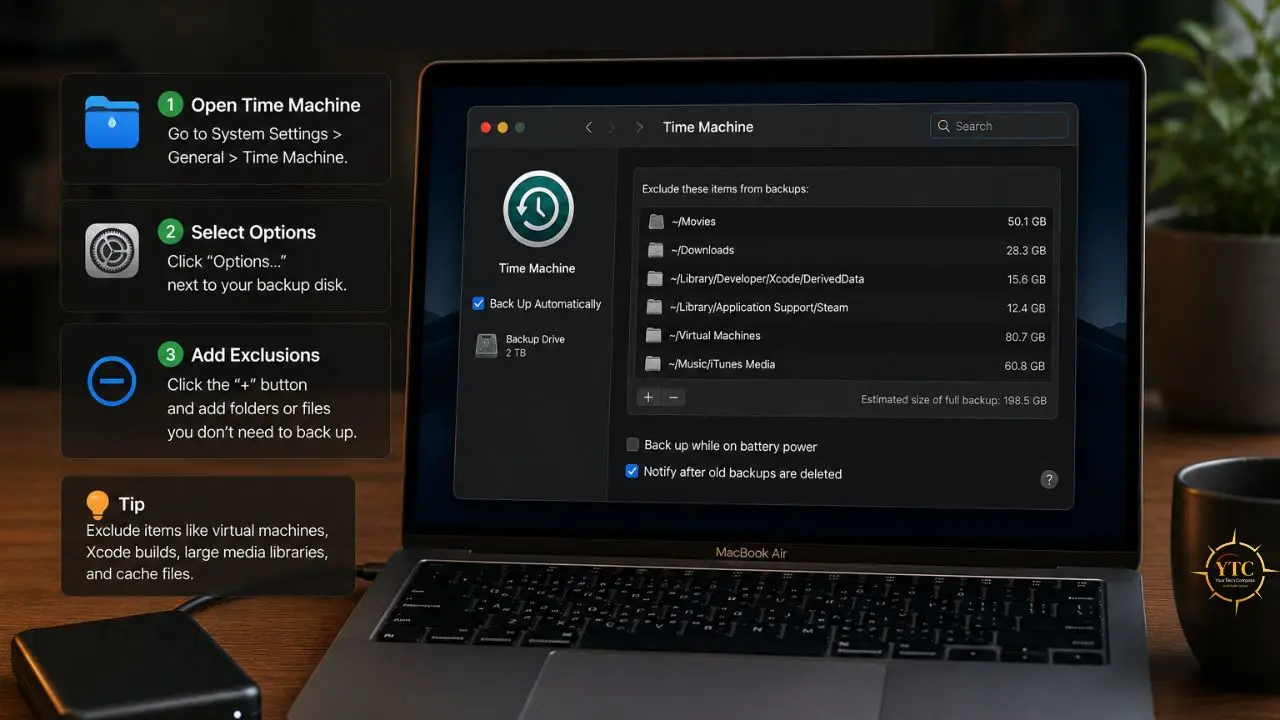
Fix 4: Add Time Machine Exclusions for Large Unnecessary Files
- What It Does: Removes large, frequently changing or nonessential files and folders from every backup cycle, making every subsequent backup measurably faster.
- Risk Level: Zero. You can add or remove exclusions at any time without affecting your Mac or your existing backups.
- Who Needs This Most: Developers with Xcode, designers with large project files, anyone running virtual machines, or anyone with a large Downloads folder.
Here’s the thing about Time Machine exclusions: they’re not just a one-time fix for the backup you’re running right now. Every exclusion you add makes future backups faster because those files and folders no longer need to be checked, compared, or copied in each cycle. The effect compounds over time.
The Files and Folders Most Worth Excluding
- ~/Library/Developer/Xcode/DerivedData: Xcode’s build cache. This folder regenerates completely whenever you build your project, so backing it up is almost never useful. It can reach 30–50GB on an active development machine and changes with every build.
- Virtual Machine Files: Parallels .pvm packages, VMware .vmwarevm files, UTM virtual machine bundles. These are often 20–100GB each, and they register as “changed” every time the VM runs, meaning Time Machine tries to copy the entire VM image on every backup cycle. Back up your VMs separately if needed; don’t include them in Time Machine.
- ~/Downloads: If you regularly download large files you don’t need backed up (videos, disk images, installer files), excluding Downloads saves significant time per backup cycle. Keep it included if your Downloads folder contains important documents you’d need to recover.
- ~/Library/Caches: App cache files. macOS and your apps rebuild these automatically; they have no recovery value and can occupy several gigabytes of storage.
- Large Local Media Folders: If you keep a large music library, video project files, or photo libraries that are also backed up to another service or external drive, consider excluding them from Time Machine to avoid redundant backup coverage.
Step-by-step: How to Exclude Folders from Time Machine
Step 1: Go to System Settings → General → Time Machine.
Step 2: Click Options in the lower-right corner of the Time Machine panel. This opens a list of currently excluded items.
Step 3: Click the + (Add) button at the bottom-left of the exclusion list.
Step 4: In the file browser that opens, navigate to the folder you want to exclude. Click on it to select it, then click Exclude.
Step 5: Repeat for any additional folders. When you’re done, click Save.
The next Time Machine backup will skip all excluded folders entirely. The improvement in backup speed is most noticeable on the first backup after adding exclusions, and subsequent backups will also be faster.
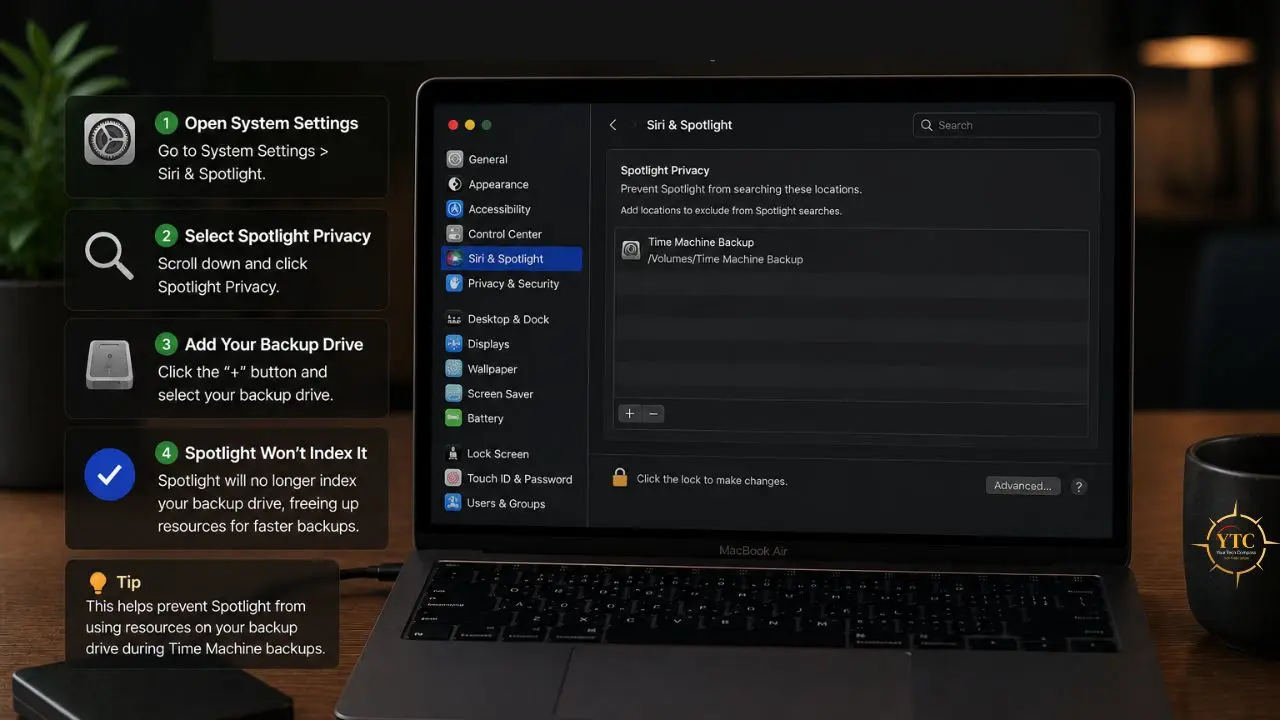
Fix 5: Stop Spotlight From Competing With Your Backup Drive
- What It Does: Prevents Spotlight from indexing your Time Machine backup drive, eliminating the competing disk I/O that slows both processes during backup sessions.
- Risk Level: Zero. This is actually the recommended configuration for Time Machine drives.
- When to Apply: If you notice your Mac’s fan spinning or disk activity remaining high during backups, even when the Mac is otherwise idle.
When Spotlight tries to index your backup drive while Time Machine is also writing to it, both processes are fighting for the same disk bandwidth. The result is that neither runs at full speed, the backup takes longer, and your Mac’s disk activity light (or Activity Monitor disk usage) stays high throughout. Removing the backup drive from Spotlight’s indexing scope solves this directly.
One important clarification: even if you exclude a Time Machine backup disk from Spotlight, you will continue to receive messages that Spotlight is indexing it. This indexing is necessary for Time Machine to function properly and cannot be turned off.
When searching, Spotlight excludes items stored on the backup disk that aren’t part of a Time Machine backup. In other words, this is how Apple intends backup drives to be configured. You’re not breaking anything by adding your backup drive to Spotlight Privacy; you’re correcting a default that most users never know to change.
Step-By-Step
Step 1: Go to System Settings → Siri & Spotlight.
Step 2: Scroll to the bottom of the settings panel and click Spotlight Privacy. This opens a list of locations that Spotlight has been told to ignore.
Step 3: Click the + (Add) button at the bottom of the privacy list.
Step 4: In the file browser, navigate to and click on your Time Machine backup drive. Click Choose to add it.
Step 5: Your backup drive now appears in the privacy exclusion list. Close System Settings.
From this point forward, Spotlight will not attempt to index the contents of your backup drive during regular searches. The next backup session will have uncontested access to the drive’s disk bandwidth, resulting in faster writes and shorter backup times.
Fix 6: Check Your Cable and Port Connection

- What It Does: Ensures the physical connection between your MacBook Air M4 and your external drive is running at its maximum rated speed, not artificially limited by the wrong cable or port.
- Risk Level: Zero.
- Why This Is Easy to Miss: A USB 3.2 SSD connected via a USB 2.0 cable looks identical from the outside. Same connector, same plug, same color, but completely different maximum speeds. USB 2.0 caps at 480 Mbps. USB 3.2 Gen 2 delivers up to 10 Gbps. That difference is significant enough to account for multi-hour backup times, even with a fast SSD.
What to Check
Your Cable’s Rated Speed
Check the cable packaging, the cable itself (some have speed ratings printed on the connector), or search for the model number online. You want a cable rated for USB 3.2 Gen 2 (10 Gbps) or better for a USB-C SSD. If you’re using a cable that came with an unrelated device, a phone charger cable, for example, it’s almost certainly USB 2.0 and is limiting your backup speed.
Direct Connection vs. Hub
Plug your backup SSD directly into your MacBook Air M4’s USB-C port rather than through a hub or dock. Passive hubs and lower-quality docks can throttle transfer speeds by sharing bandwidth across connected devices. If you must use a hub, use a powered Thunderbolt dock rated for at least 10 Gbps per port, not a $15 USB splitter.
Which Port You’re Using
The MacBook Air M4 ships with two Thunderbolt 4/USB 4 ports rated at up to 40 Gbps each, plus one USB 3 port rated at up to 10 Gbps. For maximum backup speed, connect your drive to one of the Thunderbolt 4 ports; they’re the two ports on the left side of the machine. The USB 3 port on the right side is excellent, but the Thunderbolt ports give you headroom if you ever upgrade to a faster Thunderbolt-rated drive.
Damage or Wear
USB-C cables can degrade over time, especially those that have been bent, tightly wrapped, or used heavily. A worn cable may negotiate a lower-speed USB 2.0 connection automatically, even with a USB 3.2-capable drive and port. If you have another USB-C cable nearby, swap it in and check whether backup speed changes.
Which Format Is Right for Your Drive? Quick Reference
📋 Time Machine Drive Format Guide
Drive Type | Recommended Format | Scheme | Reason |
External SSD (USB-C / Thunderbolt) | APFS | GUID Partition Map | Optimized for flash; required for modern Time Machine; supports snapshots |
External SSD (USB-A / USB 3.0) | APFS | GUID Partition Map | Same benefits apply regardless of connection type |
Spinning HDD (any Connection) | HFS+ (Mac OS Extended, Journaled) | GUID Partition Map | APFS fragmentation degrades HDD performance over time |
NAS / Network Drive | SMB3 (managed by NAS) | N/A (NAS handles formatting) | Time Machine supports SMB-based NAS shares natively |
ExFAT / NTFS Formatted | ❌ Neither works | — | Time Machine cannot reliably back up to either format |
FAQs

The first backup copies your entire Mac from scratch: every file, every folder, everything. There’s no incremental baseline yet, so Time Machine has nothing to compare against or skip. Every subsequent backup is incremental: only files that have changed since the previous backup get copied, which is dramatically faster. Even with all the fixes in this guide applied, your first backup will always be longer than the ones that follow. The fixes help make it as fast as your hardware allows; they don’t change the fundamental nature of what that first backup has to do.
No. The Terminal command sudo sysctl debug.lowpri_throttle_enabled=0 is a temporary kernel-level setting that resets automatically when you restart your Mac. The only practical effect of leaving it disabled during a backup session is that Time Machine runs faster and uses more disk I/O, which is exactly what you want during a dedicated backup. Re-enable it when the backup finishes, or restart; it resets on its own.
APFS for any SSD; it’s the format macOS now requires for Time Machine on modern Macs, and it’s specifically designed for the way SSDs store and retrieve data. HFS+ (Mac OS Extended, Journaled) for any spinning hard drive. APFS’s metadata structure can fragment on mechanical drives over time, leading to gradual performance degradation that’s difficult to diagnose. When in doubt: SSD → APFS, HDD → HFS+.
Apple recommends at least twice your Mac’s internal storage to give Time Machine enough room for meaningful backup history. For a 512GB MacBook Air M4, use at least a 1TB drive. For a 1TB model, use 2TB. Going 3× capacity gives you a deeper history and more recovery options. Time Machine keeps multiple versions of changed files over time; the more space you give it, the further back you can recover.
Yes, it’s the single highest-impact hardware change you can make, and the difference is not subtle. A spinning drive’s 80–150 MB/s ceiling versus a USB-C SSD’s 800–1,000 MB/s ceiling translates directly into backup time. A backup that takes 3 hours on a spinning drive typically completes in 20–25 minutes on an equivalent USB-C SSD, with all other variables held constant. After the first full backup on an SSD, subsequent Time Machine backups on M-chip Macs take less than a minute.
You can, but a hub introduces a potential bottleneck. Passive or unpowered hubs share bandwidth across all connected devices. For Time Machine, connect your backup drive directly to one of the MacBook Air M4’s Thunderbolt 4 ports whenever possible. These ports deliver up to 40 Gbps and give your SSD room to run at full rated speed. If you need to use a hub, choose a powered Thunderbolt dock rated for at least 10 Gbps throughput, not a basic USB splitter.
Conclusion
The MacBook Air M4 is fast enough to back up its entire drive in under 30 minutes, but only if the tools and hardware around it aren’t holding it back. Start with Fix 1: the Terminal command to disable Time Machine’s throttle. It takes 30 seconds, carries zero risk, and addresses the most common cause immediately. Then check your cable (Fix 6); it’s the most overlooked cause and takes 60 seconds to rule out. Add folder exclusions (Fix 4) and enable Spotlight privacy for your backup drive (Fix 5) to speed up future backups. If you’re running on a spinning hard drive, Fix 2 is the hardware upgrade that changes everything; the difference between an HDD and a USB-C SSD as a Time Machine destination is not a marginal improvement. It’s the difference between a 3-hour backup and a 20-minute one. For a broader look at how to get more performance out of your Mac hardware beyond backups, our MacBook speed-up guide and MacBook Pro M4 review cover more of the performance optimization landscape worth knowing about.
The honest bottom line: most MacBook Air M4 users experiencing slow Time Machine backups are hitting one of three things: the default throttle that macOS applies to all Time Machine processes, a spinning hard drive that physically cannot keep up with M4 data generation speeds, or a cable that’s negotiating USB 2.0 speeds with a USB 3.2-capable drive. Fix those three things, and your backups will run the way this hardware was actually built to run. If you also need help with other Mac maintenance tasks, like resetting your MacBook Air, factory resetting your MacBook or taking a screenshot on Mac, our Tech Guides section covers the full range of practical Mac how-tos in the same detailed, step-by-step format.
Every Mac guide, fix, and honest tech how-to worth bookmarking lives at YourTechCompass.com, where we explain technology the way it should always be explained: clearly, completely, and without assuming you already know the answer.