Accidentally deleting photos is one of those moments that feels immediately irreversible; you tap delete, the image disappears, and for a second, you’re convinced it’s gone forever. I’ve been there, and the good news is that “deleted” on Android doesn’t always mean “gone.” Understanding why gives you a realistic picture of your chances of recovery and helps you work through the right method in the right order before time runs out.
When you delete a photo on Android, the operating system removes the file reference; the entry in the file index that tells your phone where the photo lives in storage. The actual image data often remains in the underlying storage until something new is written to that same space. That window between deletion and overwriting is your recovery opportunity. The faster you act, the better your chances. Every photo you take, app you download, or video you play after deletion potentially overwrites the old data, permanently erasing it. That’s why the first rule of Android photo recovery is to stop using the phone as soon as you realize photos are missing and work through the recovery methods below in order.
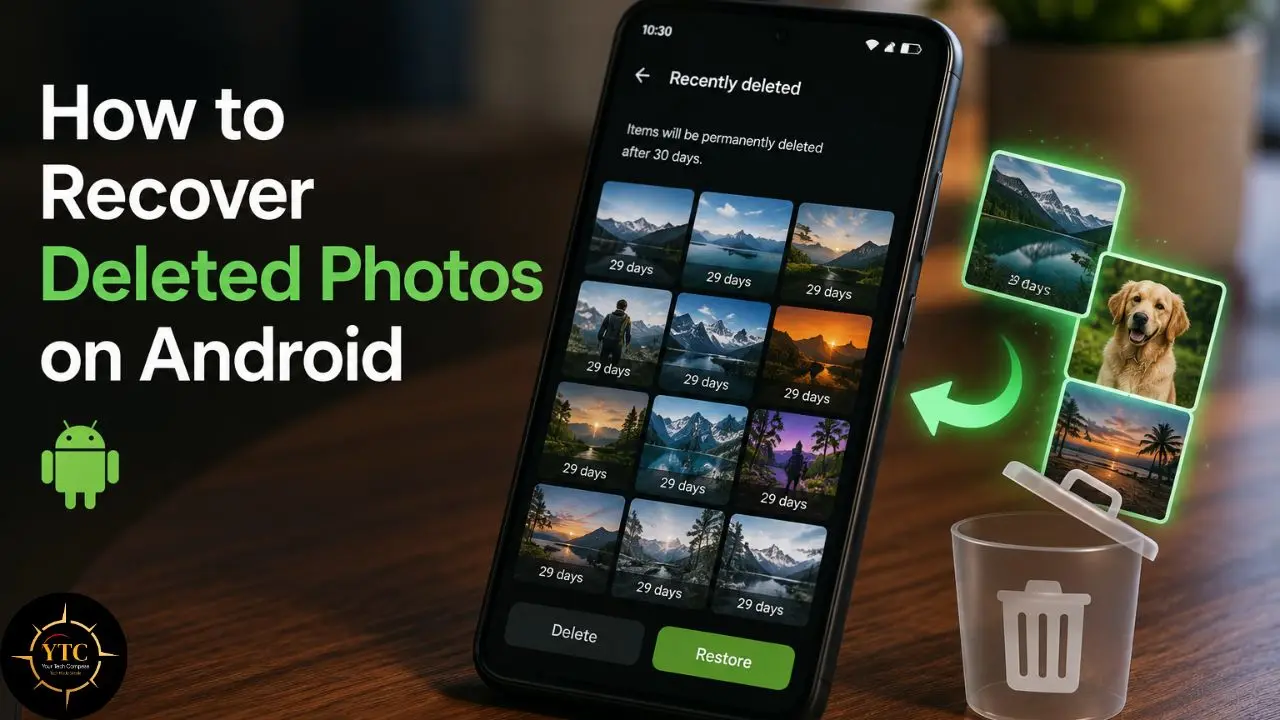
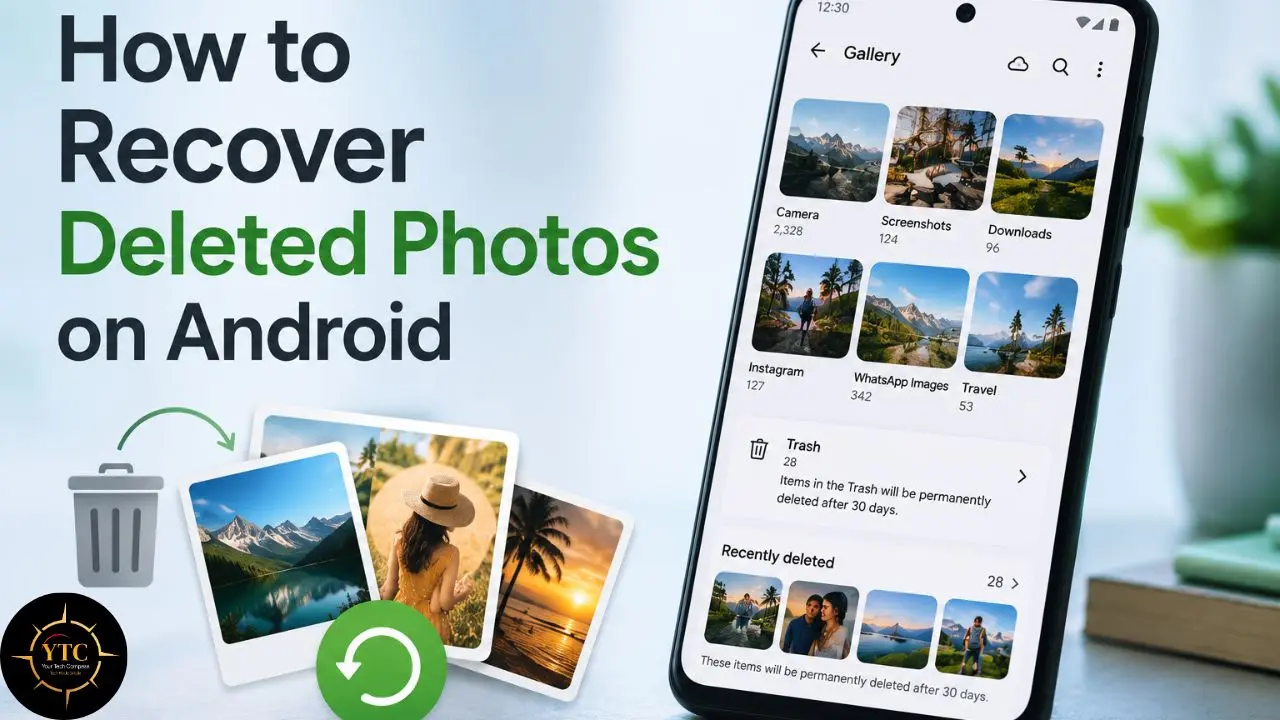
Step 1: Check the Trash or Recently Deleted Folder
This is the fastest and most reliable recovery method available, and the one most people skip because they don’t know it exists. Most Android gallery apps and photo management tools automatically move deleted photos to a temporary trash folder before permanently deleting them. On most devices, this trash folder retains deleted photos for 30 days before clearing them.
The location of the trash folder varies slightly depending on which gallery app your device uses, so here’s where to look on each major platform:
Google Photos
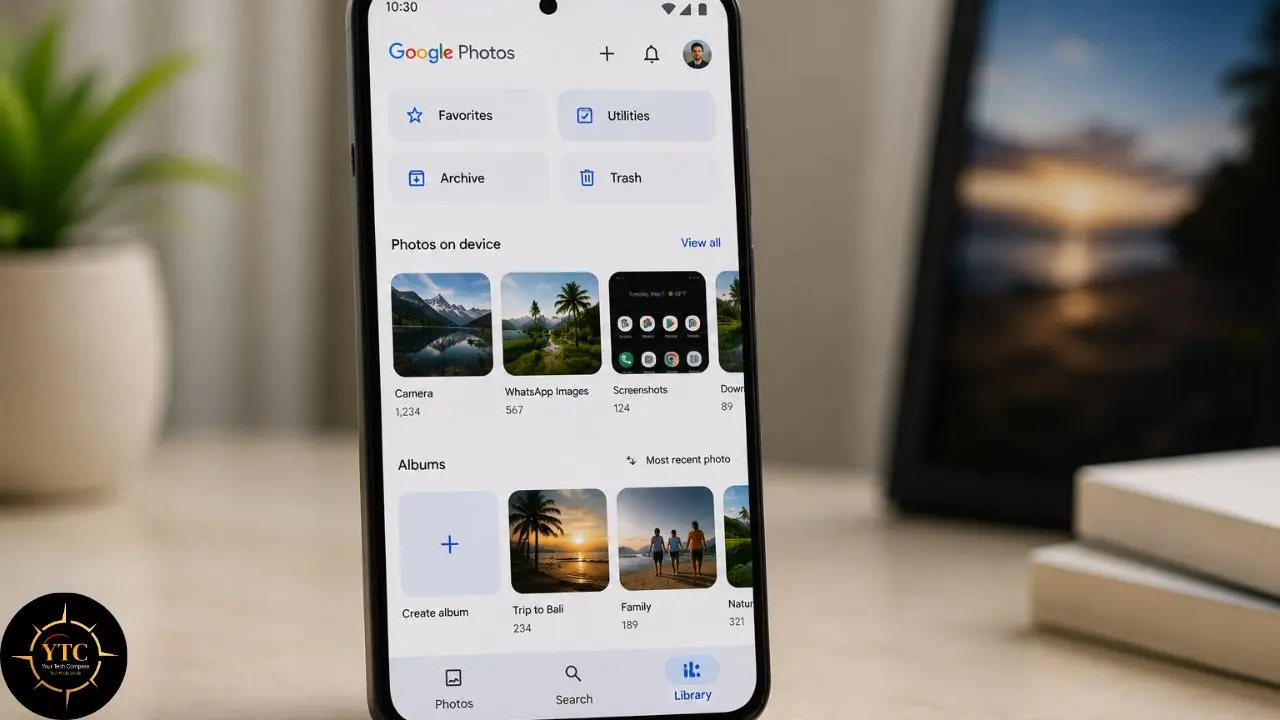
- Open the Google Photos app.
- Tap Library at the bottom of the screen.
- Tap Trash; you’ll see all recently deleted photos here.
- Tap and hold any photo you want to recover to select it, then select additional photos as needed.
- Tap Restore in the bottom-right corner. The photos return to your main library immediately.
Google Photos holds deleted items in trash for 60 days before permanently deleting them. If you use Google Photos as your primary photo app (which it is by default on most Android phones), this is your best first stop.
Samsung Gallery (Samsung Phones)
Samsung phones running One UI have their own gallery trash separate from Google Photos. Even if you don’t use Google Photos, your deleted Samsung Gallery photos go here first.
- Open the Gallery app on your Samsung phone.
- Tap the three-line menu (≡) in the bottom-right corner.
- Tap Trash.
- Select the photos you want to recover.
- Tap Restore.
Samsung Gallery holds deleted photos for 30 days. Importantly, this is a separate trash from Google Photos; photos deleted from Samsung Gallery don’t automatically appear in Google Photos Trash, and vice versa.
Other Android Gallery Apps (OnePlus, Xiaomi, Oppo, Motorola)
Most manufacturer gallery apps include a similar trash function. Open your default gallery app and look for a menu option labeled Trash, Bin, Recently Deleted, or Recycle Bin. The location varies: on some devices, it’s under a hamburger menu (≡); on others, it’s accessible from the main album list. If you can’t find it, try the search bar within the gallery app and type “trash.”
What to Do If the Photo Isn’t in Trash
If the photo has already been permanently deleted from the trash folder (either because the 30–60-day window has passed or because you manually emptied the trash), move to Step 2.
Step 2: Restore Photos From Google Photos Backup
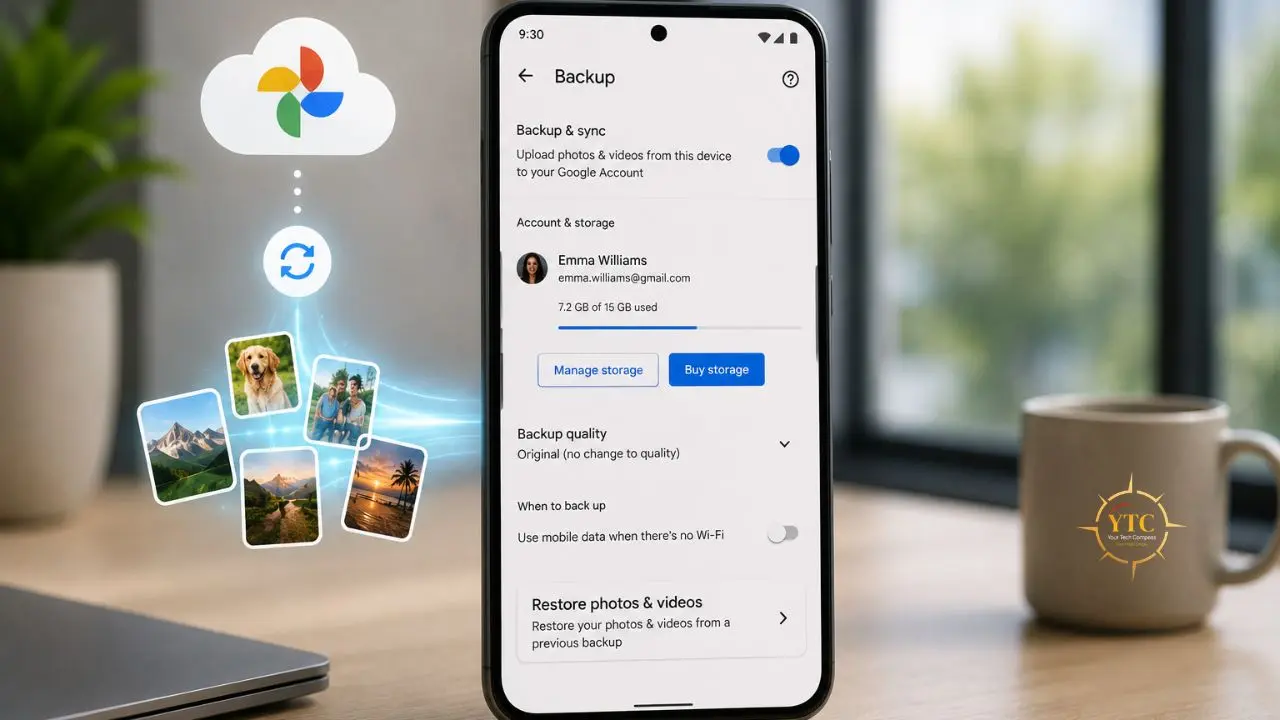
Google Photos is a cloud backup service that runs silently in the background on most Android phones, automatically uploading every photo you take to Google’s servers. If backup was enabled, even if you’ve since turned it off, there’s a meaningful chance your deleted photos exist in the cloud even after they’ve left your device entirely.
First, verify that backup was enabled: Open Google Photos → tap your profile picture (top right) → tap Photos settings → tap Backup. If it shows “Backup is on” or shows a date when backup was last active, Google Photos has been saving your images.
To Restore Photos from Google Photos Backup
- Open Google Photos.
- Tap Library → Trash (for recently deleted within 60 days).
- If the photo isn’t in the trash, use the search bar. Type a date, location, or subject to find specific images from your backup history.
- When you find the photo, tap it → tap the three-dot menu → tap Download to save it back to your device, or tap Restore if it appears in trash.
The Honest Caveat About Google Photos Backup
Google Photos compresses photos by default on the free tier (called “Storage saver” mode), meaning the backed-up version may be slightly lower resolution than the original. If you’ve specifically enabled “Original quality” backup in settings, your originals are preserved. Either way, even a slightly compressed backup is infinitely better than a permanently lost photo.
If your Google account is running out of storage, Google Photos may have paused backup. Check the backup status screen for any warnings about storage limits, and purchase additional Google One storage if needed to resume backup going forward.
Step 3: Check Other Cloud Services
If Google Photos wasn’t backing up your photos, other cloud services may have copies. Many Android phones automatically connect to manufacturer-specific cloud storage or sync to services you’ve connected to other apps.
Samsung Cloud (Samsung Phones)
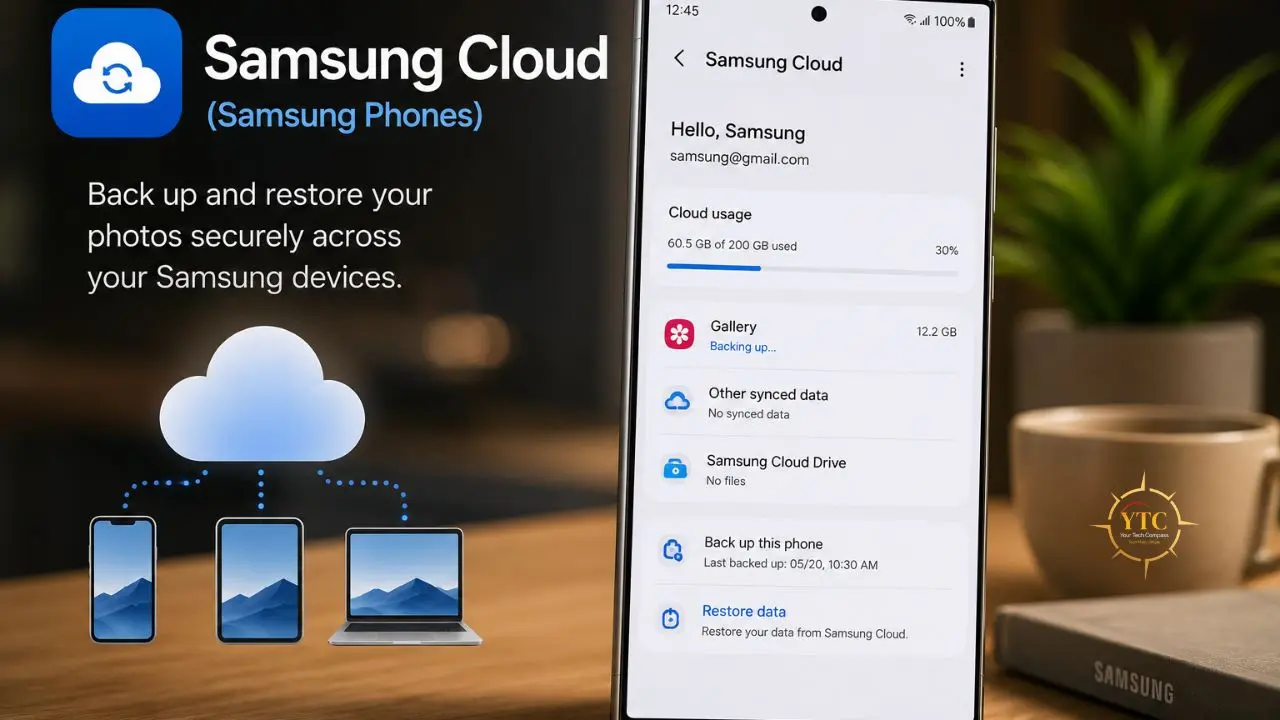
Samsung phones running One UI often sync to Samsung Cloud alongside (or instead of) Google Photos.
- Open Settings on your Samsung phone.
- Tap Samsung account → Samsung Cloud.
- Tap Gallery → look for deleted photos in the cloud sync history.
- Alternatively, open the Samsung Gallery app → tap ≡ → Trash → if photos have been deleted from the device but are still in Samsung Cloud, they may be recoverable here.
OneDrive (Microsoft/Windows Users)
If you’ve connected your Android to a Microsoft account and have OneDrive’s camera upload enabled:
- Open OneDrive
- Navigate to Photos → Camera Roll
- Search for the photos by date
Dropbox
- Open Dropbox.
- Go to Photos or Camera Uploads folder.
- Tap the three-dot menu → Deleted Files to see if they’re recoverable from Dropbox’s version history.
Amazon Photos
Amazon Prime members get unlimited full-resolution photo storage. If you’ve connected your device to Amazon Photos:
- Open Amazon Photos.
- Tap All Photos → check your timeline for the missing images.
The key insight here is that you may have automatic backups running in services you’ve forgotten about. Check every cloud service your phone is connected to before moving to more complex recovery methods.
Step 4: Use File Recovery Apps for On-Device Recovery
Before we get into it: this review is independent. No brand paid for coverage, and no score was negotiated. If you want to see exactly how we evaluate tools: what we test, how we score, and how we handle affiliate relationships, our Review Methodology has all of it.
If the trash folder is empty, cloud backup wasn’t running, and you need to attempt recovery directly from the phone’s internal storage, file recovery apps are the next option. This is where realistic expectations become important, and where most guides fail you by presenting these apps as more reliable than they actually are.
What’s Actually Possible Without Root Access
Android limits low-level storage access on non-rooted phones as a security measure. As a result, recovery apps on non-rooted devices can typically only access:
- Cached thumbnail versions of deleted photos (usually lower resolution than the original)
- Photos that haven’t yet been overwritten in storage
- Temporary files from the MediaStore database
The honest expectation for non-rooted recovery in 2026 is “some recent files, often at thumbnail resolution.” Every photo you’ve taken, app you’ve downloaded, or video you’ve played since deletion may overwrite the space where your deleted photo used to be. Act as quickly as possible and stop using the phone before attempting recovery.
Root access enables recovery apps to perform raw partition scanning, which yields better results. However, rooting a modern Android phone trips SafetyNet, breaks banking apps and Google Pay, voids the manufacturer’s warranty, and introduces security risks. For the vast majority of users, rooting specifically to recover photos is not the right trade-off.
DiskDigger: Best Free Option for Photo Recovery
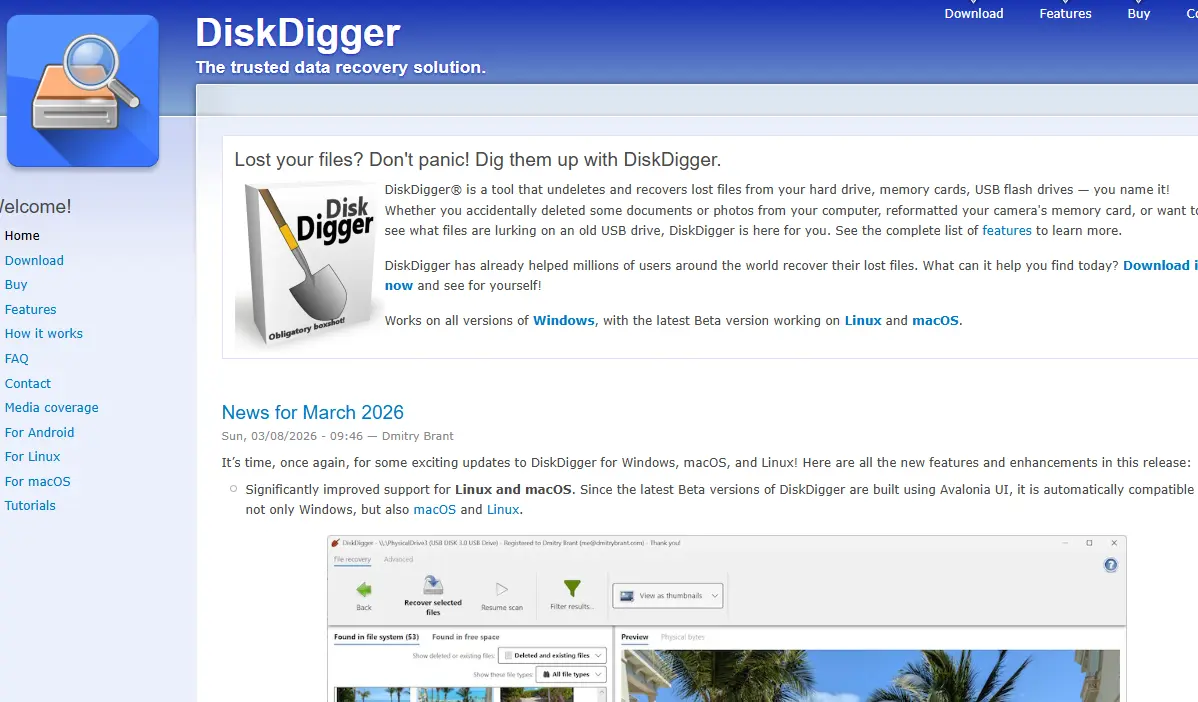
DiskDigger is the most widely used Android photo recovery app with over 517,000 reviews on the Google Play Store and a straightforward recovery workflow. It operates in two modes:
- Basic Scan (non-rooted): Scans accessible storage for recoverable JPEG and PNG photos. Results often include thumbnails, cached images, and lower-resolution versions. Free to use for photo recovery.
- Full Scan (rooted only): Performs a raw partition scan that can recover original full-resolution files from deleted space. Requires root access.
How to Use DiskDigger
- Install DiskDigger from the Google Play Store.
- Open the app and grant storage permissions when prompted.
- Select Basic Photo Scan (for non-rooted phones).
- DiskDigger scans your device’s storage. This takes 2–10 minutes, depending on storage size.
- Review the results; you’ll see thumbnails of potentially recoverable photos.
- Select the photos you want to recover.
- Tap the restore icon and choose where to save them: your device storage, Google Drive, or Dropbox.
Honest Limitations
On non-rooted phones, you may recover thumbnail-sized images rather than originals. The free version is limited to photos and videos; recovering documents or other file types requires the Pro version ($2.99). DiskDigger’s success rate varies significantly based on how much new data has been written since deletion and whether the device uses TRIM (which actively erases unused storage blocks on modern flash storage).
Dr.Fone: Best for Comprehensive Recovery
Dr.Fone takes a different approach: you connect your Android phone to a computer via USB and run recovery through the desktop application rather than a phone app. This approach gives the software more processing power and a different access pathway to your device’s storage.
How to Use Dr.Fone
- Download Dr.Fone for Windows or Mac and install it on your computer.
- Connect your Android phone via USB cable.
- Enable USB Debugging on your phone: Settings → About Phone → tap Build Number 7 times → go back to Settings → Developer Options → enable USB Debugging.
- Open Dr.Fone and select Data Recovery.
- Follow the on-screen instructions to scan your device.
- Preview and select the photos you want to recover.
- Click Recover to restore them to your computer.
Honest Limitations
Dr.Fone requires a paid subscription for full recovery. The free version shows what’s recoverable, but won’t actually restore files until you purchase.
Plans start at approximately $19.95/month or $69.99/year. It supports recovery of multiple file types beyond photos (contacts, messages, documents), which makes it more valuable if you’ve lost multiple types of data simultaneously.
EaseUS MobiSaver: Alternative Option
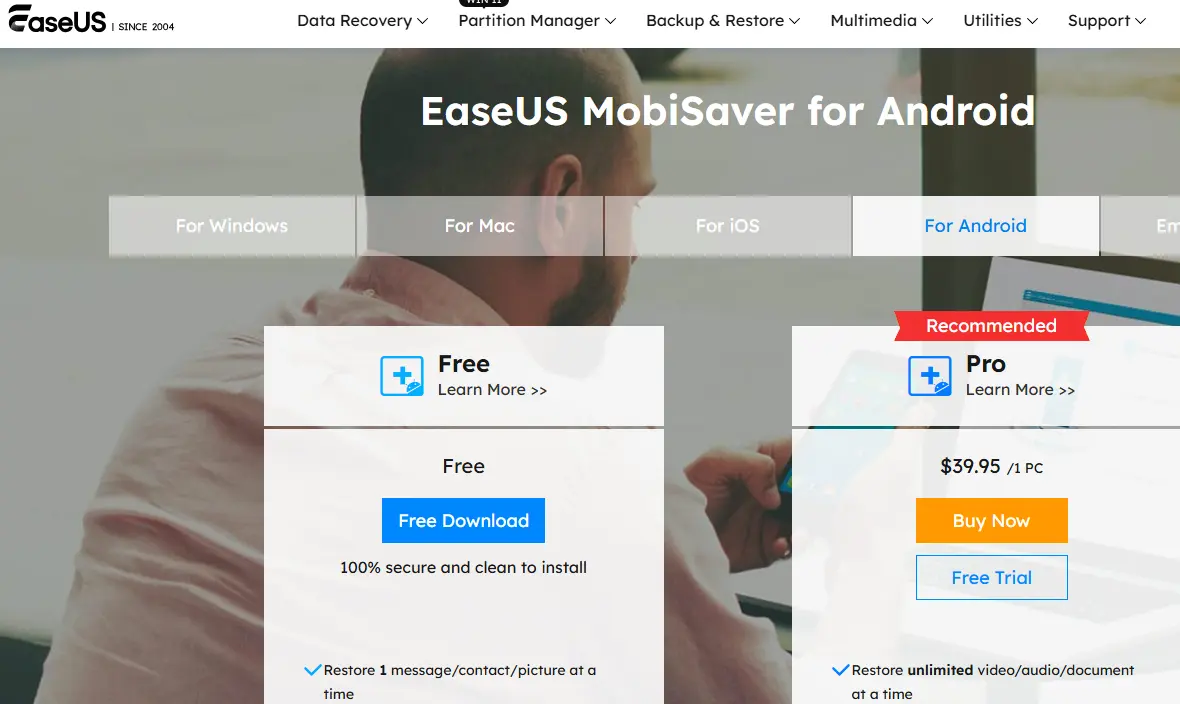
EaseUS MobiSaver is a comparable desktop-based recovery tool that works similarly to Dr.Fone, connecting your Android to a computer for scanning and recovery.
How to Use EaseUS MobiSaver
- Download and install EaseUS MobiSaver on your Windows or Mac computer.
- Connect your Android device via USB with USB Debugging enabled (follow the same steps as Dr.Fone above).
- Launch MobiSaver and click Scan to begin analyzing your device.
- Select the Photos category from the scan results.
- Preview recovered photos and select the ones you want to restore.
- Click Recover to save them to your computer.
Honest Limitations
Like Dr.Fone, EaseUS MobiSaver’s free version shows results but restricts actual recovery to a paid plan. Results on non-rooted devices are similar to other tools; thumbnails and recent files are more recoverable than older, overwritten originals.
Recovery App Comparison at a Glance
App | Platform | Root Required? | Free Recovery? | Best For | Verdict |
Android (on-device) | No (Basic) / Yes (Full) | ✅ Photos only (Basic) | Quick on-device photo check | ✅ Start here | |
Windows / Mac | No | ❌ Paid for recovery | Multiple file types, comprehensive | ✅ Best for serious loss | |
Windows / Mac | No | ❌ Paid for recovery | Alternative to Dr.Fone | ✅ Comparable option |
Step 5: Recover Photos From an SD Card
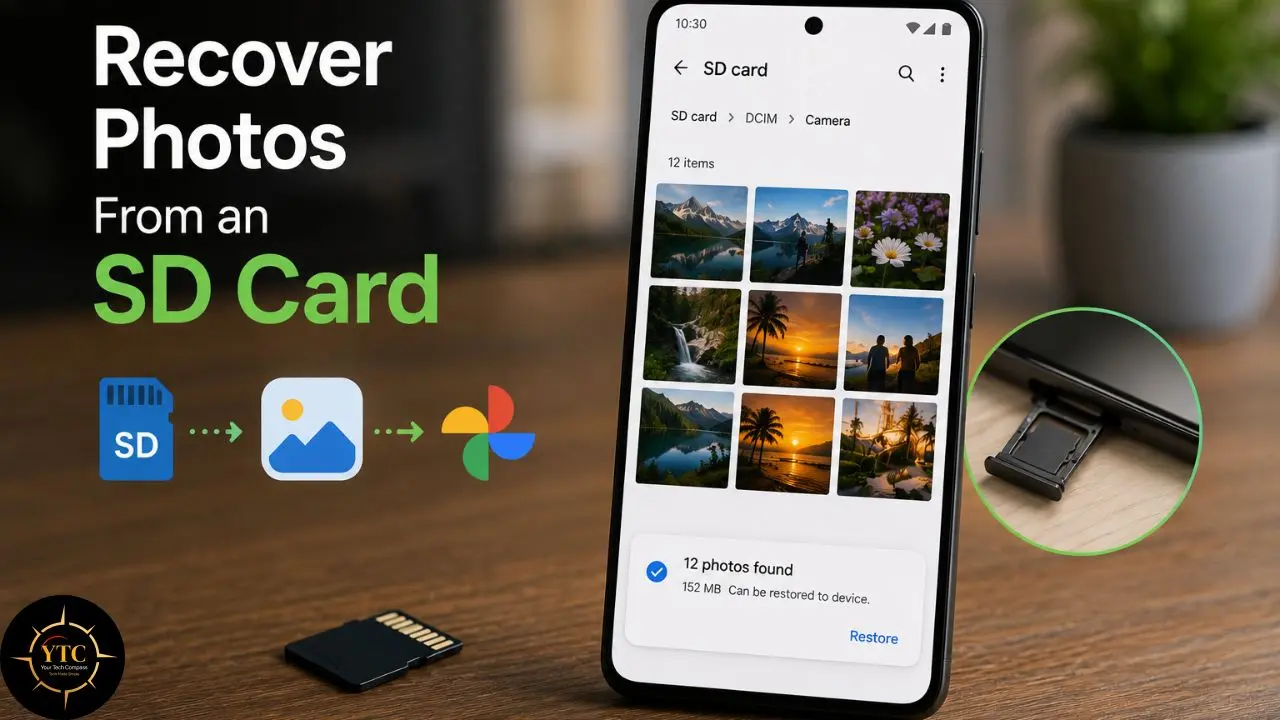
If your Android device uses a removable SD card and your deleted photos were stored on it (rather than internal storage), SD card recovery is significantly more achievable than internal storage recovery. SD cards use a simpler file system than modern Android internal storage, and they don’t implement the aggressive TRIM that makes recovery of internal storage so difficult.
The Critical Rule Before You Start
Remove the SD card from your phone immediately and stop any activity that might write new data to it. Every file written to the card after deletion reduces the chances of recovery. Do not take new photos, do not move files, do not format the card.
Equipment You’ll Need
- A microSD card reader that connects to your computer (USB-A or USB-C, depending on your laptop).
- A Windows or Mac computer.
- Recovery software (see below).
Step-by-Step SD Card Recovery
- Power off your Android phone before removing the SD card. Removing it while the phone is on can cause file system errors.
- Remove the SD card from the phone’s SIM/SD card tray.
- Insert the SD card into a card reader and connect it to your computer.
- Download and install recovery software. The three most reliable options for SD card recovery are:
- Recuva (Windows, free): The most widely recommended free SD card recovery tool. Simple interface, reliable JPEG recovery, and genuinely free for personal use. Download from piriform.com.
- Disk Drill (Windows and Mac): More polished interface than Recuva, with 500MB of free recovery before requiring a paid license. Particularly strong for Mac users, where Recuva isn’t available.
- PhotoRec (Windows, Mac, Linux, free): Open-source, command-line-based, and the most technically thorough option. More complex to use than Recuva, but it often recovers more files because it scans raw partition data regardless of file system structure.
- Launch your chosen recovery software and select the SD card as the target drive. Make sure you’re scanning the card, not your computer’s hard drive.
- Run a deep scan rather than a quick scan for best results. This takes longer (15–45 minutes for large cards) but finds significantly more recoverable files.
- Preview results and look for your deleted photos in the recovered file list.
- Restore selected photos to your computer’s local storage. Not back to the SD card, as saving to the same card risks overwriting other recoverable files.
Recovery Success Factors for SD Cards
Deletion time matters, but so does card usage since deletion. A card that’s been used heavily since the deletion has lower recovery odds than one that’s been idle.
Cards that have been formatted (especially with a “full format” rather than “quick format”) are harder to recover from, but not impossible. PhotoRec in particular can often find photos after a quick format.
Step 6: Contact Google Support or a Professional Data Recovery Service
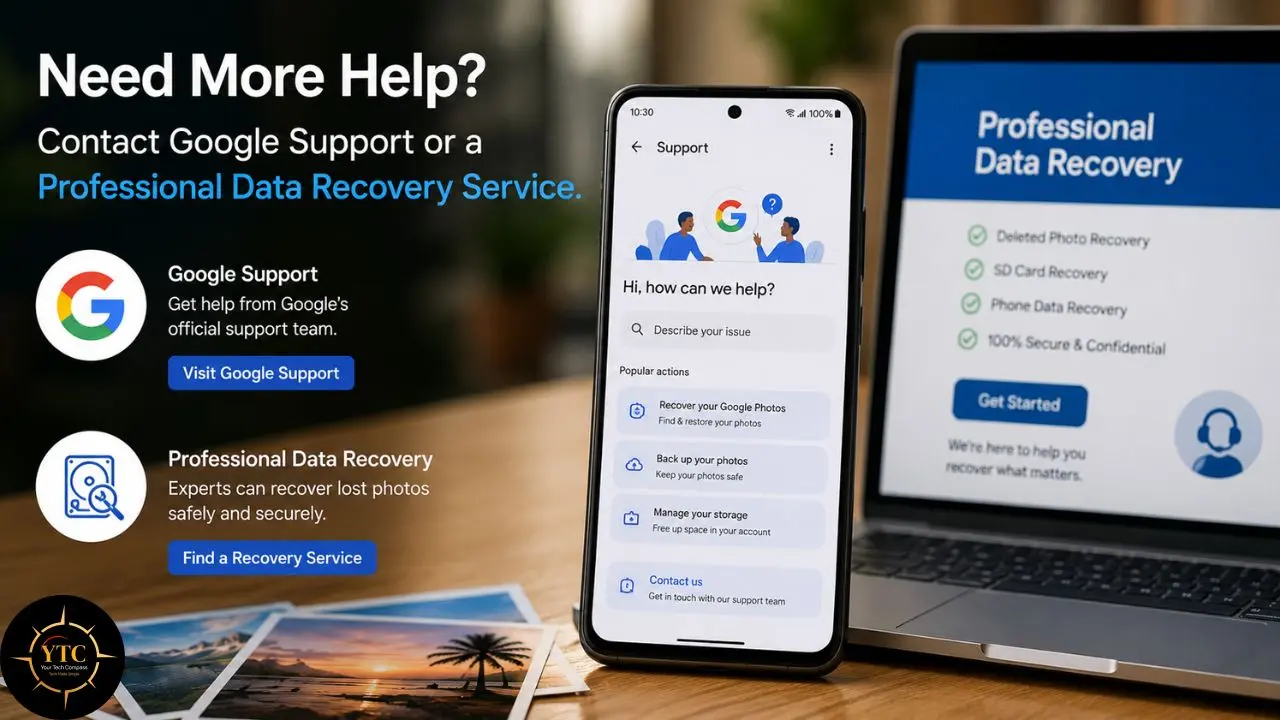
If all of the above methods have failed, the trash folder is empty, cloud backup wasn’t running, recovery apps found nothing useful, and SD card recovery was unsuccessful. You have two remaining options, depending on how critical the photos are.
Google Support
If your photos were recently in Google Photos before being permanently deleted, contact Google Support directly. In some cases, Google can assist with recovery beyond the standard 60-day trash window, particularly for account-level issues or accidental deletions at scale. Visit support.google.com/photos and use the “Contact us” option.
Professional Data Recovery Services
For irreplaceable photos (wedding photos, once-in-a-lifetime moments, critical work images), professional data recovery labs are worth considering. These services use specialized hardware to access NAND flash memory at a physical level, beyond what any software tool can reach. Services like DriveSavers, Ontrack, and Secure Data Recovery operate with cleanroom environments and can recover data from physically damaged devices.
The Honest Caveat
Professional data recovery is expensive, typically ranging from $300 to $1,500, depending on the complexity of the recovery and the device. It’s only worth pursuing for photos of genuine irreplaceable value. Contact the service before sending your device; they typically offer a free evaluation to determine whether recovery is feasible before you commit to the cost.
How to Prevent Future Photo Loss
Recovery is stressful and uncertain. Prevention is reliable and takes less than 20 minutes to set up properly. These are the specific settings worth configuring now.
Enable Google Photos Automatic Backup
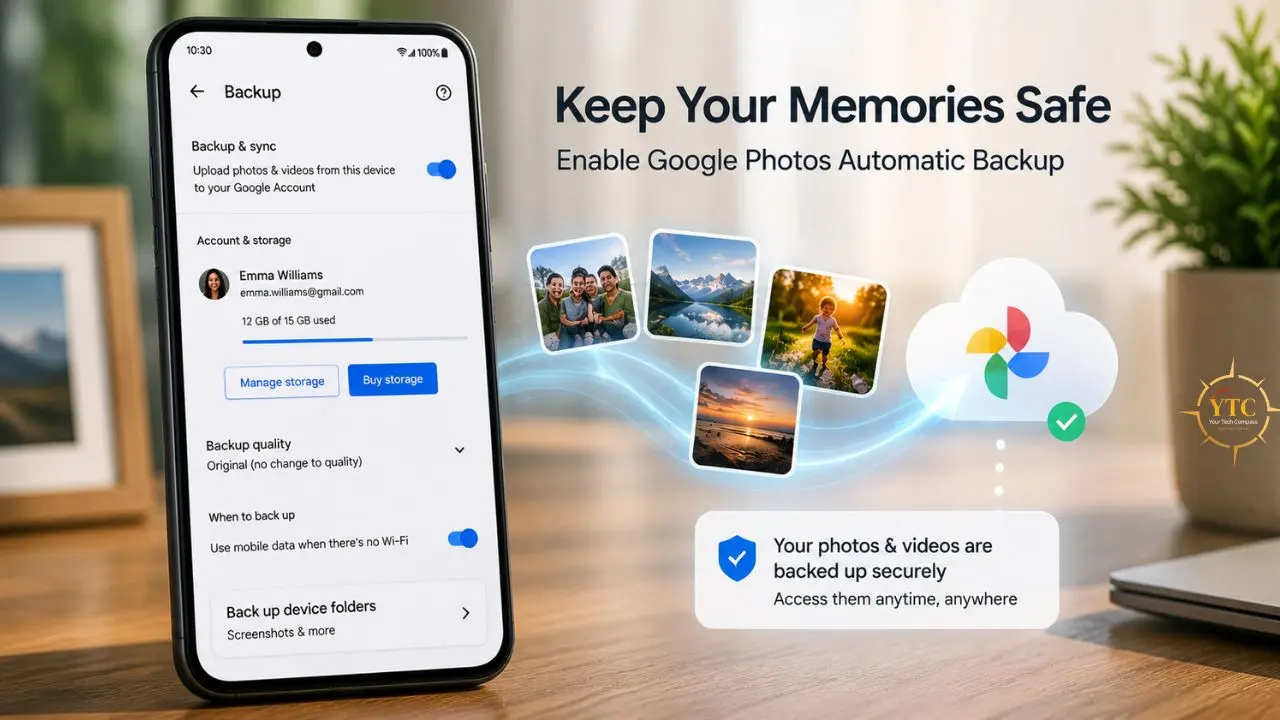
Open Google Photos → tap your profile picture → Photos settings → Backup → toggle Backup on. Under Backup quality, select either “Storage saver” (compressed, uses less Google storage) or “Original quality” (exact copy, counts toward Google storage limit).
Choose a backup network preference; “Wi-Fi only” prevents cellular data charges. Once enabled, every photo you take is automatically uploaded within minutes of being captured.
Check Your Google Storage
Google accounts come with 15GB of free storage shared across Gmail, Google Drive, and Google Photos. If that fills up, backup pauses automatically, and you won’t know unless you check.
Go to one.google.com/storage to see your current usage. If you’re running low, purchase additional Google One storage. 100GB costs $1.99/month, which is a reasonable insurance premium for your entire photo library.
Enable Samsung Cloud Gallery Sync (Samsung Phones)
To do this, go to Settings → Samsung account → Samsung Cloud → Gallery → enable sync. This creates a second cloud backup, separate from Google Photos, which provides useful redundancy for Samsung users.
Regular Cache Clearing Helps Prevent Storage Issues That Can Affect Gallery Performance
Here’s how to clear cache on Android to keep your device running smoothly and reduce the chance of gallery app crashes that can corrupt photo libraries. If you’re experiencing ongoing app issues beyond the gallery, our guide on fixing Android apps that keep crashing covers the next steps for persistent crashes.
Use Multiple Backup Destinations
The 3-2-1 backup rule applies to photos as much as to any other data: three copies of important photos, in two different formats, with one copy offsite. In practice, for most people, this means: Google Photos backup (cloud), a physical backup copy on a home computer or external hard drive for irreplaceable photos, and the original on your device. For truly critical images, a second cloud service (OneDrive, Amazon Photos or iCloud via Family Sharing) adds an extra layer of protection.
FAQs

It depends on which layer of recovery you’re using. Google Photos trash holds deleted photos for 60 days. Samsung Gallery trash holds them for 30 days. Most manufacturer gallery trash folders hold them for 30 days. Beyond that, recovery depends on whether the actual data has been overwritten in storage, which can happen within hours on a heavily used phone. Act within the trash window for reliable recovery; beyond that, success is uncertain.
Yes. The trash folder in your gallery app and Google Photos trash are both accessible entirely from your phone. DiskDigger also works as a phone-only app for on-device scanning. You only need a computer for SD card recovery (Recuva, Disk Drill, PhotoRec) or desktop-based recovery apps (Dr.Fone, EaseUS MobiSaver).
A factory reset makes recovery significantly harder, but not necessarily impossible; it depends on how the reset was performed and what happened afterward. A standard factory reset removes file references and may not immediately overwrite all data. However, most modern Android phones now encrypt storage by default, and a factory reset destroys the encryption key, effectively making any remaining data permanently unreadable even with specialized recovery hardware. For any phone manufactured after 2018, treat a factory reset as permanent erasure and back up before resetting.
This is the most common frustration with Android photo recovery apps on non-rooted phones. Android restricts low-level storage access for security reasons, which means recovery apps can only access the MediaStore database rather than the raw partition. The MediaStore stores thumbnail versions of photos for display purposes, and those thumbnails are often what recovery apps surface on non-rooted devices. The full-resolution originals may still exist in storage but are inaccessible without root access. If thumbnail resolution is insufficient, professional data recovery services are the next step.
Possibly. WhatsApp automatically saves received media to a dedicated folder (usually internal storage/WhatsApp/Media/) and also backs up media as part of its daily backup to Google Drive. Check Settings → Chats → Chat Backup in WhatsApp to see your last backup date, and restore from backup if the photo was received before the backup. Instagram doesn’t automatically save photos from messages to your gallery. Once deleted from the app, recovery depends on whether a local copy exists in your device’s storage or a cache file is accessible to a recovery app.
Recovery apps require broad storage access permissions to scan your device, which means they can, in theory, read all files on your phone. Download only from the Google Play Store, check the developer’s reputation and review count before installing, and uninstall the app after recovery is complete. DiskDigger performs read-only operations during scanning; it doesn’t write to or modify your storage while looking for deleted files, which minimizes risk. Avoid obscure apps from developers with no public track record.
Conclusion
Recovering deleted photos on Android is genuinely possible in many cases, but the window closes faster than most people realize. The trash folder in your gallery app and Google Photos are your best first steps: fast, reliable, and available to anyone without any additional tools. Cloud backup recovery works whenever the backup is running. Recovery apps are the fallback for situations where neither trash folders nor cloud backup can help, with honest expectations about what’s achievable on non-rooted phones. SD card recovery is the most reliable software-based option because SD cards are more accessible to scanning tools than encrypted internal storage.
The most important takeaway from all of this is the value of setting up a backup before you need recovery. Google Photos automatic backup running in the background costs nothing (within the 15GB free tier), requires no action from you, and completely eliminates the anxiety of this situation for future photos. Spend ten minutes enabling it now, and you’ll never have to work through this guide again.
Every tech guide, how-to, and practical fix worth bookmarking lives at YourTechCompass.com, where we explain technology clearly, completely, and without assuming you already know the answer.