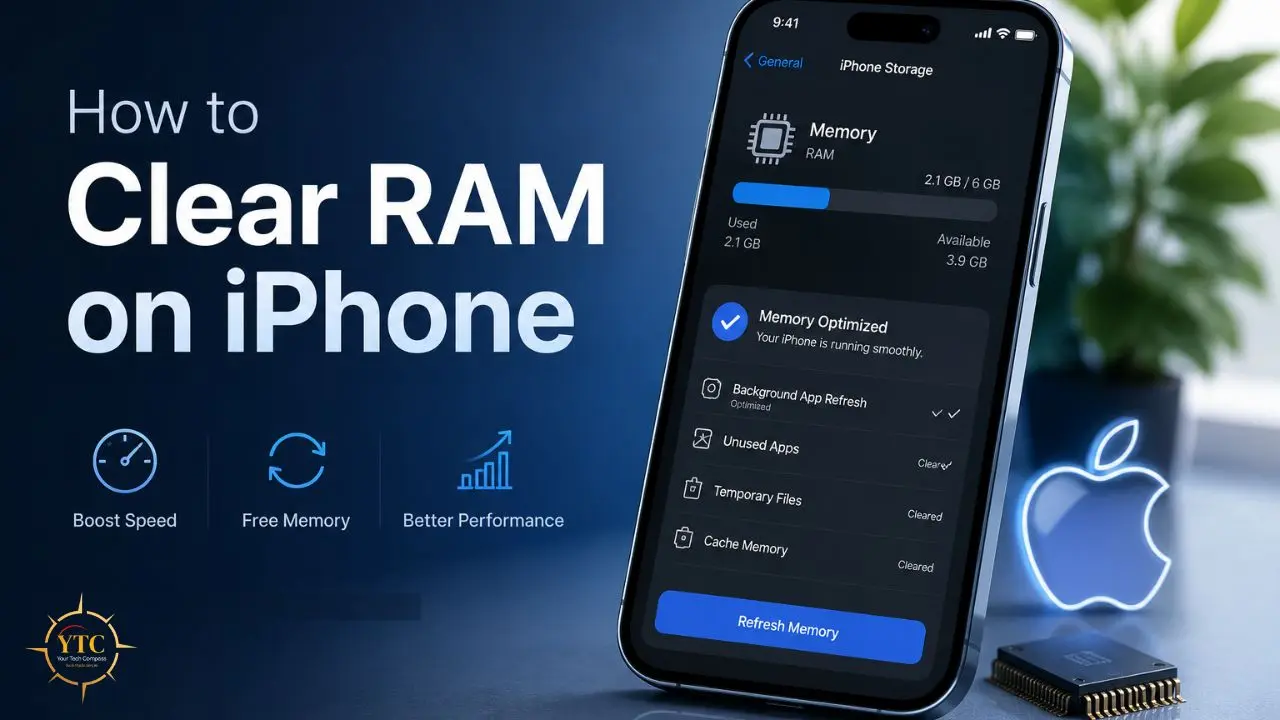
Your iPhone starts the morning fast. By the afternoon, apps take longer to open, the keyboard has input lag, and switching between apps feels sluggish. Nothing about your phone has changed. You haven’t installed anything new, you haven’t dropped it, and the battery is fine. What’s happening is memory pressure: your iPhone’s RAM is full, and iOS is working harder than it should to keep everything running. The fix is faster than you’d expect, and it doesn’t require any app downloads or technical knowledge.
This guide explains what RAM actually is on an iPhone, why iOS manages it differently from every other platform, the exact steps to clear it on every iPhone model from Face ID to physical Home button, and the performance tweaks that keep your phone running well long after the initial speed boost. I’ll also correct the most persistent myth about iPhone RAM, one that most guides, including many popular ones, still get wrong.
What RAM Actually Does on Your iPhone
RAM (Random Access Memory) is your iPhone’s short-term working memory. It’s where the operating system keeps everything that’s currently active: the app you’re using, the apps you’ve recently used and might switch back to, background processes, system services, and anything iOS is doing quietly in the background. RAM is distinct from storage: storage is where your photos, apps, and files live permanently; RAM is where things live temporarily while they’re being used.
When your iPhone has plenty of free RAM, everything it needs to do is immediately accessible in memory. Apps open instantly because their data is already loaded. Switching between apps is seamless because iOS hasn’t had to remove anything to make room for the new thing. When RAM fills up, iOS starts deciding what to keep and what to remove, and those decisions create the symptoms you notice as performance degradation.
How Much RAM Does Your iPhone Have?
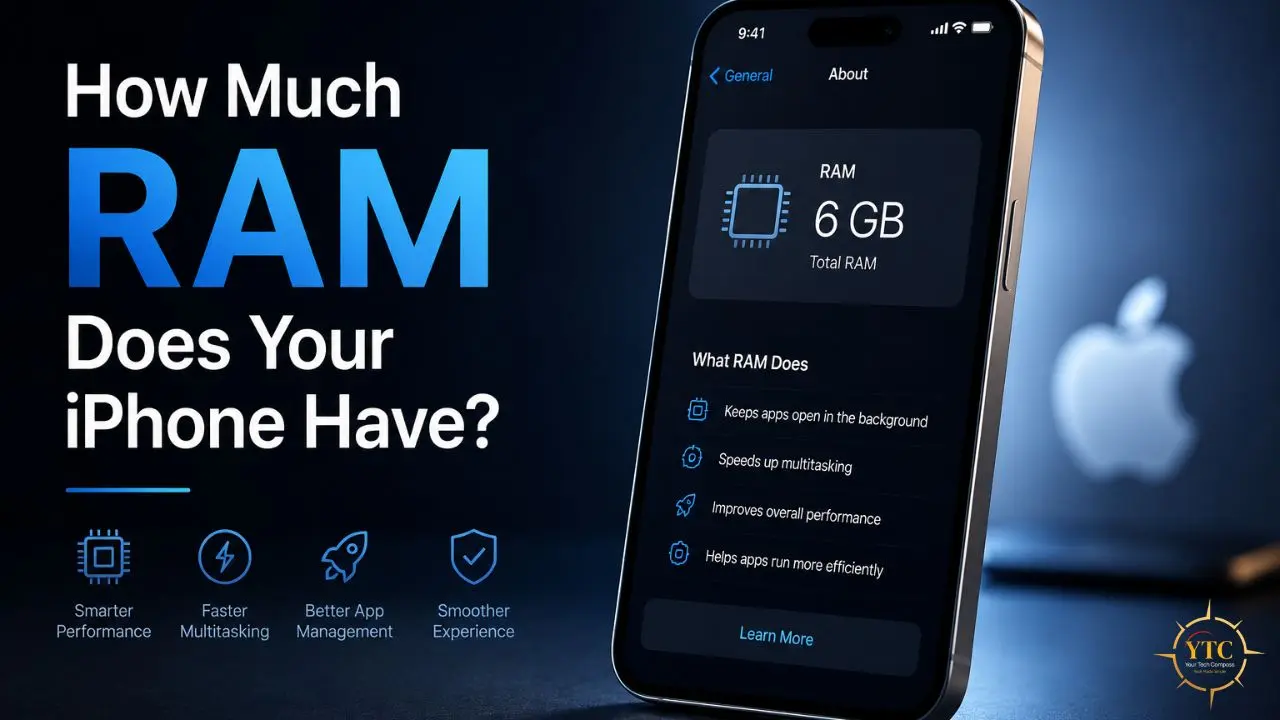
Apple doesn’t officially publish iPhone RAM specifications, but teardowns and developer tools have confirmed the figures across all current models. Here’s the breakdown:
- iPhone 16, 16 Plus, 16 Pro, 16 Pro Max: 8GB LPDDR5X RAM (all models)
- iPhone 15 Pro, 15 Pro Max: 8GB RAM
- iPhone 15, 15 Plus: 6GB RAM
- iPhone 14, 14 Plus, 14 Pro, 14 Pro Max: 6GB RAM
- iPhone 13, 13 mini: 4GB RAM
- iPhone 13 Pro, 13 Pro Max: 6GB RAM
- iPhone 12 (all models): 4–6GB RAM, depending on model
- iPhone SE (3rd generation): 4GB RAM
The 8GB threshold matters because Apple Intelligence, Apple’s on-device AI features in iOS 18 and later (iOS 26), requires at least 8GB of RAM to function. This is why the iPhone 15 Pro makes the cut for Apple Intelligence, while the base iPhone 15, with its 6GB of RAM, does not. If you’re on an older or lower-RAM model and experiencing performance issues, RAM management becomes more important because the margin between smooth operation and memory pressure is smaller.
Why iOS Manages RAM Differently Than Android
If you’ve used both iOS and Android, you may have noticed that iOS doesn’t show you running apps in a list you can manage, doesn’t provide a RAM usage meter by default, and generally makes memory management invisible. That’s by design, not omission.
According to Apple’s official iOS performance documentation, iOS dynamically manages RAM to avoid unnecessary manual intervention. When you “switch” to another app, iOS doesn’t keep the old app fully running; it suspends it and takes a snapshot of its state.
In addition, when you return to that app, iOS resumes it from that snapshot. This uses a fraction of the RAM that actually running the app would require, while still delivering the appearance of instant switching. When memory pressure builds, iOS terminates the least-recently used suspended apps first, freeing their RAM for current use.
This system means that the most important thing to understand about iPhone RAM is this: manually clearing RAM is not a daily maintenance task. iOS handles routine memory management better than any manual process you can apply. You clear RAM when something has gone wrong (when performance has degraded beyond what iOS’s automatic management can resolve), not as a preventive habit or a scheduled routine.
The Biggest iPhone RAM Myth and Why It Persists

Before the methods, let me address the most persistent and damaging piece of iPhone advice on the internet: force-closing apps from the App Switcher does not free RAM and actually worsens performance.
When you double-press the Home button (or swipe up from the bottom on Face ID models) to see your open apps and then swipe them away, you’re not freeing RAM. iOS had already suspended those apps and was managing their memory efficiently. What you’re actually doing is terminating the app entirely, which means the next time you open it, iOS has to reload it from storage from scratch, which takes more time, more CPU, and more battery than resuming from the suspended state.
Apple’s own senior engineers have said this publicly on multiple occasions. Former Apple employee Chris Espinosa stated it plainly: “iOS’s memory management makes force-quitting apps counterproductive.”
The practice persists because it feels like doing something (you’re visibly removing things), but the performance effect is the opposite of what people believe. The App Switcher shows your recently used apps, not your actively running apps. Most of them are already suspended.
The legitimate RAM-clearing methods are as follows. None of them involves swiping apps closed.
How to Clear RAM on iPhone: All Models
There is no “Clear RAM” button in iOS settings. Instead, hardware gestures trigger memory flushes as a side effect of other system actions. Here’s the correct method for each iPhone type.
Method 1: Clear RAM on Face ID iPhones (iPhone X and Later, No Home Button)
This applies to iPhone X, XR, XS, XS Max, 11, 11 Pro, 12 series, 13 series, 14 series, 15 series and 16 series.
These phones don’t have a physical Home button, so you need to enable a virtual one through Accessibility before using this method. This is a one-time setup.
Step 1: Enable AssistiveTouch
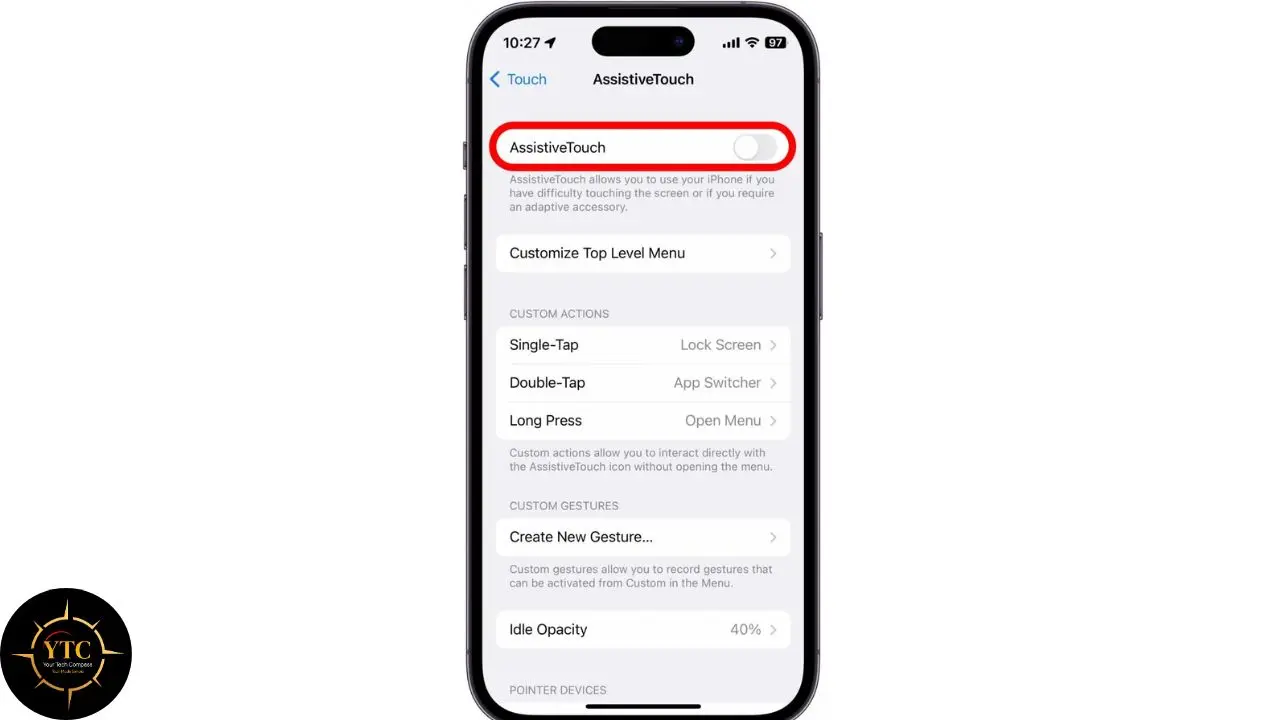
Go to Settings → Accessibility → Touch → AssistiveTouch and toggle AssistiveTouch on. A small floating gray circle will appear on your screen. This is your virtual Home button. You can drag it to any edge of the screen to keep it out of your way.
Step 2: Access the Shut Down Screen
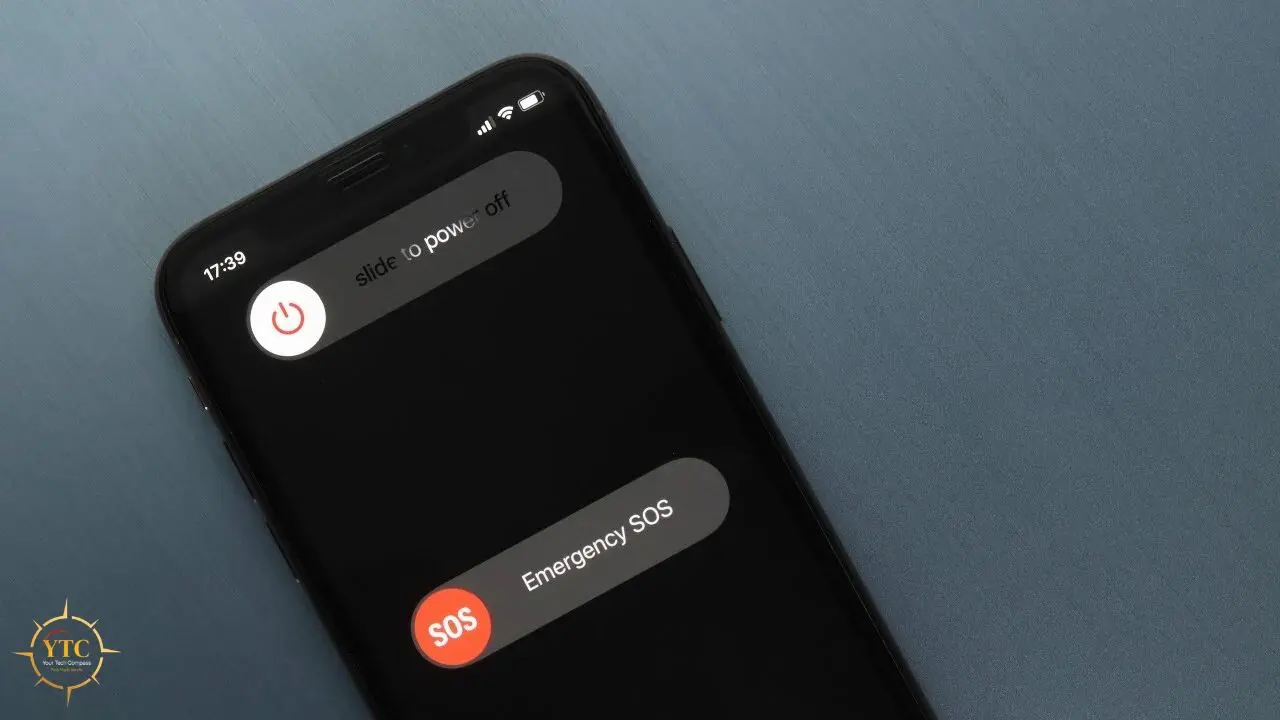
Go back to Settings → General and scroll to the very bottom. Tap Shut Down.
The power-off slider will appear. This is the screen you need. Do not slide it. Just leave this screen visible.
Step 3: Use the Virtual Home Button
While the Shut Down screen is visible, tap the AssistiveTouch floating button on your screen and hold the virtual Home icon. Hold it for approximately 2–3 seconds until the screen returns to your Lock Screen. This completes the RAM flush.
What Just Happened
Pressing and holding Home while the Shut Down screen is displayed sends a specific signal to iOS that flushes active memory. Your apps will need to reload when you next open them, and your iPhone should feel more responsive.
After the RAM Flush
If you don’t use AssistiveTouch regularly, you can disable it by going back to Settings → Accessibility → Touch → AssistiveTouch and toggling it off. The setting doesn’t need to stay on between uses.
Method 2: Clear RAM on Touch ID iPhones (Models With a Physical Home Button)
This applies to iPhone 6s, 7, 8 and SE (2nd and 3rd generation).
This method is simpler than Method 1 because you have a physical Home button and don’t need AssistiveTouch.
Step 1: Go to the Shut Down Screen
Open Settings → General and scroll to the bottom. Tap Shut Down. The power-off slider appears on screen.
Step 2: Press and Hold the Physical Home Button
While the Shut Down screen is visible, press and hold your physical Home button for approximately 2–3 seconds. Continue holding until the Shut Down screen disappears and you’re returned to your Lock Screen.
That’s the entire process. No apps to download, no third-party tools required. The RAM flush is complete. You’ll know it worked because the Lock Screen appears rather than the Shut Down screen.
Method 3: Force Restart (Best for Unresponsive or Severely Frozen iPhones)
If your iPhone is frozen, crashing repeatedly, or not responding to normal input, a force restart is the appropriate method. Unlike a regular restart (which you initiate through the power menu), a force restart terminates all processes immediately without waiting for anything to close gracefully. It’s the equivalent of cutting power and restarting, more thorough than Methods 1 and 2, and the right tool when the phone itself isn’t responding.
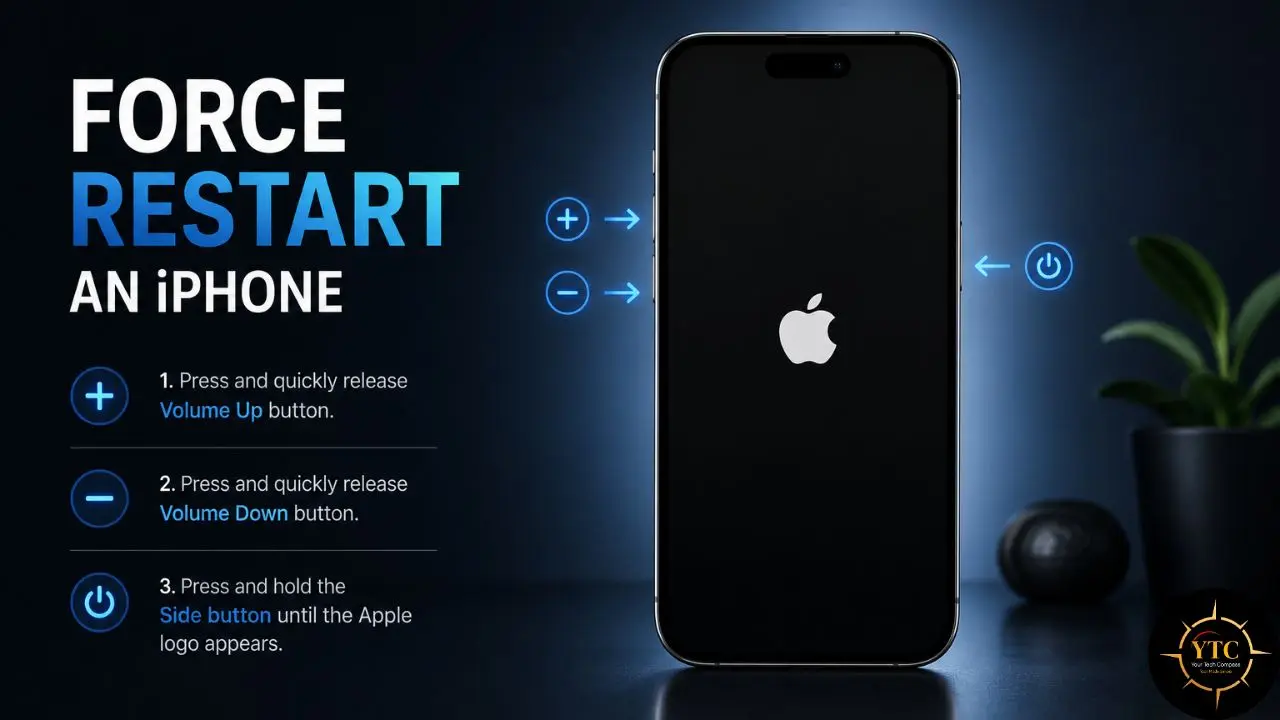
iPhone 8, X, and Later (Face ID + Touch ID 2nd Gen)
- Quickly press and release the Volume Up button
- Quickly press and release the Volume Down button
- Press and hold the Side button (right side of phone)
- Keep holding even when the power slider appears
- Release when the Apple logo appears on a black screen
iPhone 7 and iPhone 7 Plus
- Press and hold Volume Down and the Side button simultaneously
- Keep holding until the Apple logo appears
iPhone 6s, 6s Plus, and iPhone SE (1st Generation)
- Press and hold the Home button and the Top or Side button simultaneously
- Keep holding until the Apple logo appears
A force restart takes approximately 15–30 seconds. After the Apple logo appears, release the buttons and wait for iOS to fully reload. When your iPhone starts up again, it will have a completely clean RAM state, every process terminated and restarted fresh.
When to Use a Force Restart Versus Methods 1 and 2
Methods 1 and 2 are for proactive performance improvement when your phone is slow but functional. A force restart is for when your phone is frozen, apps won’t close, or normal taps are unresponsive.
Force restart is the more disruptive option. Use it when the situation calls for it, not as a regular practice.
Comparison: Which RAM-Clearing Method to Use

🧠 iPhone RAM-Clearing Methods at a Glance
Method | Works On | Time Required | Disruption Level | Best For | Verdict |
AssistiveTouch + Shut Down Screen | iPhone X and later (Face ID) | ~1 minute (first use: 2 min setup) | Low (no full restart) | General slowdown, lag, or sluggish multitasking | ✅ Start here on modern iPhones |
Home Button Hold + Shut Down Screen | iPhone 6s, 7, 8, SE (2nd/3rd gen) | ~30 seconds | Low (no full restart) | Same as above, simpler process | ✅ Start here on older iPhones |
Force Restart | All iPhone models | ~15–30 seconds | High (terminates all active tasks) | Frozen phone, repeated crashes, unresponsive screen | ✅ Use when the phone won’t cooperate |
Regular Restart | All iPhone models | ~30 seconds | Medium | Weekly maintenance, clearing memory leaks | ✅ Best weekly habit |
When You Should Not Clear RAM
Clearing RAM isn’t harmful, but it interrupts active processes, and in some situations, that interruption can be genuinely problematic. Avoid clearing RAM when:
- You’re Actively Using GPS Navigation: Clearing RAM will interrupt the navigation session, close the Maps or navigation app, and require you to re-enter your destination. If you’re driving, this is a safety issue, not just an inconvenience.
- Audio Is Playing in the Background: Music, podcasts (such as the Apple Podcast app), audiobooks, or streaming playback will stop when RAM is cleared. The app will need to restart and buffer before playback resumes.
- An Active Download or iOS Update Is in Progress: A large app download, podcast sync, or iOS software update running in the background will be interrupted. In most cases, these resumes were left off, but it’s cleaner to let them complete them first.
- An Alarm or Timer Is Set for the Near Future: System alarms typically survive a RAM flush, but timers inside apps (not the built-in Clock app) may not. Use the built-in Clock app for any timer you’re relying on.
- You’re On An Active Call or Voice Memo Recording: The call or recording will drop immediately.
The underlying principle is: check whether anything time-sensitive is running before you clear RAM. If nothing is, the process is completely safe.
Other Ways to Improve iPhone Performance Long-Term
Clearing RAM solves the immediate symptom. These settings and habits address the underlying causes, so you’ll need to clear RAM less frequently once they’re in place.
Restart Your iPhone Weekly
A full weekly restart is the single most effective maintenance habit for iPhone performance. It terminates processes that should have closed but didn’t, clears memory leaks that accumulate over days of continuous use, and gives iOS a clean state to start from. Hold the Side button and either volume button, drag the power slider, and restart once a week. It takes 30 seconds.
Reduce Background App Refresh
Background App Refresh allows apps to update their content while you’re not using them, continuously consuming RAM and battery throughout the day. Most of this updating happens for apps you rarely open, producing no visible benefit.
Go to Settings → General → Background App Refresh. Set it to Wi-Fi only (removes cellular background updates) or turn it off entirely. Then scroll through the individual app list and disable it for any app that doesn’t genuinely need real-time updates. Social media, news apps, and shopping apps are the most common consumers of RAM through background refresh.
Update iOS Regularly
iOS updates regularly include memory management improvements, bug fixes for excessive background CPU usage, and hardware-specific optimizations. Running an outdated iOS version means running on firmware that may contain documented bugs affecting RAM efficiency. Go to Settings → General → Software Update and install any available updates.
Clear Safari Cache and Website Data
Safari stores significant amounts of cached data from websites you’ve visited; images, scripts, and page elements that accumulate over time and contribute to memory pressure when Safari is active. Clearing this periodically frees both storage and working memory. Here’s how to clear cookies on iPhone as part of your regular iPhone maintenance routine.
Manage Active Notifications
Frequent notification deliveries, especially from apps that push notifications every few minutes, keep processor activity elevated throughout the day. Go to Settings → Notifications and disable or set to “Deliver Quietly” any app that sends notifications you don’t need immediately. This reduces background processing load and contributes to both performance and battery life.
Check If Overheating Is the Real Issue
If your iPhone is slow and also running warm, the performance issue may be thermal throttling, iOS deliberately slowing the processor to prevent heat damage, rather than pure RAM pressure. In that case, clearing RAM addresses a symptom but not the cause. If your phone is genuinely hot to the touch, read through the iPhone overheating guide for the full thermal troubleshooting process. What SOS mode on iPhone means and how it relates to performance issues is covered in our guide on what SOS means on iPhone.
FAQs

No, not at all. RAM contains only temporary data that’s actively in use right now. Your photos, messages, contacts, and files are stored in your iPhone’s permanent storage, which clearing RAM doesn’t touch. The only thing you’ll notice after clearing RAM is that apps need a moment to reload when you next open them, because their temporary working data has been cleared and needs to be rebuilt.
No. Daily RAM clearing is unnecessary and counterproductive on modern iPhones. iOS manages memory automatically and handles routine RAM pressure better than manual intervention can. Clear RAM when you notice specific performance symptoms (lag, crashes, sluggish multitasking), not on a scheduled basis. A weekly restart covers any residual memory management needs without disrupting active processes.
Apple intentionally doesn’t provide one, because iOS is designed to handle memory automatically. Third-party apps that claim to “boost” or “optimize” iPhone RAM in the App Store cannot access system-level memory; iOS’s sandbox restrictions prevent them from doing so. These apps are, at best, a placebo and, at worst, a waste of your time. The hardware gesture methods in this guide are the only legitimate RAM-clearing approaches on a non-jailbroken iPhone.
If clearing RAM produces no improvement, the slowdown has a different cause. Check these in order: storage (Settings → General → iPhone Storage. If your storage is over 90% full, that directly causes performance degradation), battery health (Settings → Battery → Battery Health & Charging (below 80% capacity affects performance), iOS version (Settings → General → Software Update) a pending update may contain a fix), and thermal state (is the phone warm?). Persistent slowness that none of these explain may warrant an Apple Support diagnostic or battery replacement.
No, and this is the most important iPhone performance myth to understand. When you swipe apps away in the App Switcher, you’re not freeing RAM from running processes. iOS had already suspended those apps and was efficiently managing their memory. Force-closing them means iOS has to reload the app entirely from storage the next time you open it, which uses more resources than resuming from a suspended state. The legitimate RAM-clearing methods are the Shut Down screen gestures described above.
After performing either the AssistiveTouch method (Face ID) or the Home button method (Touch ID), you’ll be returned to your Lock Screen. The next apps you open will take a moment to load, slightly longer than their cached versions would, because iOS is loading them fresh. That brief additional load time confirms that the previous state has been cleared and that RAM is starting fresh.
Conclusion

Clearing RAM on an iPhone is one of the fastest performance fixes available for a device that’s showing signs of memory pressure, and it takes under a minute to apply. The Face ID method (AssistiveTouch + Shut Down screen) and the Home button method cover every iPhone model, and a force restart is available for any situation where the phone isn’t responding to normal input. The common thread across all three is that they work at the system level; no app required, no data lost, and no negative consequences when applied correctly.
The longer-term picture is equally important: weekly restarts, disciplined Background App Refresh settings, keeping iOS updated, and periodically clearing the Safari cache reduce the frequency with which you’ll need to manually intervene with RAM. Memory pressure isn’t something that happens to broken iPhones; it happens to iPhones that are heavily used and well-maintained tools. The methods in this guide keep your system running at peak performance.
Every iPhone guide, performance fix, and practical tech how-to worth bookmarking lives at YourTechCompass.com, where we explain technology clearly, completely, and without myths.