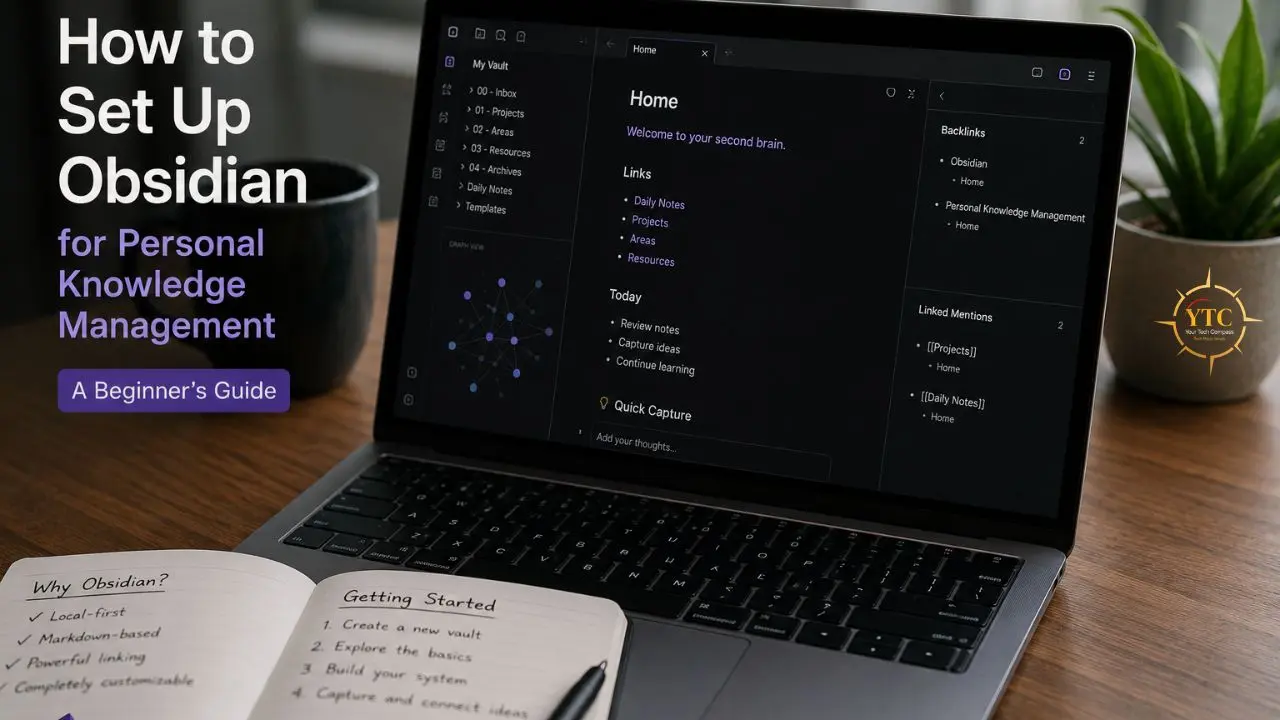
You download Obsidian, open it for the first time, and stare at a completely blank screen. No template. No suggested folder structure. And, no onboarding wizard asking what you’d like to track. Just a cursor blinking in an empty vault, quietly demanding that you decide what your entire knowledge management system should look like before you’ve written a single note. If that experience made you close the app and go back to Apple Notes, you’re not alone. Obsidian is deliberately minimal by default, which makes it incredibly powerful for people who know what they want and genuinely overwhelming for everyone who doesn’t.
This guide makes those decisions for you. I’m going to give you an opinionated, beginner-friendly Obsidian setup for personal knowledge management that you can have running in an afternoon and actually use from day one, not the theoretically perfect PKM system, not a philosophy lecture on Zettelkasten, and definitely not another YouTube rabbit hole. This is a practical, step-by-step guide for complete beginners to Obsidian, people switching from Notion, Evernote or Apple Notes, and anyone who wants a note-taking system that makes them smarter over time without requiring a PhD in productivity methodology to set up.
What Is Obsidian and Why Should Beginners Care?
Obsidian is a local-first, Markdown-based note-taking application. That sentence has a lot packed into it, so let me break it down in plain language because it’s genuinely important.
“Local-first” means your notes are stored on your own computer as plain text files, not in a company’s cloud server somewhere you can’t see or control. Every note you write in Obsidian is a .md file sitting in a folder on your hard drive. If Obsidian, the company, shut down tomorrow morning, you would still have every single one of your notes in a format that any text editor in the world can open. That’s not true of Notion, Evernote, or any other cloud-first note app, where your data effectively lives inside someone else’s system under someone else’s terms.
“Markdown” is a simple formatting system where you type symbols to indicate formatting (a # before text makes it a heading, **text** makes it bold) and those symbols render into clean, formatted text. You don’t need to know all of Markdown before you start. You need to know about 10% of it, and I’ll cover exactly that later in this guide.
What Makes Obsidian Different
What actually separates Obsidian from every other note-taking app isn’t the local storage or the Markdown; it’s the bidirectional linking. You can link any note to any other note using [[double brackets]], and Obsidian tracks those links in both directions.
When you link Note A to Note B, Obsidian also shows you in Note B that Note A links to it. This creates a knowledge graph (a living, visual map of how your ideas connect to each other) that you simply cannot build in a folder-based system like Google Docs or Evernote.
This linking architecture is what makes Obsidian specifically suited for Personal Knowledge Management. PKM is the practice of capturing, organizing, and, critically, connecting information in a way that makes you smarter over time.
Not just storing things. Connecting them. A great PKM system doesn’t just help you find a note you wrote three months ago. It shows you how that note connects to six other things you’ve been thinking about, reveals patterns in your own thinking, and surfaces ideas you’d forgotten you had.
The other relevant advantages: Obsidian is free for personal use, available on Windows, Mac, Linux, iOS, and Android, and backed by a community plugin library of 1,500+ extensions that let you add exactly the features you need without bloating the core app.
The honest caveat: Obsidian has a steeper initial setup than Notion or Apple Notes. The blank slate is intentional; it gives you flexibility, but it requires you to make decisions. This guide makes those decisions for you as a beginner. You can customize everything later.
Installing Obsidian and Understanding Vaults
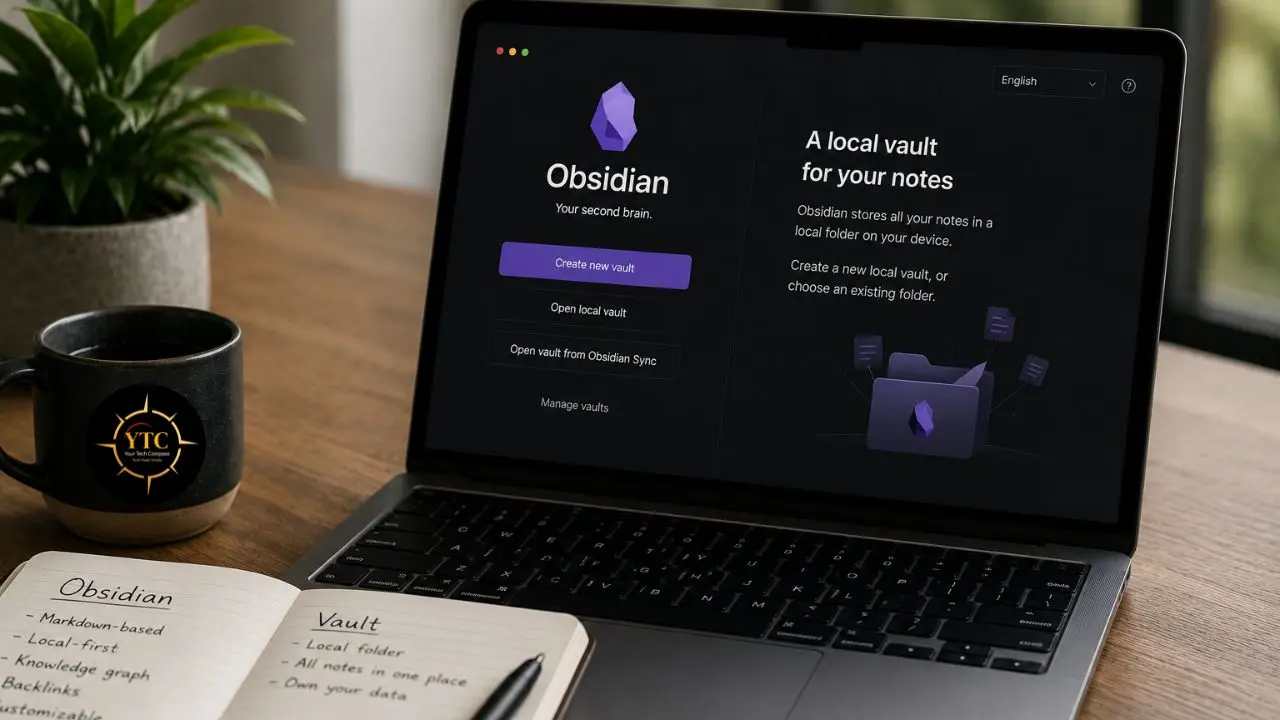
Getting Obsidian Installed
Download Obsidian from obsidian.md. The direct download is free and available for Windows, Mac, and Linux. Standard installer on all platforms; nothing complicated.
Mobile apps for iOS and Android are available in their respective app stores and are free. The one feature that costs money is Obsidian Sync, which I’ll cover in the syncing section. The core app itself is genuinely free forever for personal use.
What Is a Vault?
This is the concept that confuses most new Obsidian users, and once you understand it, everything else makes sense. A vault is simply a folder on your computer. That’s it. When you open Obsidian and create a vault, all you’re doing is pointing Obsidian at a folder and telling it, “All the notes I create will live here.”
Inside that folder, every note you write becomes a .md file. Obsidian also creates a hidden .obsidian subfolder where your settings, installed plugins, and any themes you’ve added are stored. You don’t need to touch the .obsidian folder directly. Obsidian manages it for you.
For beginners, one vault is enough. You don’t need separate vaults for work, personal, and creative projects. Keep everything in one vault with folder organization inside it. Splitting into multiple vaults means splitting your links, too, and the whole power of Obsidian comes from everything being connected.
Where to Create Your Vault
This matters more than most guides acknowledge. Name it something simple, like “MyKnowledge,” “Brain,” or just “Obsidian,” and put it somewhere you have direct control over:
- If you want free syncing across your Apple devices: Create the vault inside your iCloud Drive folder on Mac. It will sync automatically to your iPhone and iPad if iCloud is set up correctly.
- If you’re cross-platform (Mac + Windows or Windows + Android): Create the vault in your Dropbox or OneDrive folder. Free tiers are sufficient for most vaults.
- If you want the official Obsidian solution and don’t want to think about it: Obsidian Sync is $5/month, end-to-end encrypted, works on every platform and includes version history. It’s the only paid feature most users ever need.
Your First Steps After Creating the Vault
Once your vault exists and Obsidian is open, get comfortable with three things:
- Create your first note: Press Ctrl + N on Windows/Linux or Cmd + N on Mac. Type something. Anything. You’re writing a Markdown file.
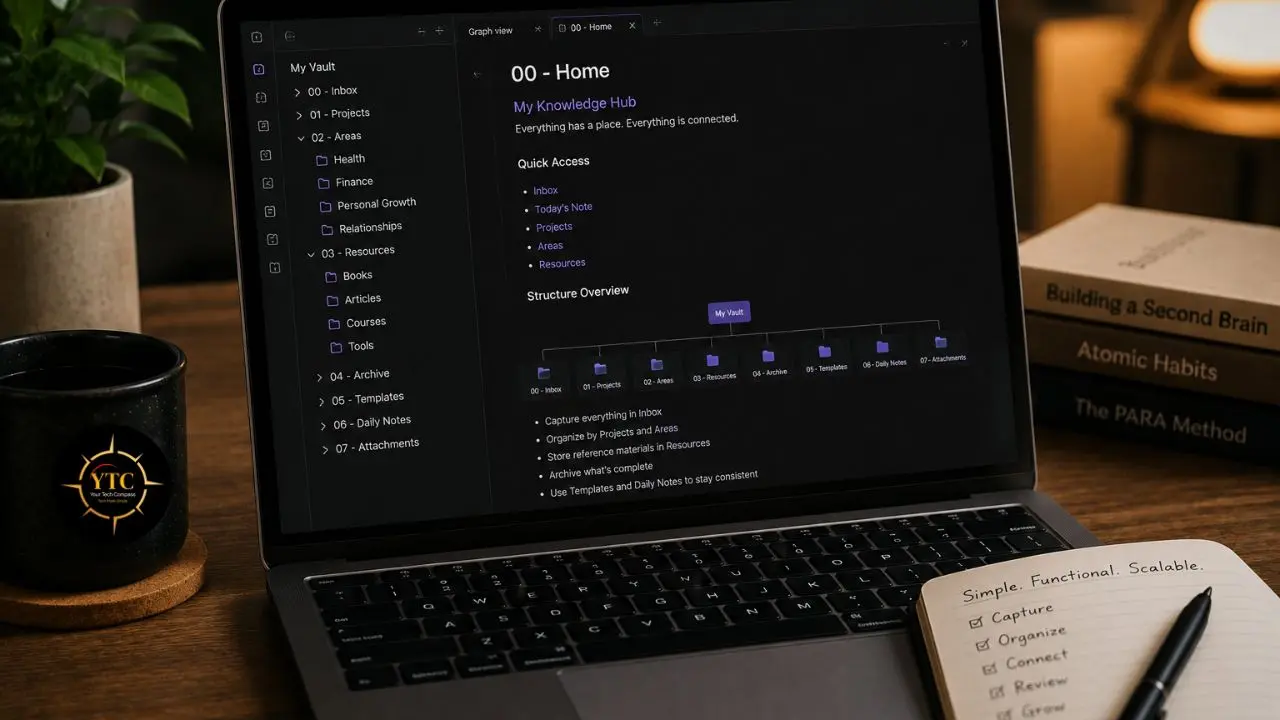
- Understand the three-panel layout: File explorer on the left (your folders and notes), editor in the center (where you write), right sidebar (backlinks, search, and other panels you’ll add later).
- Toggle between Edit mode and Reading mode: Press Ctrl/Cmd + E. Edit mode shows the Markdown syntax; Reading mode renders it as formatted text. You’ll primarily work in Edit mode.
The Beginner Folder Structure: Simple, Functional, Scalable
The folder structure is where most beginners overthink Obsidian, and I want to address that directly before sharing the structure I recommend. The internet is full of elaborate folder hierarchies and productivity systems with twelve levels of nesting, color-coded tags, and specialized plugins for every conceivable use case. Most of the people who built those systems spend more time maintaining them than using them.
The goal of a folder structure for a beginner is to be simple enough that you’ll actually maintain it consistently. Not perfect. Not comprehensive. Usable.
Here’s the four-folder beginner vault I recommend:
📁 00 – Inbox
📁 01 – Notes
📁 02 – Projects
📁 03 – Resources
00 – Inbox
The inbox is your capture zone. Everything goes here first: quick thoughts, articles you want to read later, meeting notes, ideas, quotes you heard, tasks you need to remember. The purpose of the inbox is to remove decision paralysis at the moment of capture.
When something needs to go into your vault, you don’t have to decide where it belongs right now. It goes in the inbox, and you sort it during your weekly review. More on that workflow shortly.
01 – Notes
This is where your permanent notes live; notes you’ve processed, reviewed, and written in your own words. The distinction between Notes and the Inbox is significant: the Inbox contains raw captures; Notes contains knowledge you’ve actually internalized and articulated.
Notes are the building blocks of your knowledge graph. They’re written in your own words, linked to other notes via [[wikilinks]], and intended to be permanent.
02 – Projects
Active projects with a defined outcome and an end date live here. One note per project works well to start; that note can include subtasks, progress updates, links to other notes and references to resources.
When a project is finished, archive it by moving it to the 02 – Projects/Archive subfolder rather than deleting it. Completed projects often contain knowledge worth keeping.
03 – Resources
This folder holds reference material that you want to be able to retrieve, but that isn’t your own original thinking, for instance, book summaries, clipped articles, templates, meeting notes from other people, or research you’ve gathered. The distinction from Notes: Resources contain external sources; Notes contain your processed understanding of those sources.
What You Don’t Need as a Beginner
- An “Areas” folder from the PARA system; that complexity is genuinely useful at scale, but it’s overkill when you’re starting out.
- Tags as your primary organization system; use them sparingly as supplementary metadata; folders should do the primary organizational work.
- Nested subfolders beyond one level. They create navigation overhead that slows you down.
The honest rule: any folder structure works if you actually use it. The best system is the one you maintain consistently, not the one that looked most impressive in a productivity YouTube video.
As your vault grows and your link network deepens, you’ll naturally evolve toward a more Zettelkasten-influenced approach, where links between notes do more organizational work than folders do. But for the first 30–60 days, folders give you the structure you need to build the habit before adding sophistication.
Markdown Basics: What You Need to Know to Start Writing

Obsidian uses Markdown, a lightweight formatting syntax where you type plain text symbols and they convert into formatted output. The good news is that you don’t need to learn all of Markdown. You need to know about 10% of it to write effective notes.
Here’s exactly what that 10% looks like:
Essential Markdown for Daily Use
Syntax | What It Does | Example |
# | Heading 1 (largest) | # My Note Title |
## | Heading 2 | ## Section Name |
**text** | Bold | **important word** |
*text* | Italic | *emphasized text* |
– | Bullet point | – List item |
1. | Numbered list | 1. First item |
[[Note Name]] | Link to another note | [[My Ideas]] |
> | Blockquote | > This is a quote |
— | Horizontal divider | Separates sections |
The Wikilink: Obsidian’s Most Important Feature
The [[wikilink]] is what makes Obsidian fundamentally different from every other note-taking app. Type [[ anywhere in a note, and Obsidian immediately shows you a searchable list of all your existing notes to link to.
Select one, and the link is created. If the note you want to link to doesn’t exist yet, you can type the name anyway.
Obsidian creates a placeholder link, and you can create that note later when you’re ready. This is how you build connections between ideas over time without having to decide at the moment of writing whether the connected note already exists.
YAML Frontmatter: Optional but Useful
At the very top of any note, you can add a YAML frontmatter block; a section between — markers that holds metadata about the note:
—
tags: [ideas, work]
created: 2026-06-01
status: in-progress
—
This metadata is invisible in Reading mode but can be queried by plugins like Dataview. You don’t need to add frontmatter to every note immediately; start adding it once you’ve installed the Templater plugin and built a note template, so it gets inserted automatically.
Essential Settings to Configure Before You Start
Before you start writing notes in earnest, spend five minutes configuring these settings. They don’t take long, and they prevent a common source of frustration for new users: notes ending up in the wrong place or links breaking after moving files.
Settings → Editor
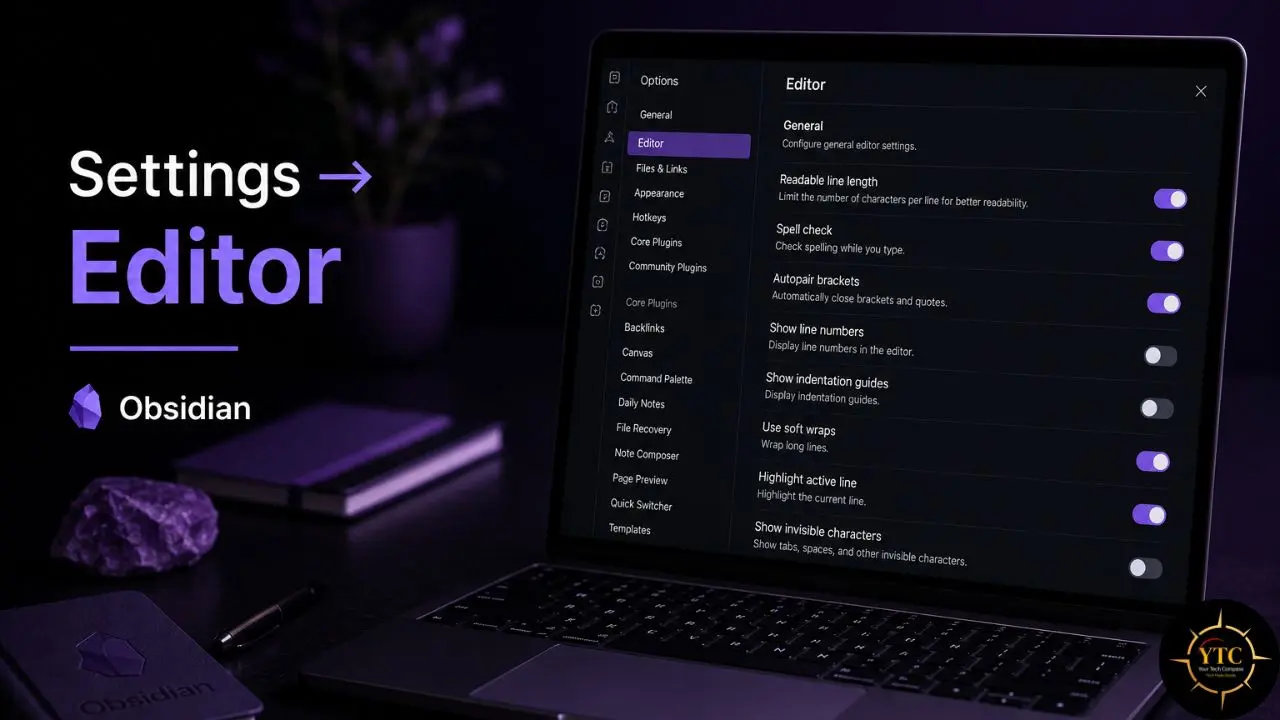
- Readable Line Length: Turn ON. This limits the text width to a comfortable reading line rather than stretching across your full monitor. Your eyes will thank you.
- Spell Check: Turn ON. It’s basic hygiene for any writing environment.
- Auto Pair Brackets: Turn ON. It automatically closes [[, (, “, and other paired characters so you don’t have to type the closing bracket manually.
Settings → Files and Links
- Default Location for New Notes: Set to “In the folder specified below” and select 00 – Inbox. This ensures every new note you create goes to the inbox automatically, which is the entire point of having an inbox.
- New Link Format: Set to “Relative path to file”. This prevents links from breaking when you move notes between folders, a surprisingly common frustration for new users who set this incorrectly.
- Use [[Wikilinks]]: Keep ON. This is Obsidian’s primary linking format and the feature most worth using.
Settings → Appearance
Browse the community themes under Settings → Appearance → Themes → Browse. The default theme is fine, but three themes consistently earn recommendations for beginners specifically because they’re clean, distraction-free, and don’t require additional configuration: Minimal, Things, and AnuPpuccin. Any of the three works; pick the one that feels most comfortable to look at for long sessions.
Adjust font size to your reading comfort; 16px is a sensible default for most screens.
Hotkeys Worth Memorizing
These six keyboard shortcuts will cover 90% of your daily navigation:
- Ctrl/Cmd + N — New note
- Ctrl/Cmd + O — Quick open (search for any note by name; faster than navigating the file tree)
- Ctrl/Cmd + P — Command palette (search for any Obsidian action)
- Ctrl/Cmd + E — Toggle between Edit and Reading mode
- Ctrl/Cmd + G — Open graph view
- Ctrl/Cmd + [ — Go back (navigate like a browser history)
The 5 Essential Plugins for Beginners
Obsidian has over 1,500 community plugins. As a beginner, you need five of them. Installing more before you have an established workflow creates configuration overhead that slows you down and pulls your attention toward optimizing the tool rather than using it. Here’s how to install any plugin, and which five to start with.
How to Install Plugins: Settings → Community Plugins → Turn off Safe Mode → Browse → search for the plugin name → Install → Enable. Each plugin takes about 60 seconds to install and enable.
Plugin 1: Templater (Must-Have)
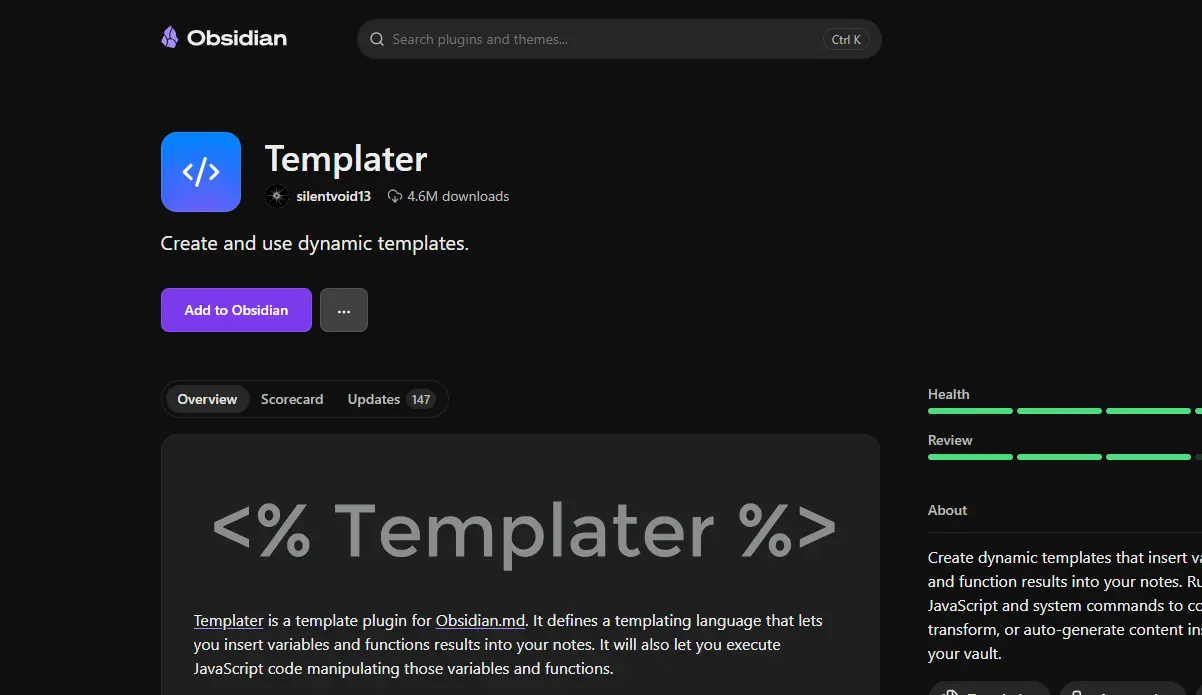
Templater lets you create note templates: pre-written structures that Obsidian inserts automatically when you create a specific type of note. Without Templater, every new note starts blank, and you have to manually type the same header structure every time. With it, your daily note, book summary, or meeting note structure is inserted with a single keyboard shortcut.
A simple beginner template that covers most use cases:
—
created: {{date}}
tags:
—
# {{title}}
## Summary
## Notes
## Links
Set up your templates folder (I recommend a folder called Templates outside your four main folders) and configure Templater to look there. Then assign a hotkey to insert your most-used template.
Plugin 2: Calendar (Must-Have for Daily Notes)
The Calendar plugin adds a visual calendar panel to Obsidian’s sidebar. Click any date to open or create the daily note for that day. This sounds minor until you’re actually using it; navigating daily notes without a calendar requires either remembering exact file names or scrolling through a list of dated files. The calendar makes going back to any day’s notes immediate and intuitive.
Daily notes are the easiest PKM habit to build. Every morning, open that day’s note and use it as a capture zone for the rest of the day. Everything you want to remember goes there first. The Calendar plugin makes this workflow feel natural rather than mechanical.
Plugin 3: Dataview (Useful Once You Have 20+ Notes)
Dataview lets you query your notes like a database. You write a simple query in a code block, and Obsidian generates a live table or list from your notes based on the criteria. For example: show me all notes tagged #book where status: in-progress. Or show me everything created in the last 7 days. Or list all notes in 02 – Projects that haven’t been updated in 30 days.
The honest guidance for beginners: install Dataview now so it’s available, but don’t try to learn its query syntax until you have at least 20–30 notes worth querying. In the first two weeks, your vault is too small for Dataview to add meaningful value. When it does become useful, you’ll know, because you’ll start losing track of notes in the folder system.
Plugin 4: Obsidian Git (For Backup)
Obsidian stores everything locally on your computer. That’s a feature; your data is yours.
It’s also a responsibility: a hard drive failure without a backup means everything is permanently lost. Obsidian Git automatically backs up your vault to a private GitHub repository on a schedule you configure.
The alternative with less setup: place your vault in Dropbox or iCloud and let those services handle version history and backups. Either approach solves the problem. Obsidian Git is the more technically complete solution; cloud folder syncing is faster to set up for users who aren’t comfortable with GitHub.
Plugin 5: Linter (For Consistency)
Linter automatically formats your notes to a consistent standard every time you save, with consistent YAML frontmatter formatting, proper heading hierarchy, removal of trailing spaces and standardized bullet list formatting. Left to its own devices, a growing vault accumulates small formatting inconsistencies that gradually make notes harder to read and query. Linter runs quietly in the background and handles this automatically, so you don’t have to think about it.
Your First PKM Workflow: Capture, Process, Connect
The folder structure and plugins are the infrastructure. This section is the actual system; the workflow that turns Obsidian from a note-taking app into a personal knowledge management tool.
The key insight that most people miss is this: the workflow matters more than the folder structure. A good workflow with a mediocre folder structure beats a perfect folder structure that nobody maintains.
The workflow has three phases: Capture, Process, and Connect.
Step 1: Capture (Daily)
Every morning, create a daily note (use the Calendar plugin to click today’s date). For the rest of the day, everything goes there first. An idea you had during a meeting.
A quote from an article you read. A task you need to remember. A link to something worth exploring. The daily note is a staging area, not permanent storage. Its job is to be a frictionless capture zone.
A simple daily note structure that works without feeling like admin work:
# Daily Note — {{date}}
## Captures
–
## Tasks
– [ ]
## Reflections
The three sections cover the three main things you’ll capture: information (Captures), things to do (Tasks), and your own thinking (Reflections). Keep it minimal. The daily note’s value comes from consistency, not from elaborate structure.
Step 2: Process (Weekly Review)
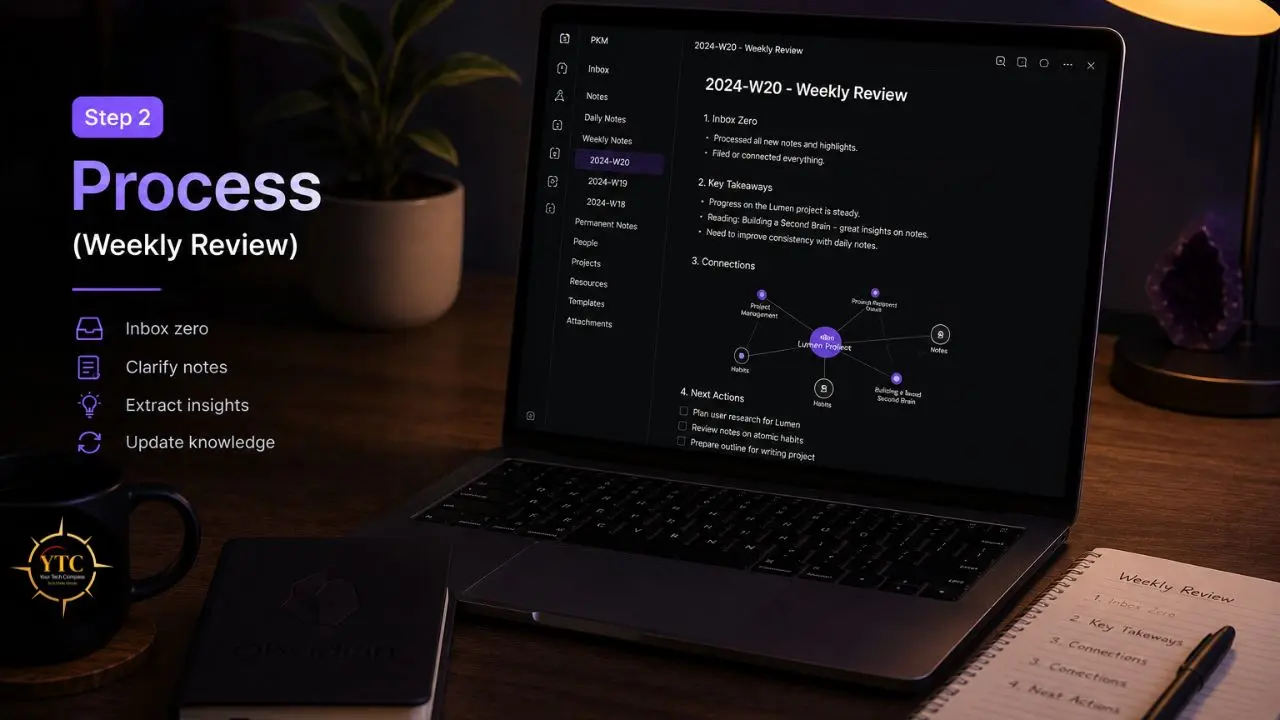
Once a week (Friday afternoon, Sunday evening, whatever time you’ll reliably protect), open your inbox and that week’s daily notes and process everything you’ve captured. For each item, make one of four decisions:
- Delete: Not actually useful. Get rid of it.
- Reference: Move to 03 – Resources as-is.
- Process: Rewrite in your own words and move to 01 – Notes.
- Project: Relevant to an active project; move to 02 – Projects.
Processing is the most important step and the one most people skip, which is exactly why most note systems fail. The difference between storing information and managing knowledge is the processing step. When you rewrite something in your own words, you’ve actually understood it, and the note you write is yours, not a copy of someone else’s thinking.
Step 3: Connect (When Writing Notes)
Every time you write a note in 01 – Notes, ask yourself one question: “What does this connect to?” Then add [[wikilinks]] to other relevant notes. Don’t force connections; only link notes that genuinely relate to each other.
A forced link network is noise; an organic one is signal. Over time, as your vault grows and your links accumulate, patterns will emerge in your graph view that you wouldn’t have predicted when you created the individual notes.
The Zettelkasten Principle, Simplified
You’ll inevitably encounter Zettelkasten when reading about PKM. Here’s the version beginners can actually use immediately: one note = one idea. Instead of writing one long document about a topic with twenty points, write twenty small notes, one point each, and link them to each other.
Small, atomic notes are more linkable, more reusable, and more likely to surface useful connections across different contexts. You don’t need to adopt the full Zettelkasten system to benefit from this principle. Just start writing smaller notes.
The Workflow at a Glance
Phase | Frequency | Action | Destination |
Capture | Daily | Add to Daily Note or Inbox | 00 – Inbox |
Process | Weekly | Review, rewrite, decide | 01 / 02 / 03 |
Connect | When writing | Add wikilinks to related notes | 01 – Notes |
Review | Monthly | Check graph, update old notes | All folders |
The Graph View: What It Is and When to Use It
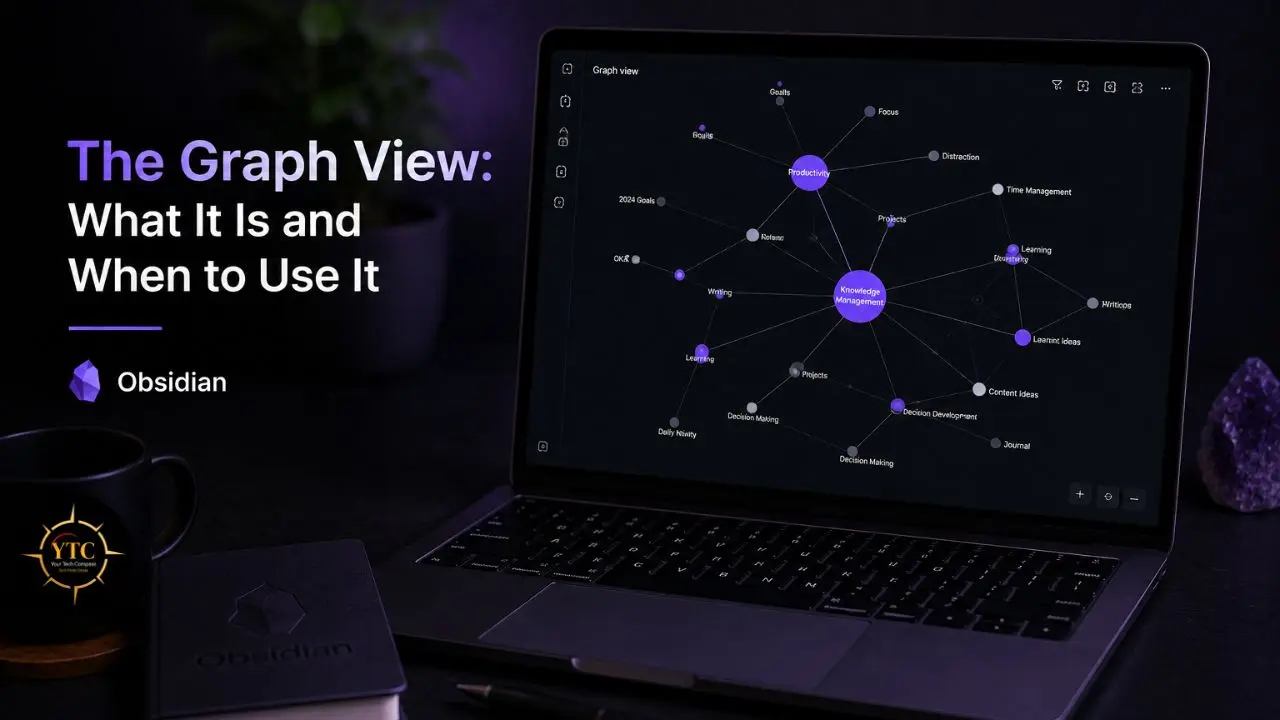
Open the graph view with Ctrl/Cmd + G or by clicking the graph icon in the left sidebar. What you see is a visual map of your entire vault: every note is a dot, and every link between notes is a line connecting dots. Notes with more connections appear larger. Clusters of connected notes reveal which topics you’ve thought about most deeply.
The graph view is Obsidian’s most visually distinctive feature, and it’s also the one most beginners misuse. Here’s honest guidance on what to actually do with it at each stage of your vault’s growth:
In the First Month
Ignore it. Your vault is too small for the graph to be meaningful. A graph of 15 notes tells you nothing useful. Focus on building the capture and process habits first.
After 50+ Notes
Look for orphan notes; notes with no links at all, shown as isolated dots with no connecting lines. These are knowledge dead-ends.
Review each one and either link it to something relevant or decide it’s not worth keeping. An unlinked note is a note you’ll never rediscover organically.
After 200+ Notes
The graph starts revealing genuinely surprising connections between topics you didn’t consciously link when writing individual notes. This is when Obsidian’s real value becomes visible, when the accumulated structure of your note-taking surfaces relationships in your thinking that you couldn’t have seen from inside any individual note.
What Not to Do
Don’t optimize your workflow for a visually impressive graph. The graph is a byproduct of good note-taking, not the goal. People who start linking notes strategically to make the graph look more connected are optimizing the wrong thing entirely.
Syncing Obsidian Across Devices
Most people who use Obsidian seriously want to access their vault from both a computer and a phone. Here are your options, with an honest assessment of each.
Option 1: Obsidian Sync ($5/Month)
The official Obsidian solution. End-to-end encrypted, works across all platforms (Mac, Windows, Linux, iOS, Android), and includes version history going back 12 months.
The easiest option if you use multiple device types and want reliable mobile sync without configuration work. If you’re cross-platform and $5/month is acceptable, this is the cleanest solution.
Option 2: iCloud (Mac + iPhone/iPad Users)
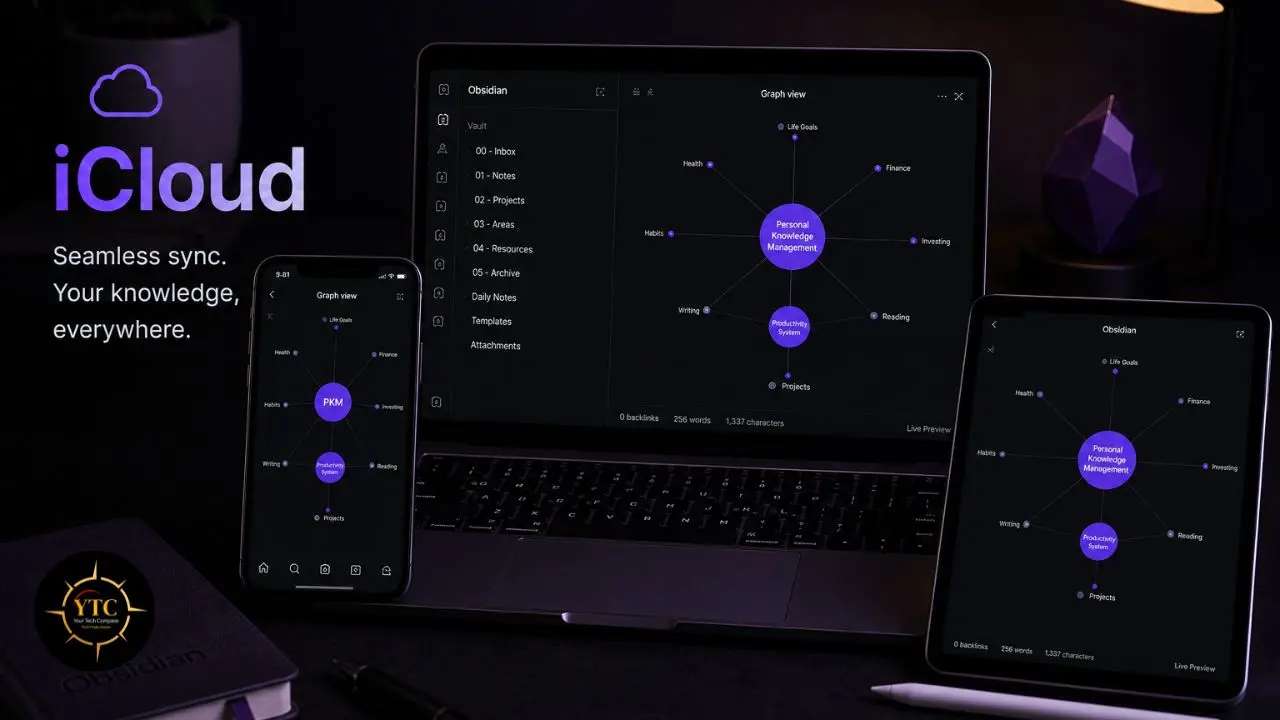
Place your vault inside the iCloud Drive folder on your Mac. If iCloud is set up on your iPhone or iPad, the vault syncs automatically through the Obsidian iOS app.
Free, requires no additional configuration beyond pointing Obsidian at the iCloud folder. Some users report occasional sync conflicts with iCloud. In addition, saving frequently and avoiding simultaneous edits on multiple devices reduces this risk to near zero.
Option 3: Dropbox or OneDrive
Cross-platform free tiers are sufficient for most vaults. Works well for Mac/Windows combinations. Android sync requires an additional app (Dropsync or FolderSync) to sync the Dropbox folder to a local path that Obsidian for Android can access. One extra setup step, but straightforward once done.
Option 4: Obsidian Git
Backs up to a private GitHub repository. More setup required; free; provides both backup and version history as a side effect. Better suited to users comfortable with Git than to complete beginners.
Honest Recommendation for Most Beginners
iCloud if you’re in the Apple ecosystem; Obsidian Sync if you’re cross-platform and want simplicity. Both work reliably for the vast majority of users.
For remote workers who need their notes accessible across multiple devices and work environments, Obsidian’s sync options pair naturally with the broader productivity stack covered in our best productivity apps for remote workers guide at YourTechCompass.com.
How Obsidian Compares to Other Note-Taking Apps
Before committing to Obsidian, it’s worth understanding where it sits relative to the alternatives, because Obsidian genuinely isn’t the right tool for every person or every use case.
📊 Obsidian vs. Notion vs. Apple Notes vs. Evernote
Feature | Obsidian | |||
Data Storage | ✅ Local files (yours) | ❌ Cloud (Notion’s servers) | ⚠️ iCloud | ❌ Cloud (Evernote’s servers) |
Free for Personal Use | ✅ Yes | ✅ Yes (limited) | ✅ Yes | ⚠️ Very limited |
Bidirectional Linking | ✅ Core feature | ⚠️ Limited | ❌ No | ❌ No |
Offline Access | ✅ Always (local) | ⚠️ Limited | ✅ Yes | ⚠️ Limited on free |
Collaboration | ❌ Not built-in | ✅ Excellent | ⚠️ Basic sharing | ⚠️ Limited |
Learning Curve | ⚠️ Steep initially | ✅ Gentle | ✅ Minimal | ✅ Gentle |
Long-Term Data Portability | ✅ Plain text forever | ⚠️ Export needed | ⚠️ Export needed | ⚠️ Export needed |
Plugin Ecosystem | ✅ 1,500+ plugins | ⚠️ Limited | ❌ None | ⚠️ Limited |
Mobile Experience | ⚠️ Good (sync setup needed) | ✅ Excellent | ✅ Native Apple | ✅ Strong |
The Headline Summary
Obsidian is the best choice if data ownership, long-term portability, and knowledge connection matter most to you. Notion is better for collaboration, databases, and teams. However, Apple Notes is better for quick, frictionless capture on Apple devices, with no setup required.
For a detailed head-to-head specifically between Obsidian and Notion on Mac, our Notion vs Obsidian comparison covers that decision in depth.
Obsidian is also one of the strongest entries in the open-source productivity tools category. Its local-first architecture, plain text format, and transparent plugin ecosystem make it a standout in a field where most tools have moved to cloud-dependent subscription models.
Our best open-source productivity tools guide covers Obsidian, along with other tools worth knowing in this space.
Taking Your Obsidian Workflow Further
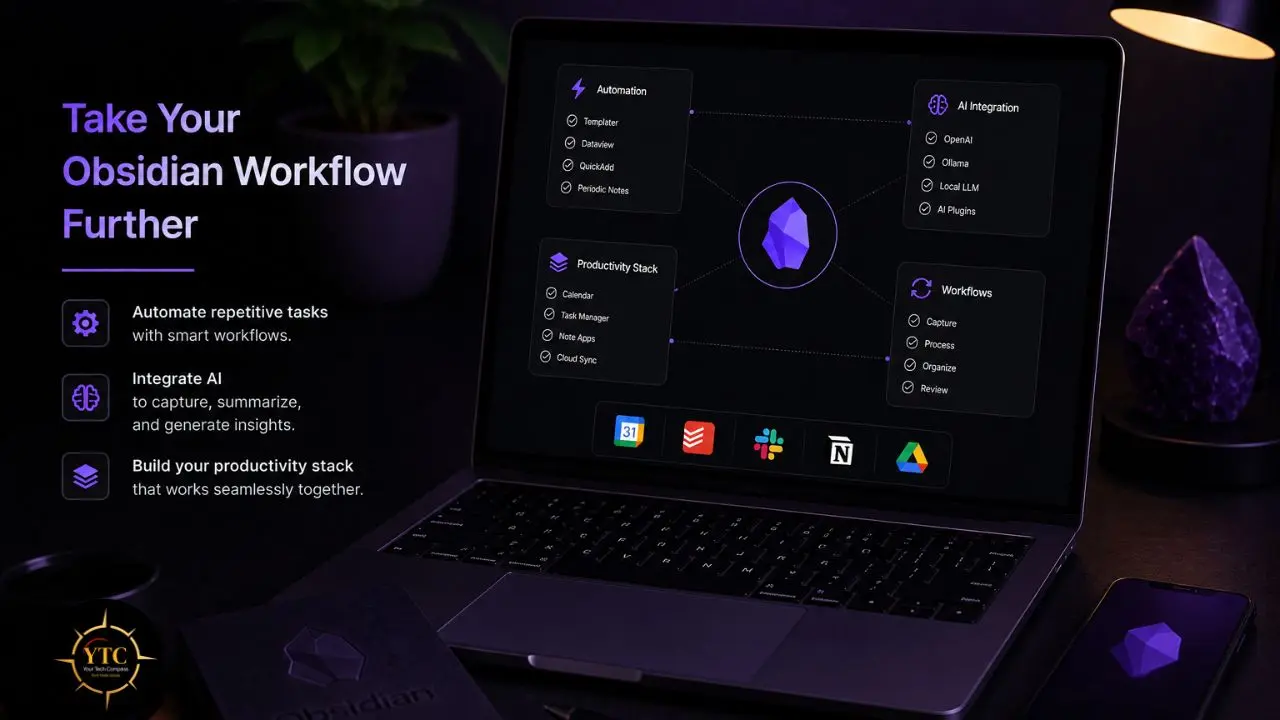
Once your vault is running and your capture-process-connect workflow is consistent, there are several natural directions to extend what you’ve built.
Automation
As your workflow matures, you may find yourself repeating tasks, such as importing notes from other apps, moving processed items to specific folders, or generating summary reports from your vault. Our Zapier review covers the automation platform that many Obsidian users integrate with for cross-app workflows.
For specific automation use cases, guides such as “automating client invoices with ChatGPT and Zapier” and “automating podcast show notes with Descript and Zapier” illustrate how AI and automation tools work alongside knowledge management systems.
AI Integration
The growing ecosystem of AI tools that integrate with Obsidian, from AI summarization plugins to tools that help you find connections between notes, is covered across our best AI productivity apps guide and our AI Unboxed section at YourTechCompass.com. As your vault grows past 200 notes, AI-assisted connection-finding becomes genuinely useful rather than aspirational.
Broader Productivity Stack
Obsidian handles your knowledge layer. For the full picture of apps and tools worth pairing with it across tasks, communication, and time management, our Apps and Tools section and our best productivity apps that actually save time guide cover the complete landscape.
For our African readers exploring how AI productivity tools are being adopted across the continent, our AI in Africa section tracks the tools and trends most relevant to that context.
FAQs
Yes, genuinely free for personal use, with no time limit, no feature gating on the core app, and no required account creation. The only paid features are Obsidian Sync ($5/month for encrypted cross-device syncing) and Obsidian Publish ($10/month for publishing notes as a public website). The core note-taking, linking, plugin, and graph features are completely free. If you place your vault in iCloud or Dropbox for syncing, you may never need to pay for Obsidian anything.
Not before you start. The table in Section 4 of this guide covers everything you’ll actually use in daily note-taking. Obsidian also has a toolbar that inserts Markdown formatting when you click it, so you can format notes without typing a single symbol if you prefer. Most users pick up the essential Markdown syntax within a few days of use without deliberately studying it; it’s just that intuitive once you’re writing regularly.
Zettelkasten (German for “slip box”) is a note-taking method developed by sociologist Niklas Luhmann, who used a physical system of index cards to connect ideas and produce over 70 books. The core principle beginners can use immediately is: one note = one idea. Write small, atomic notes rather than long documents. Link them to each other rather than organizing them in folders. The original Zettelkasten methodology is worth exploring once your vault is established, but you don’t need to understand it before you start. The four-folder structure in this guide is compatible with a gradual evolution toward a Zettelkasten approach as your link network grows.
Yes. The iOS and Android apps are free and functional. The mobile experience works best when syncing is properly set up first (iCloud for Apple devices, Obsidian Sync for cross-platform). On mobile, you’ll primarily use Obsidian for quick captures, adding to your daily note, jotting an idea to the inbox, and checking a reference. The full editing and linking experience is better suited to a desktop. Set up mobile sync before you need it, because configuring it when you’re away from your computer is frustrating.
Five. Templater, Calendar, Dataview, Obsidian Git, and Linter, exactly what’s covered in Section 6 of this guide. That’s the answer. More than five before you have a functioning workflow is configuration overhead that adds friction without adding value. The Obsidian community plugins directory has 1,500+ plugins and will happily consume an entire weekend if you let it. It’ll still be there once you have 50 notes and a genuine workflow problem to solve.
Conclusion
The best Obsidian setup for a beginner isn’t the most sophisticated one; it’s the simplest one you’ll actually maintain. Four folders. Five plugins. A daily capture habit. A weekly review. That’s the entire system, and it works because it removes the decisions you’d otherwise have to make repeatedly in the moment and replaces them with a small number of habits you run on a schedule. You can optimize from there once you know what’s actually bothering you. You cannot optimize your way to starting.
The trap that captures most Obsidian beginners is spending more time building the system than using it. I’ve watched people spend three weeks designing folder structures, testing plugins and watching productivity YouTube videos, and never write a single note worth keeping. Start with what this guide gives you. Use it for 30 days. Then, and only then, change the things that are actually causing friction in your specific workflow. As your vault grows past 100 notes, something will happen that makes everything click: the connections between your ideas will start surprising you. Notes you wrote months apart will surface a relationship you hadn’t consciously noticed. That’s when Obsidian stops feeling like a note-taking app and starts feeling like a thinking tool, and that’s the experience worth getting to.
Every productivity tool review, step-by-step guide, and honest app comparison worth bookmarking lives at YourTechCompass.com, where we give you the practical starting point, not the rabbit hole.